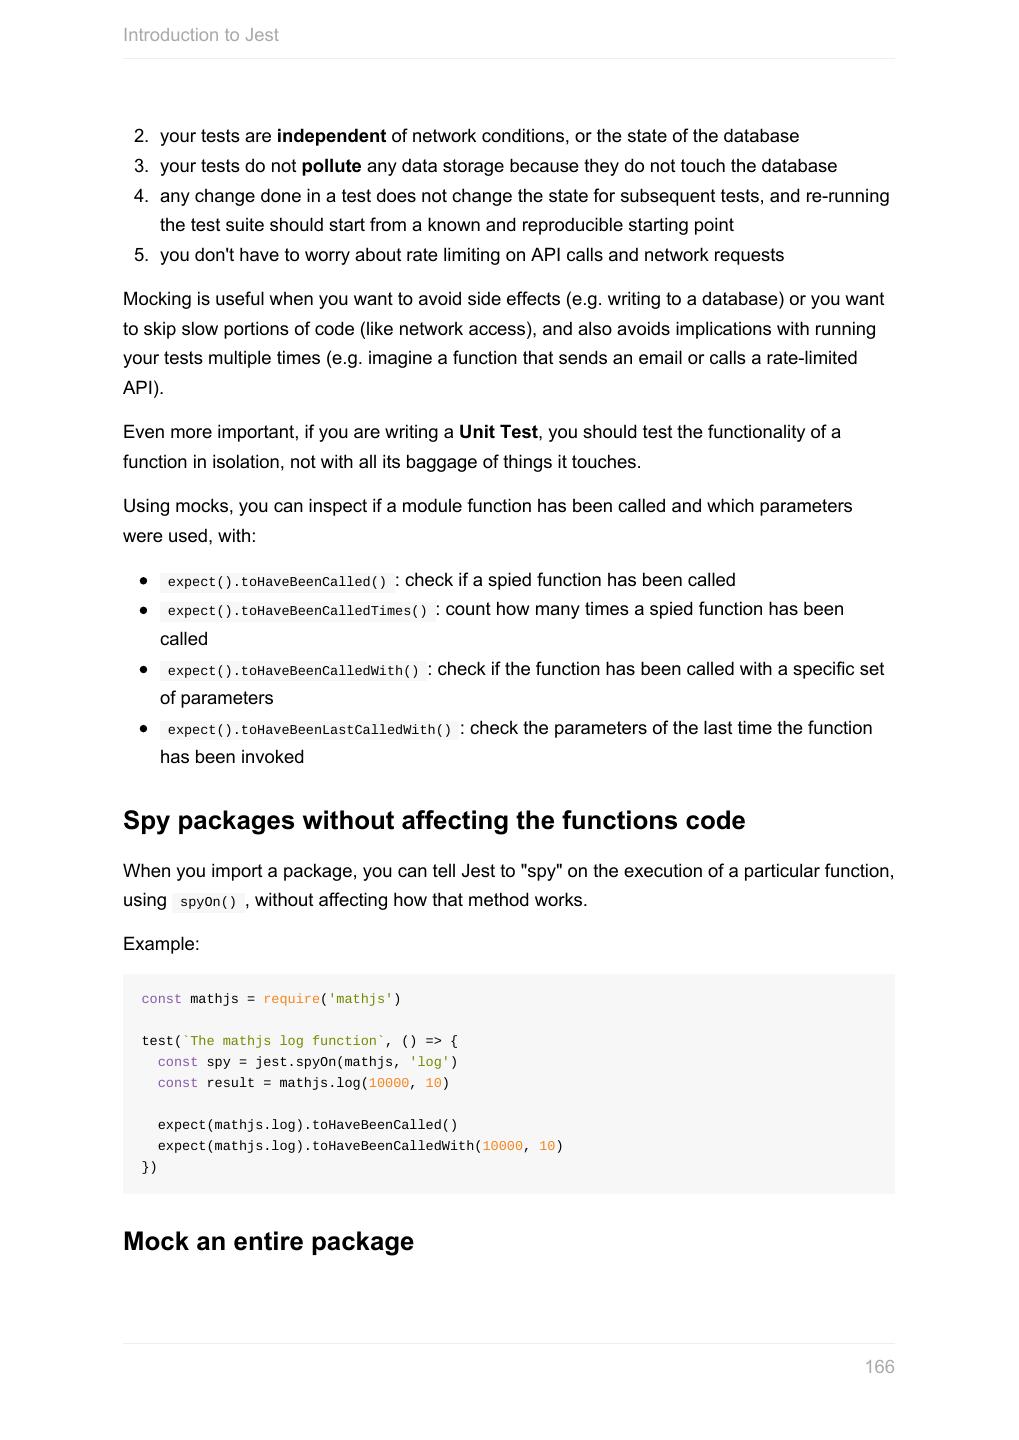
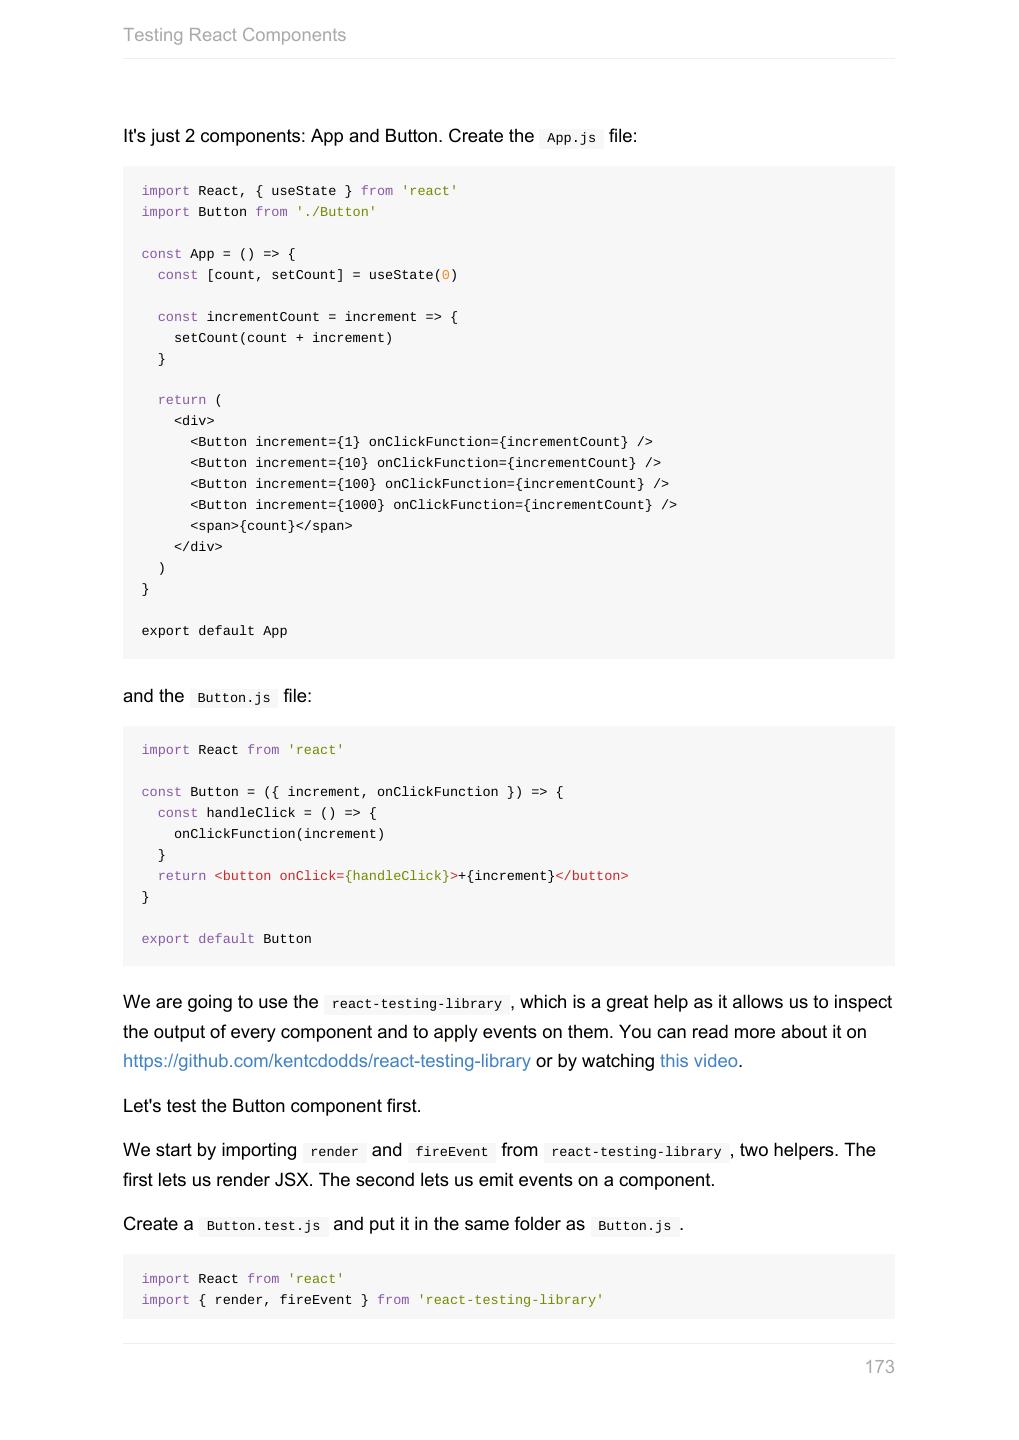
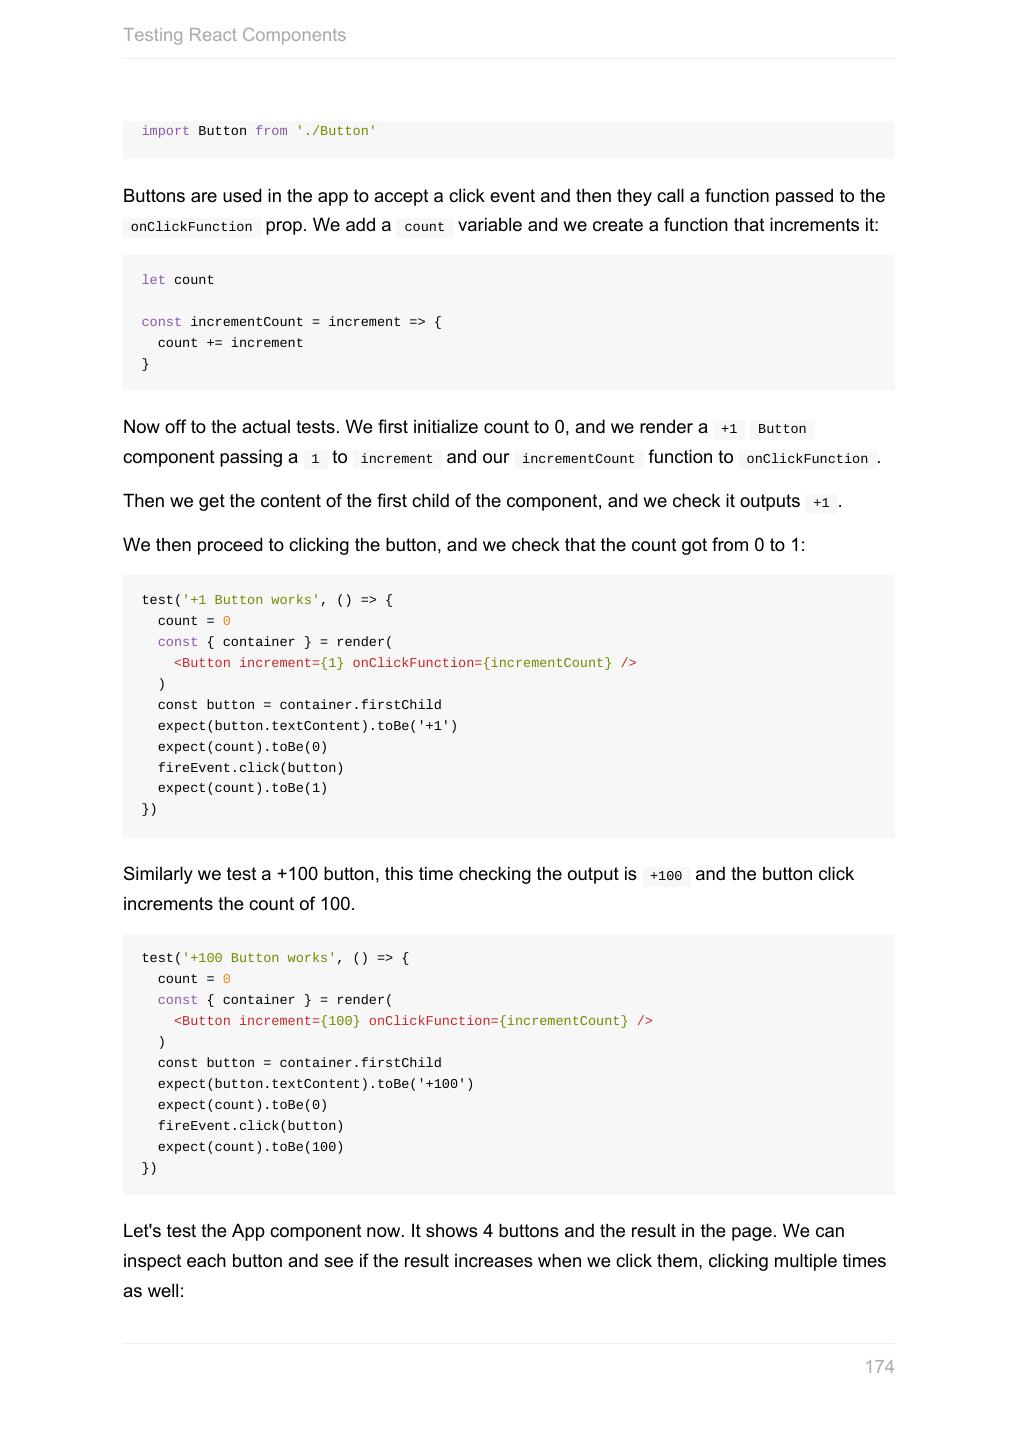
- 快召唤伙伴们来围观吧
- 微博 QQ QQ空间 贴吧
- 文档嵌入链接
- 复制
- 微信扫一扫分享
- 已成功复制到剪贴板
react-handbook
展开查看详情
1 .
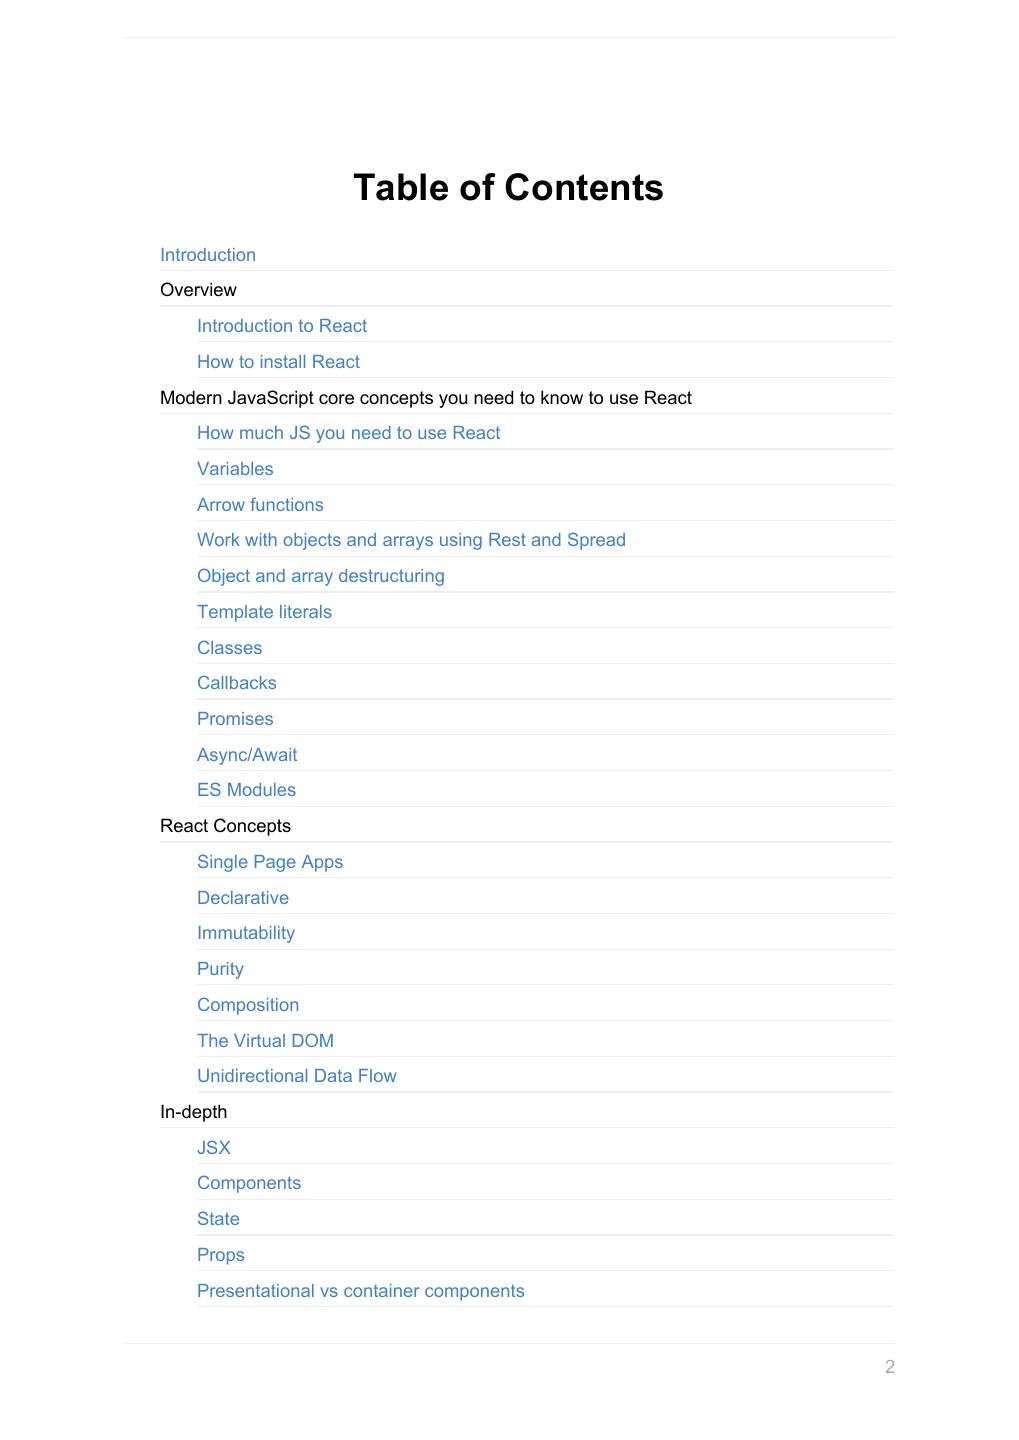
2 . Table of Contents Introduction Overview Introduction to React How to install React Modern JavaScript core concepts you need to know to use React How much JS you need to use React Variables Arrow functions Work with objects and arrays using Rest and Spread Object and array destructuring Template literals Classes Callbacks Promises Async/Await ES Modules React Concepts Single Page Apps Declarative Immutability Purity Composition The Virtual DOM Unidirectional Data Flow In-depth JSX Components State Props Presentational vs container components 2
3 . State vs Props PropTypes Fragment Events Lifecycle events Handling forms Reference a DOM element Server side rendering Context API Higher-order components Render Props Hooks Code splitting Styling CSS in React SASS with React Styled Components Tooling Babel Webpack Prettier Testing Introduction to Jest Testing React Components A look at the React Ecosystem React Router Redux Next.js Gatsby Wrapping up 3
4 .4
5 .Introduction Introduction The React Handbook follows the 80/20 rule: learn in 20% of the time the 80% of a topic. I find this approach gives a well-rounded overview. This book does not try to cover everything under the sun related to React. If you think some specific topic should be included, tell me. In this book I make use of React hooks, so you need to set the required versions of React and ReactDOM to use 16.7.0-alpha.2 (if when you're reading this Hooks are released officially, you don't need to do this). You can do so in CodeSandbox by clicking "Add Dependency" and searching react and choosing 16.7.0-alpha.2 from the select, and repeat this for react- dom . When using create-react-app , run npm install react@16.7.0-alpha.2 react-dom@16.7.0- alpha.2 after you create the project. I hope the contents of this book will help you achieve what you want: learn the basics of React. This book is written by Flavio. I publish web development tutorials every day on my website flaviocopes.com. You can reach me on Twitter @flaviocopes. 5
6 .Introduction Enjoy! 6
7 .Introduction to React Introduction to React An introduction to the React view library What is React? React is a JavaScript library that aims to simplify development of visual interfaces. Developed at Facebook and released to the world in 2013, it drives some of the most widely used apps, powering Facebook and Instagram among countless other applications. Its primary goal is to make it easy to reason about an interface and its state at any point in time, by dividing the UI into a collection of components. Why is React so popular? React has taken the frontend web development world by storm. Why? Less complex than the other alternatives At the time when React was announced, Ember.js and Angular 1.x were the predominant choices as a framework. Both these imposed so many conventions on the code that porting an existing app was not convenient at all. React made a choice to be very easy to integrate into an existing project, because that's how they had to do it at Facebook in order to introduce it to the existing codebase. Also, those 2 frameworks brought too much to the table, while React only chose to implement the View layer instead of the full MVC stack. Perfect timing At the time, Angular 2.x was announced by Google, along with the backwards incompatibility and major changes it was going to bring. Moving from Angular 1 to 2 was like moving to a different framework, so this, along with execution speed improvements that React promised, made it something developers were eager to try. Backed by Facebook Being backed by Facebook obviously is going to benefit a project if it turns out to be successful. 7
8 .Introduction to React Facebook currently has a strong interest in React, sees the value of it being Open Source, and this is a huge plus for all the developers using it in their own projects. Is React simple to learn? Even though I said that React is simpler than alternative frameworks, diving into React is still complicated, but mostly because of the corollary technologies that can be integrated with React, like Redux and GraphQL. React in itself has a very small API, and you basically need to understand 4 concepts to get started: Components JSX State Props All these (and more) are explained in this handbook. 8
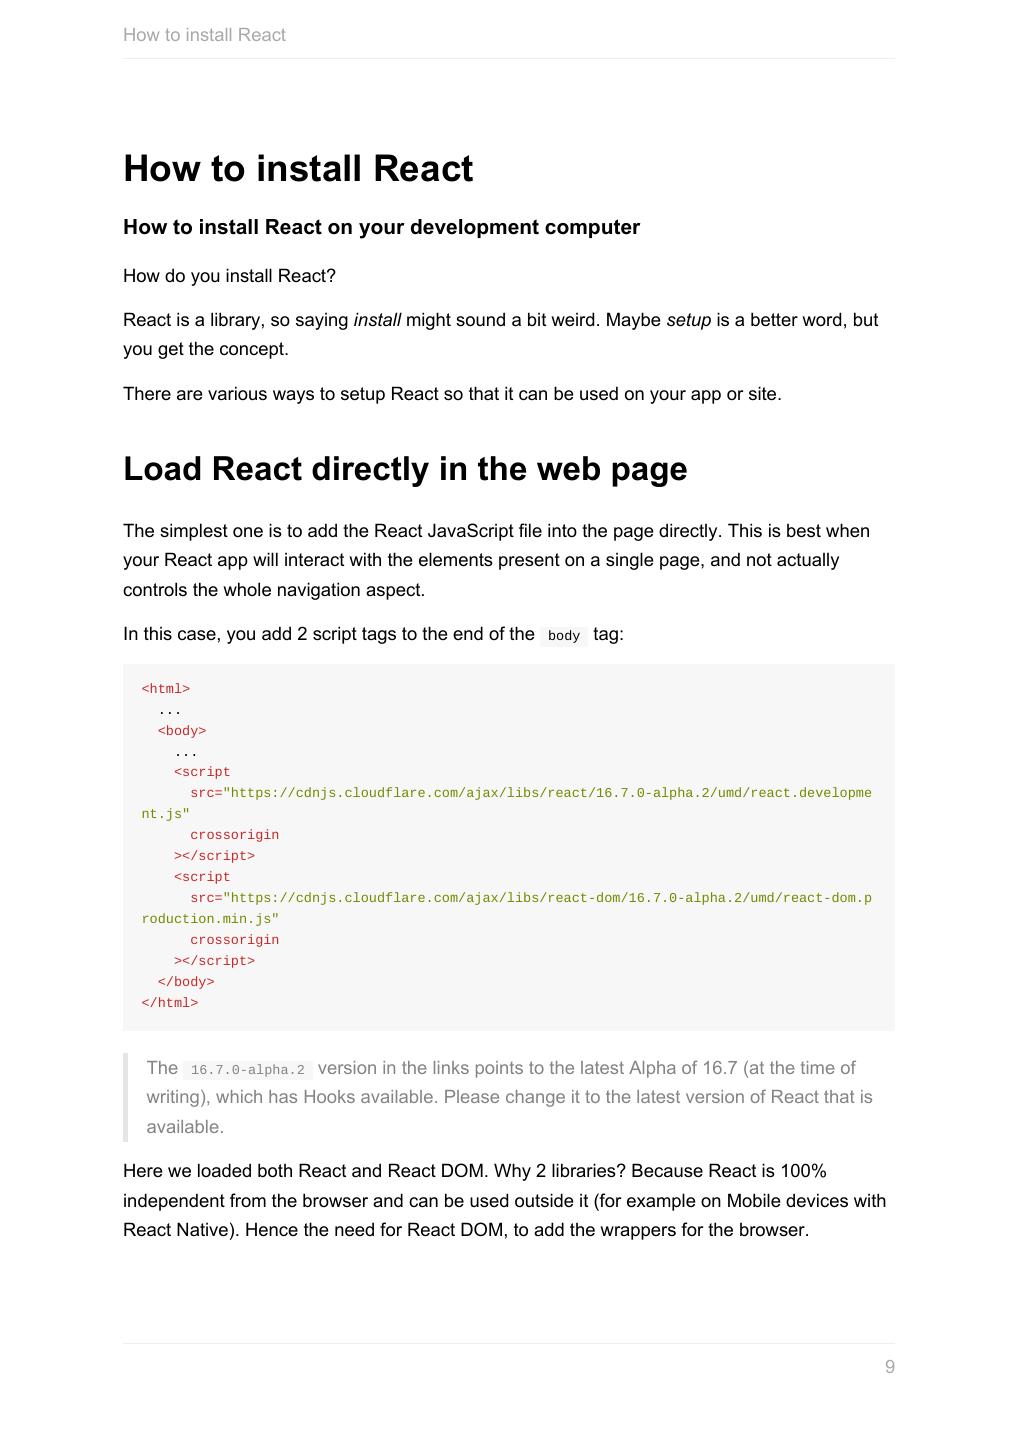
9 .How to install React How to install React How to install React on your development computer How do you install React? React is a library, so saying install might sound a bit weird. Maybe setup is a better word, but you get the concept. There are various ways to setup React so that it can be used on your app or site. Load React directly in the web page The simplest one is to add the React JavaScript file into the page directly. This is best when your React app will interact with the elements present on a single page, and not actually controls the whole navigation aspect. In this case, you add 2 script tags to the end of the body tag: <html> ... <body> ... <script src="https://cdnjs.cloudflare.com/ajax/libs/react/16.7.0-alpha.2/umd/react.developme nt.js" crossorigin ></script> <script src="https://cdnjs.cloudflare.com/ajax/libs/react-dom/16.7.0-alpha.2/umd/react-dom.p roduction.min.js" crossorigin ></script> </body> </html> The 16.7.0-alpha.2 version in the links points to the latest Alpha of 16.7 (at the time of writing), which has Hooks available. Please change it to the latest version of React that is available. Here we loaded both React and React DOM. Why 2 libraries? Because React is 100% independent from the browser and can be used outside it (for example on Mobile devices with React Native). Hence the need for React DOM, to add the wrappers for the browser. 9
10 .How to install React After those tags you can load your JavaScript files that use React, or even inline JavaScript in a script tag: <script src="app.js"></script> <!-- or --> <script> //my app </script> To use JSX you need an extra step: load Babel <script src="https://unpkg.com/babel-standalone@6/babel.min.js"></script> and load your scripts with the special text/babel MIME type: <script src="app.js" type="text/babel"></script> Now you can add JSX in your app.js file: const Button = () => { return <button>Click me!</button> } ReactDOM.render(<Button />, document.getElementById('root')) Check out this simple Glitch example: https://glitch.com/edit/#!/react-example-inline-jsx? path=script.js Starting in this way with script tags is good for building prototypes and enables a quick start without having to set up a complex workflow. Use create-react-app create-react-app is a project aimed at getting you up to speed with React in no time, and any React app that needs to outgrow a single page will find that create-react-app meets that need. You start by using npx , which is an easy way to download and execute Node.js commands without installing them. npx comes with npm (since version 5.2) and if you don't have npm installed already, do it now from https://nodejs.org (npm is installed with Node). If you are unsure which version of npm you have, run npm -v to check if you need to update. 10
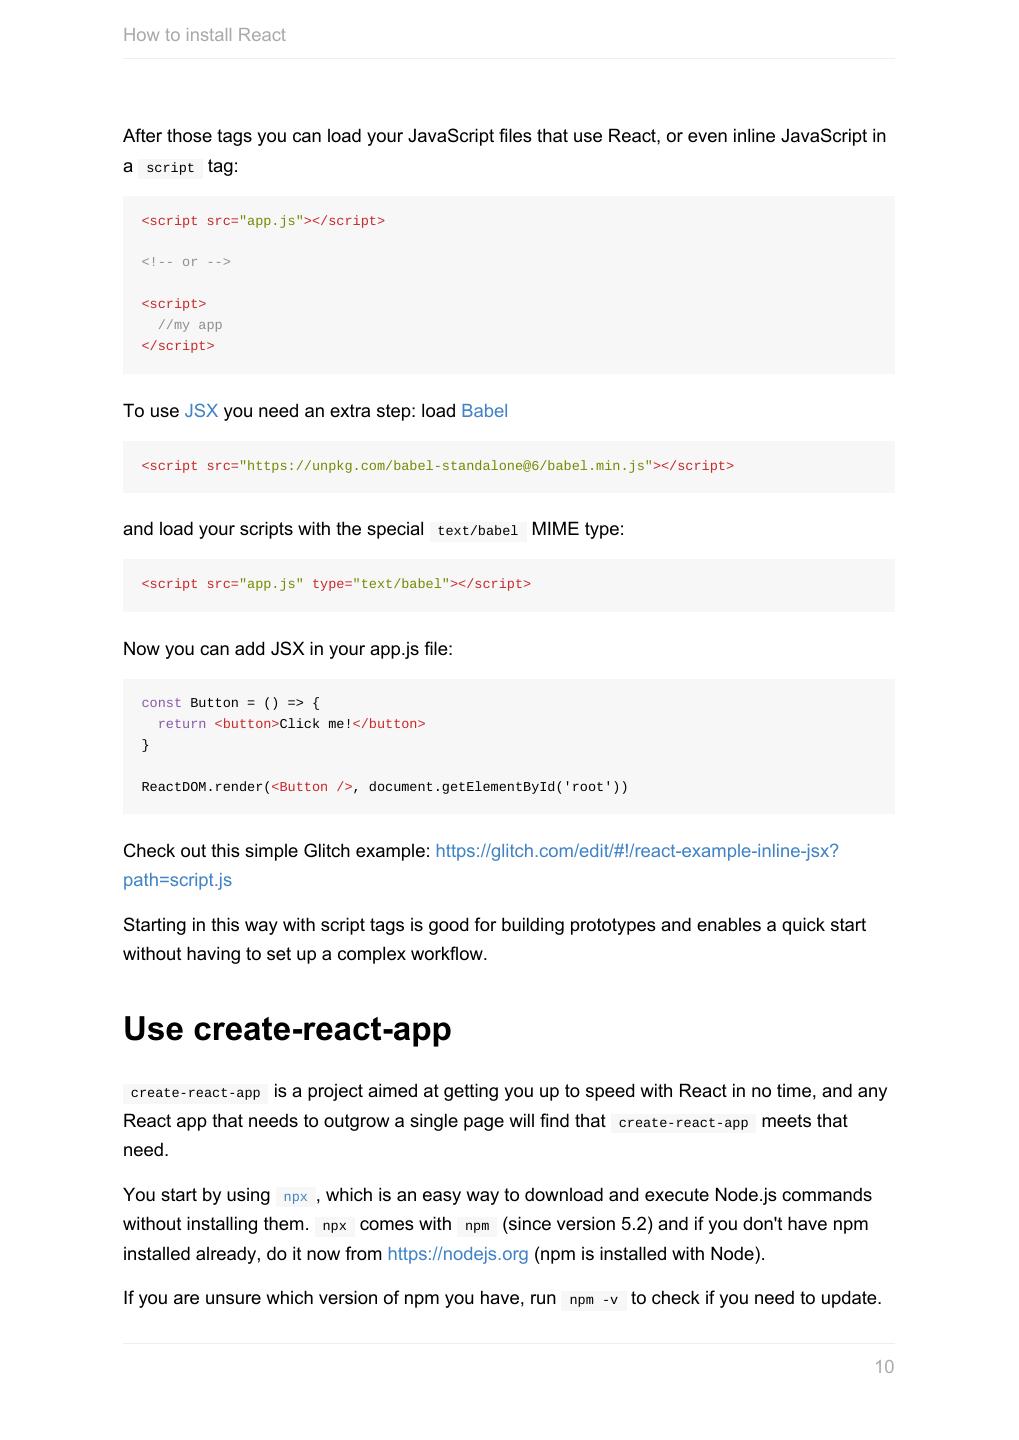
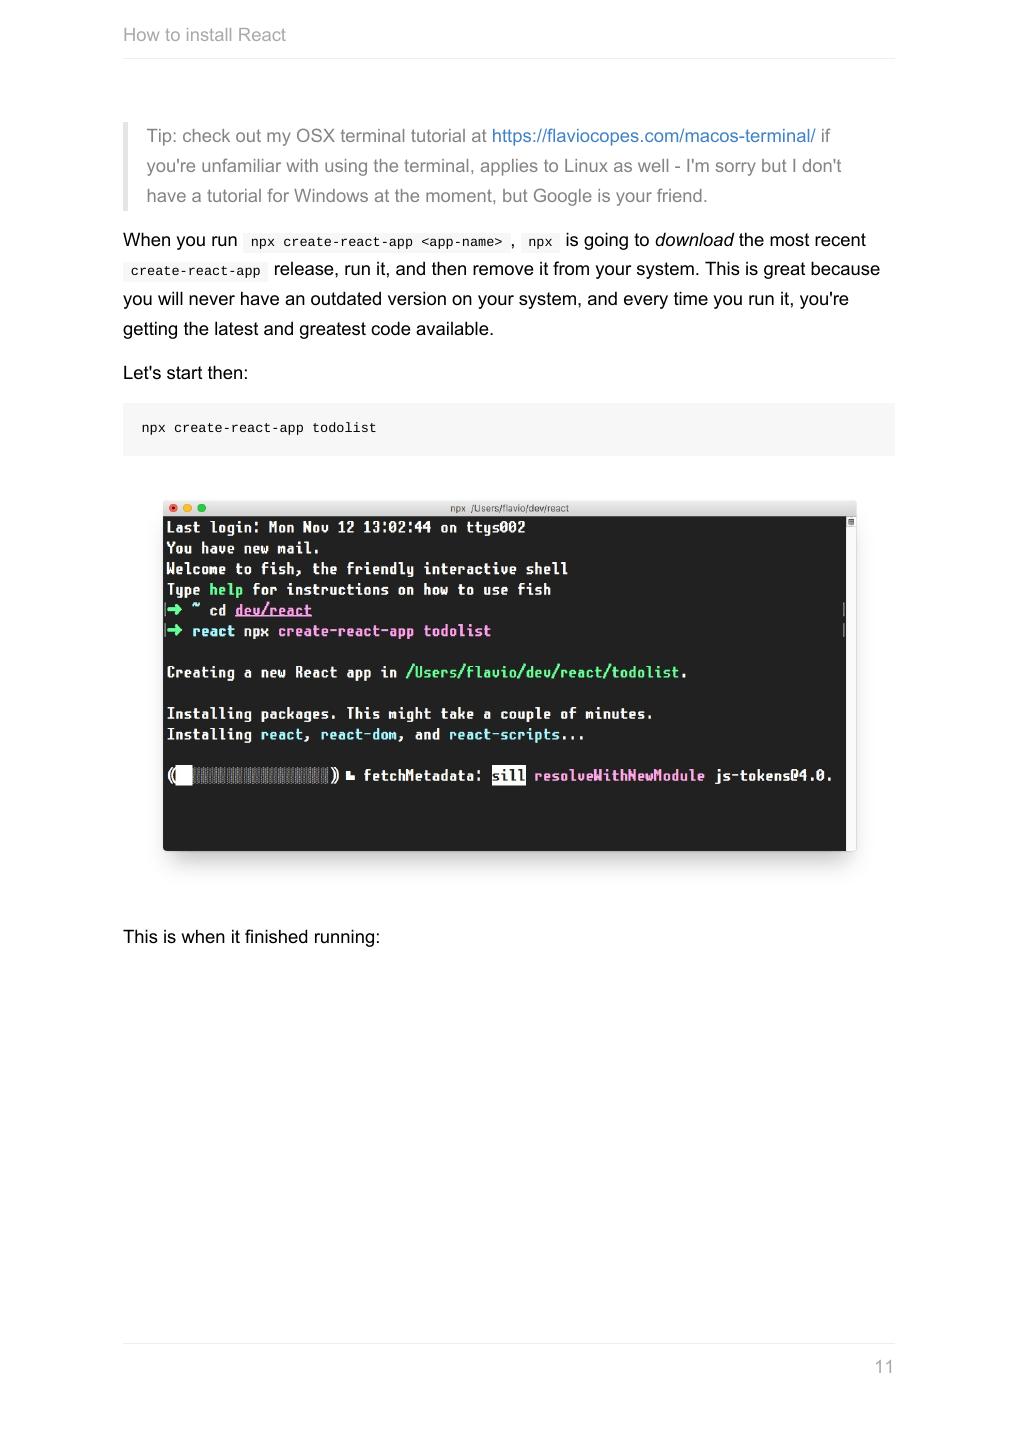
11 .How to install React Tip: check out my OSX terminal tutorial at https://flaviocopes.com/macos-terminal/ if you're unfamiliar with using the terminal, applies to Linux as well - I'm sorry but I don't have a tutorial for Windows at the moment, but Google is your friend. When you run npx create-react-app <app-name> , npx is going to download the most recent create-react-app release, run it, and then remove it from your system. This is great because you will never have an outdated version on your system, and every time you run it, you're getting the latest and greatest code available. Let's start then: npx create-react-app todolist This is when it finished running: 11
12 .How to install React create-react-app created a files structure in the folder you told ( todolist in this case), and initialized a Git repository. It also added a few commands in the package.json file, so you can immediately start the app by going into the folder and run npm start . 12
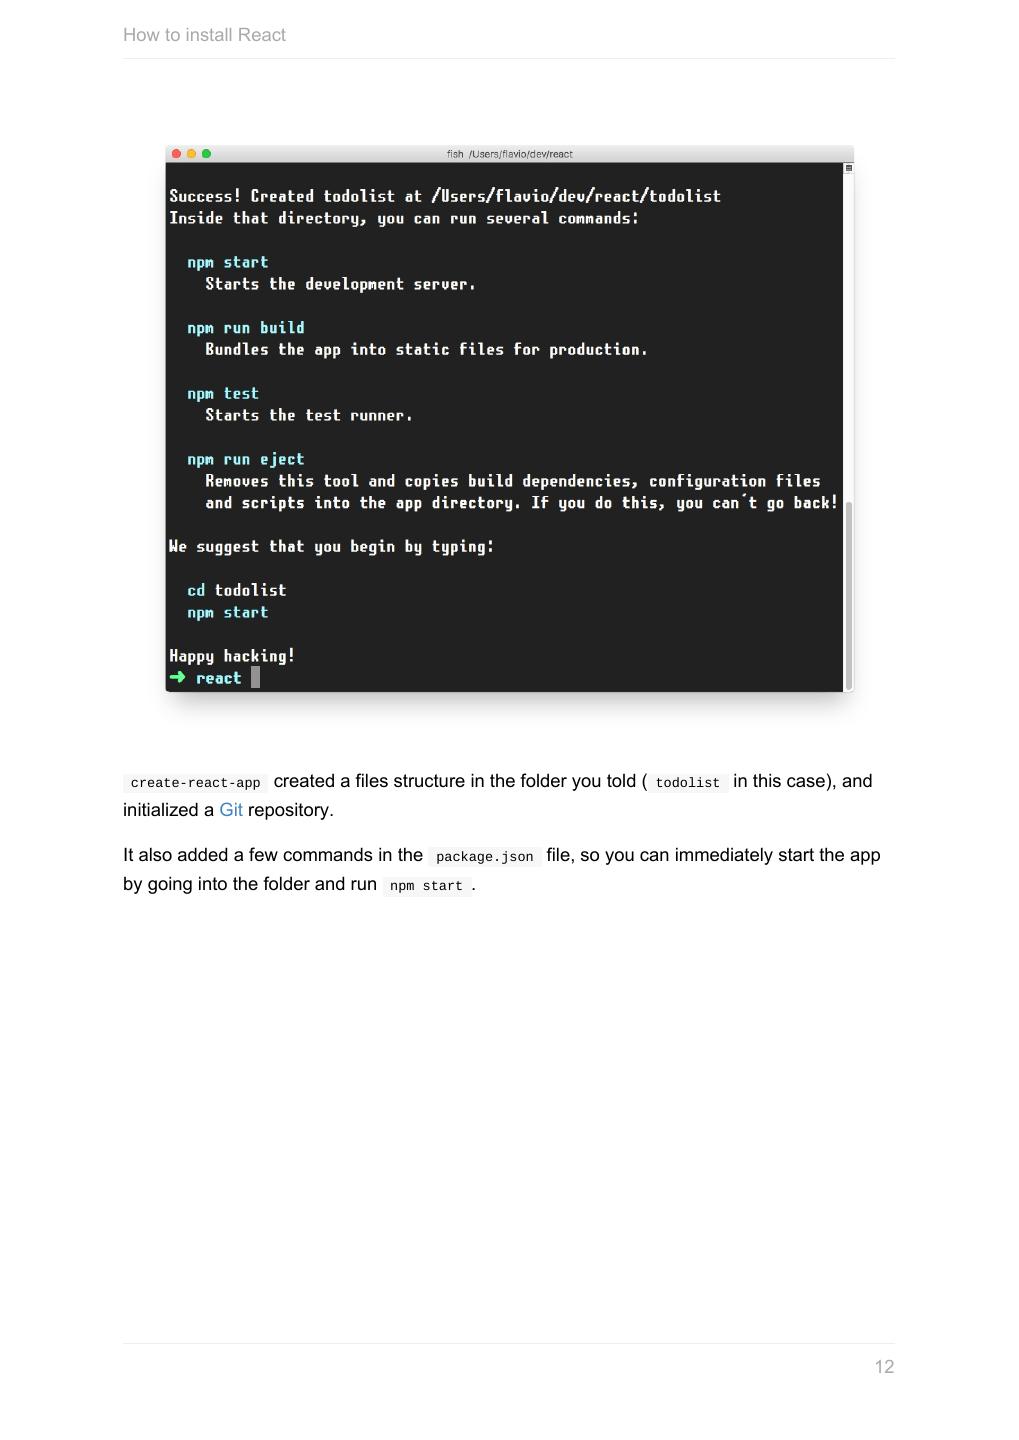
13 .How to install React In addition to npm start , create-react-app added a few other commands: 13
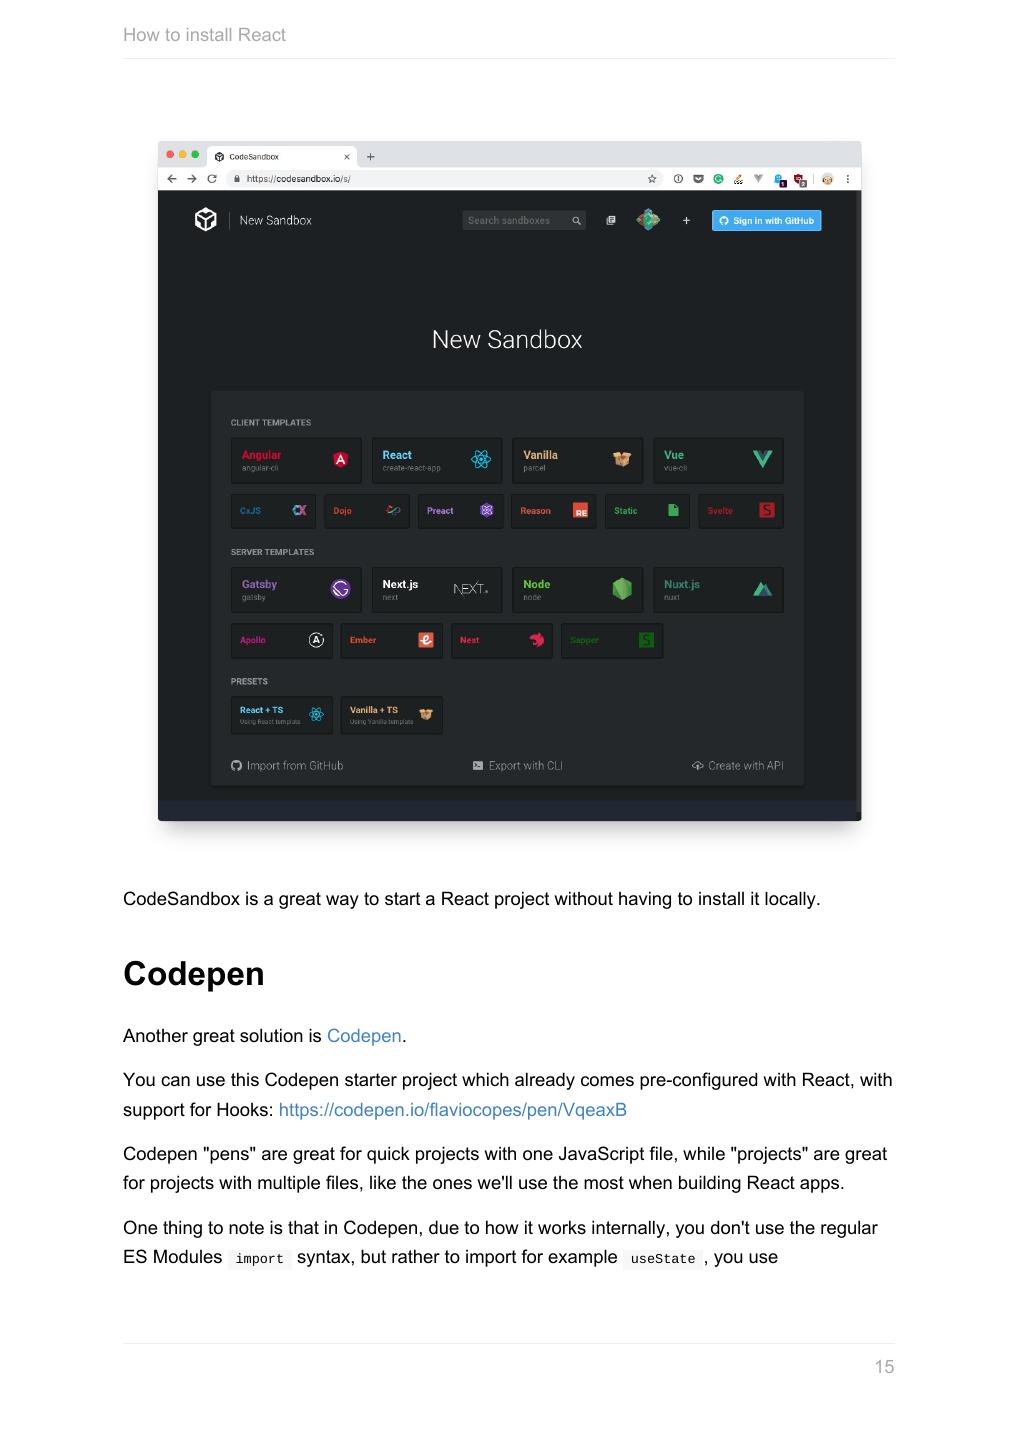
14 .How to install React npm run build : to build the React application files in the build folder, ready to be deployed to a server npm test : to run the testing suite using Jest npm eject : to eject from create-react-app Ejecting is the act of deciding that create-react-app has done enough for you, but you want to do more than what it allows. Since create-react-app is a set of common denominator conventions and a limited amount of options, it's probable that at some point your needs will demand something unique that outgrows the capabilities of create-react-app . When you eject, you lose the ability of automatic updates but you gain more flexibility in the Babel and Webpack configuration. When you eject the action is irreversible. You will get 2 new folders in your application directory, config and scripts . Those contain the configurations - and now you can start editing them. If you already have a React app installed using an older version of React, first check the version by adding console.log(React.version) in your app, then you can update by running yarn add react@16.7 , and yarn will prompt you to update (choose the latest version available). Repeat for yarn add react-dom@16.7 (change "16.7" with whatever is the newest version of React at the moment) CodeSandbox An easy way to have the create-react-app structure, without installing it, is to go to https://codesandbox.io/s and choose "React". 14
15 .How to install React CodeSandbox is a great way to start a React project without having to install it locally. Codepen Another great solution is Codepen. You can use this Codepen starter project which already comes pre-configured with React, with support for Hooks: https://codepen.io/flaviocopes/pen/VqeaxB Codepen "pens" are great for quick projects with one JavaScript file, while "projects" are great for projects with multiple files, like the ones we'll use the most when building React apps. One thing to note is that in Codepen, due to how it works internally, you don't use the regular ES Modules import syntax, but rather to import for example useState , you use 15
16 .How to install React const { useState } = React and not import { useState } from 'react' 16
17 .How much JS you need to use React How much JS you need to use React Find out if you have to learn something before diving into learning React If you are willing to learn React, you first need to have a few things under your belt. There are some prerequisite technologies you have to be familiar with, in particular related to some of the more recent JavaScript features you'll use over and over in React. Sometimes people think one particular feature is provided by React, but instead it's just modern JavaScript syntax. There is no point in being an expert in those topics right away, but the more you dive into React, the more you'll need to master those. I will mention a list of things to get you up to speed quickly. 17
18 .Variables Variables A variable is a literal assigned to an identifier, so you can reference and use it later in the program. Learn how to declare one with JavaScript A variable is a literal assigned to an identifier, so you can reference and use it later in the program. Variables in JavaScript do not have any type attached. Once you assign a specific literal type to a variable, you can later reassign the variable to host any other type, without type errors or any issue. This is why JavaScript is sometimes referred to as "untyped". A variable must be declared before you can use it. There are 3 ways to do this, using var , let or const , and those 3 ways differ in how you can interact with the variable later on. Using var Until ES2015, var was the only construct available for defining variables. var a = 0 If you forget to add var you will be assigning a value to an undeclared variable, and the results might vary. In modern environments, with strict mode enabled, you will get an error. In older environments (or with strict mode disabled) this will simply initialize the variable and assign it to the global object. If you don't initialize the variable when you declare it, it will have the undefined value until you assign a value to it. var a //typeof a === 'undefined' You can redeclare the variable many times, overriding it: var a = 1 var a = 2 You can also declare multiple variables at once in the same statement: 18
19 .Variables var a = 1, b = 2 The scope is the portion of code where the variable is visible. A variable initialized with var outside of any function is assigned to the global object, has a global scope and is visible everywhere. A variable initialized with var inside a function is assigned to that function, it's local and is visible only inside it, just like a function parameter. Any variable defined in a function with the same name as a global variable takes precedence over the global variable, shadowing it. It's important to understand that a block (identified by a pair of curly braces) does not define a new scope. A new scope is only created when a function is created, because var does not have block scope, but function scope. Inside a function, any variable defined in it is visible throughout all the function code, even if the variable is declared at the end of the function it can still be referenced in the beginning, because JavaScript before executing the code actually moves all variables on top (something that is called hoisting). To avoid confusion, always declare variables at the beginning of a function. Using let let is a new feature introduced in ES2015 and it's essentially a block scoped version of var . Its scope is limited to the block, statement or expression where it's defined, and all the contained inner blocks. Modern JavaScript developers might choose to only use let and completely discard the use of var . If let seems an obscure term, just read let color = 'red' as let the color be red and it all makes much more sense Defining let outside of any function - contrary to var - does not create a global variable. Using const Variables declared with var or let can be changed later on in the program, and reassigned. Once a const is initialized, its value can never be changed again, and it can't be reassigned to a different value. const a = 'test' 19
20 .Variables We can't assign a different literal to the a const. We can however mutate a if it's an object that provides methods that mutate its contents. const does not provide immutability, just makes sure that the reference can't be changed. const has block scope, same as let . Modern JavaScript developers might choose to always use const for variables that don't need to be reassigned later in the program. Why? Because we should always use the simplest construct available to avoid making errors down the road. 20
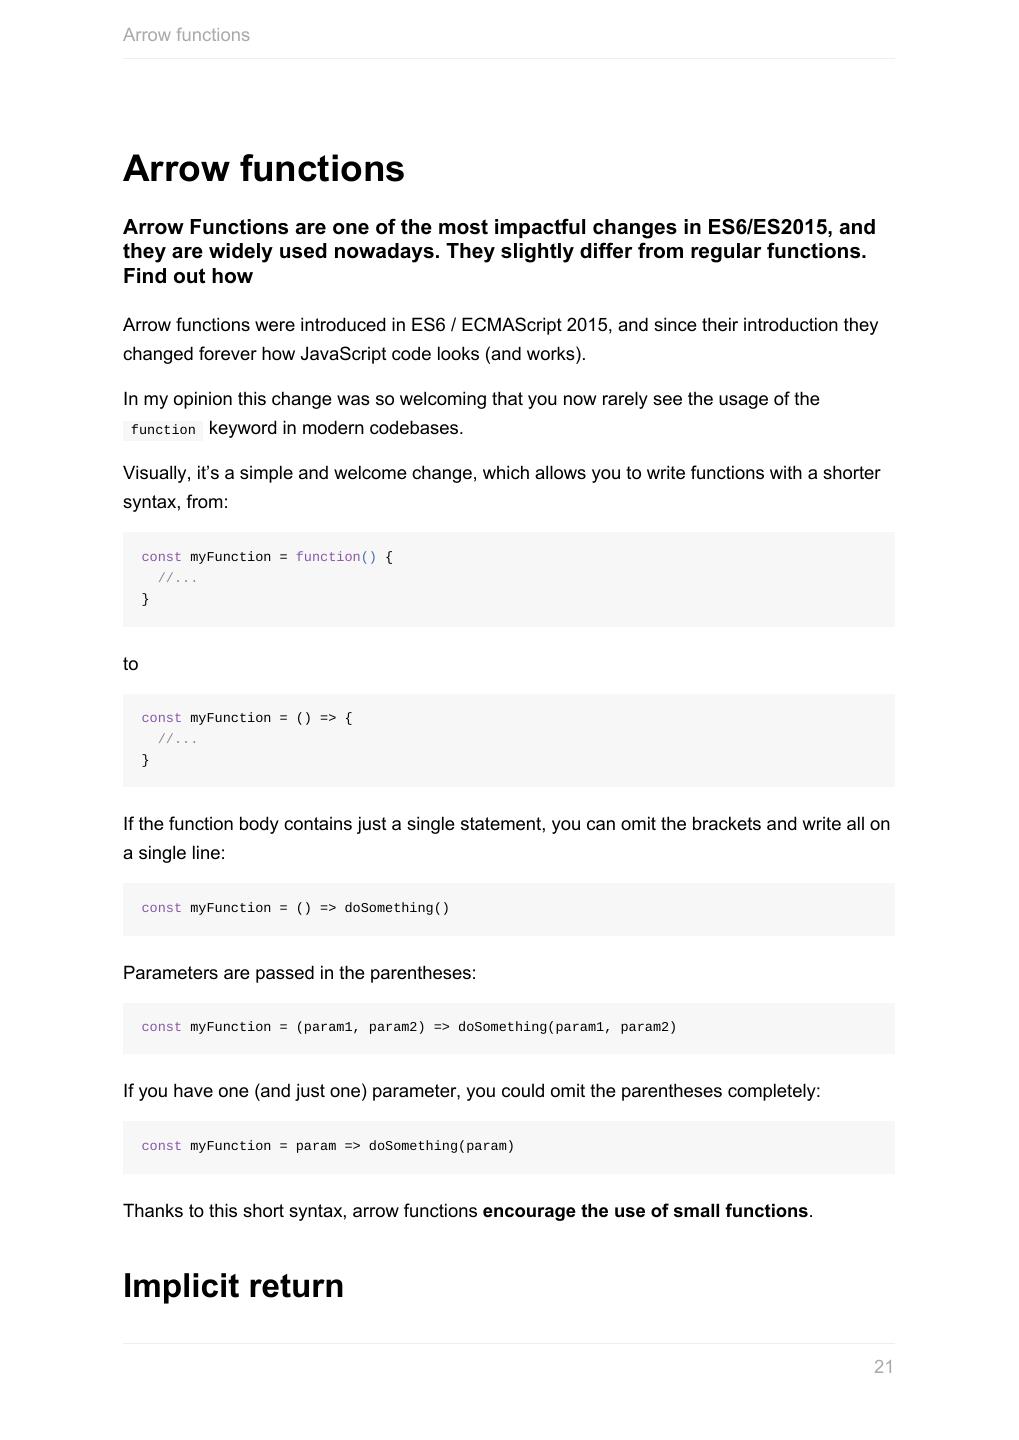
21 .Arrow functions Arrow functions Arrow Functions are one of the most impactful changes in ES6/ES2015, and they are widely used nowadays. They slightly differ from regular functions. Find out how Arrow functions were introduced in ES6 / ECMAScript 2015, and since their introduction they changed forever how JavaScript code looks (and works). In my opinion this change was so welcoming that you now rarely see the usage of the function keyword in modern codebases. Visually, it’s a simple and welcome change, which allows you to write functions with a shorter syntax, from: const myFunction = function() { //... } to const myFunction = () => { //... } If the function body contains just a single statement, you can omit the brackets and write all on a single line: const myFunction = () => doSomething() Parameters are passed in the parentheses: const myFunction = (param1, param2) => doSomething(param1, param2) If you have one (and just one) parameter, you could omit the parentheses completely: const myFunction = param => doSomething(param) Thanks to this short syntax, arrow functions encourage the use of small functions. Implicit return 21
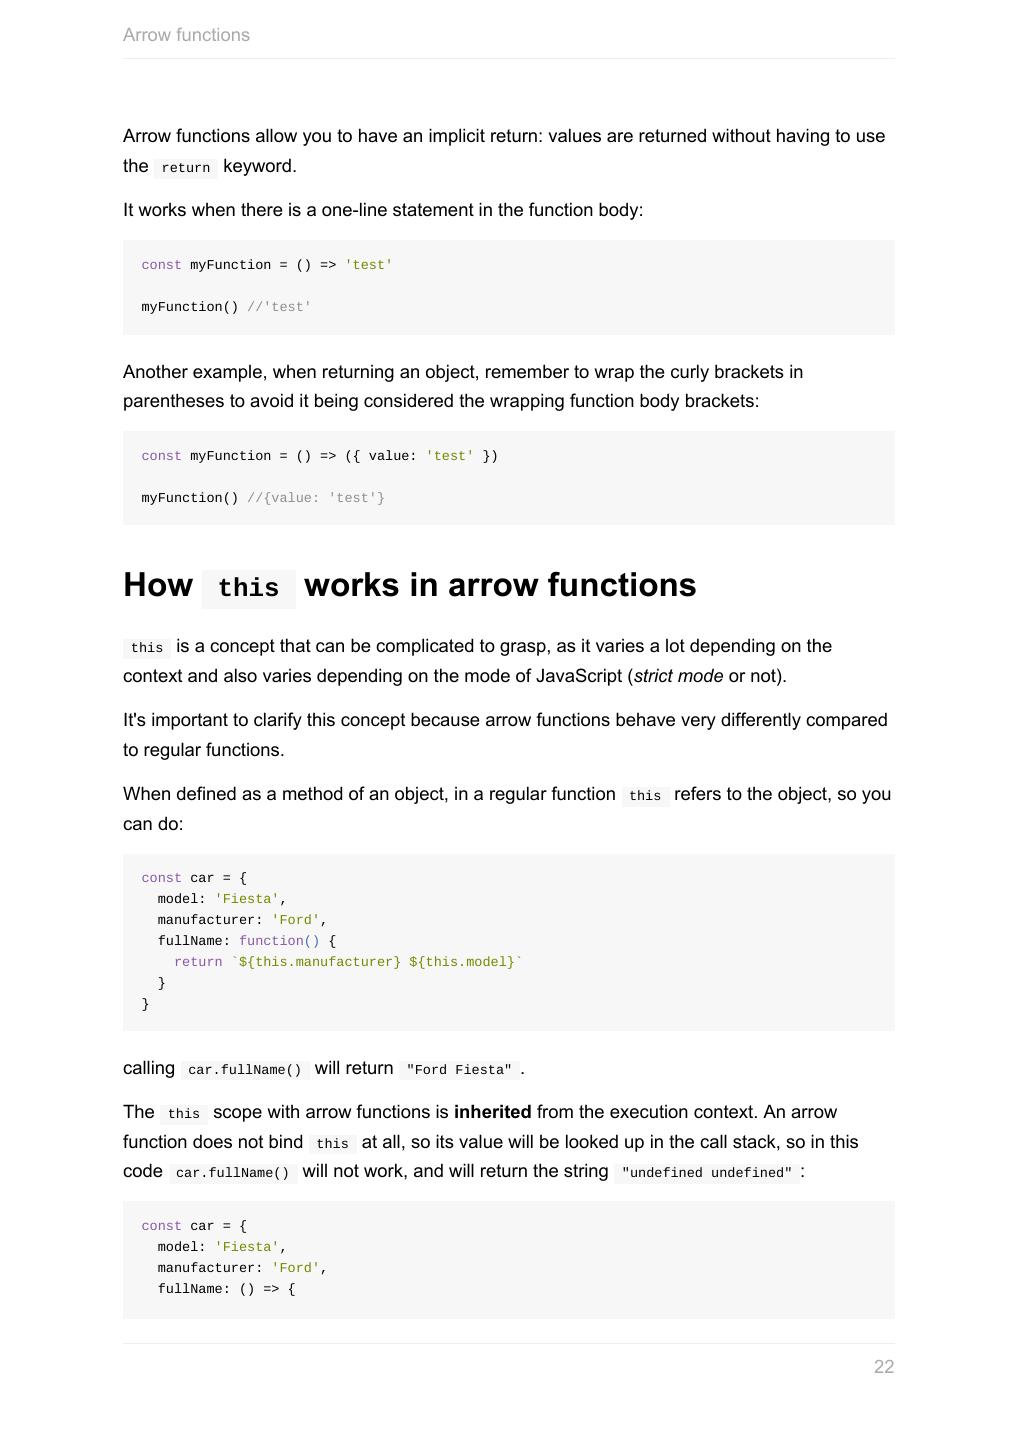
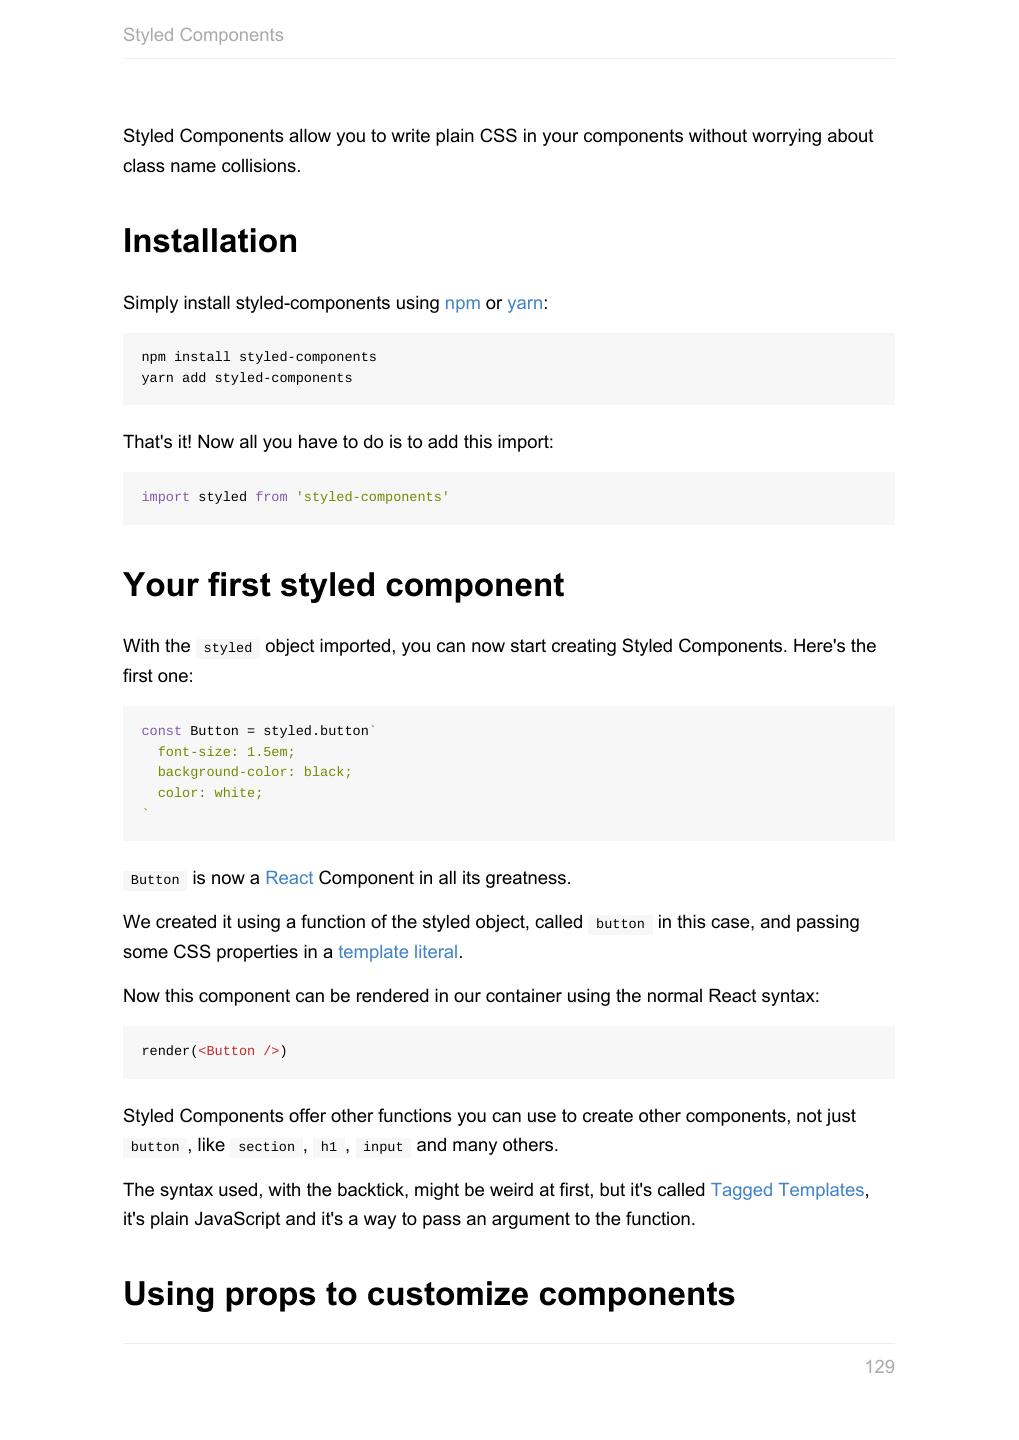
22 .Arrow functions Arrow functions allow you to have an implicit return: values are returned without having to use the return keyword. It works when there is a one-line statement in the function body: const myFunction = () => 'test' myFunction() //'test' Another example, when returning an object, remember to wrap the curly brackets in parentheses to avoid it being considered the wrapping function body brackets: const myFunction = () => ({ value: 'test' }) myFunction() //{value: 'test'} How this works in arrow functions this is a concept that can be complicated to grasp, as it varies a lot depending on the context and also varies depending on the mode of JavaScript (strict mode or not). It's important to clarify this concept because arrow functions behave very differently compared to regular functions. When defined as a method of an object, in a regular function this refers to the object, so you can do: const car = { model: 'Fiesta', manufacturer: 'Ford', fullName: function() { return `${this.manufacturer} ${this.model}` } } calling car.fullName() will return "Ford Fiesta" . The this scope with arrow functions is inherited from the execution context. An arrow function does not bind this at all, so its value will be looked up in the call stack, so in this code car.fullName() will not work, and will return the string "undefined undefined" : const car = { model: 'Fiesta', manufacturer: 'Ford', fullName: () => { 22
23 .Arrow functions return `${this.manufacturer} ${this.model}` } } Due to this, arrow functions are not suited as object methods. Arrow functions cannot be used as constructors either, when instantiating an object will raise a TypeError . This is where regular functions should be used instead, when dynamic context is not needed. This is also a problem when handling events. DOM Event listeners set this to be the target element, and if you rely on this in an event handler, a regular function is necessary: const link = document.querySelector('#link') link.addEventListener('click', () => { // this === window }) const link = document.querySelector('#link') link.addEventListener('click', function() { // this === link }) 23
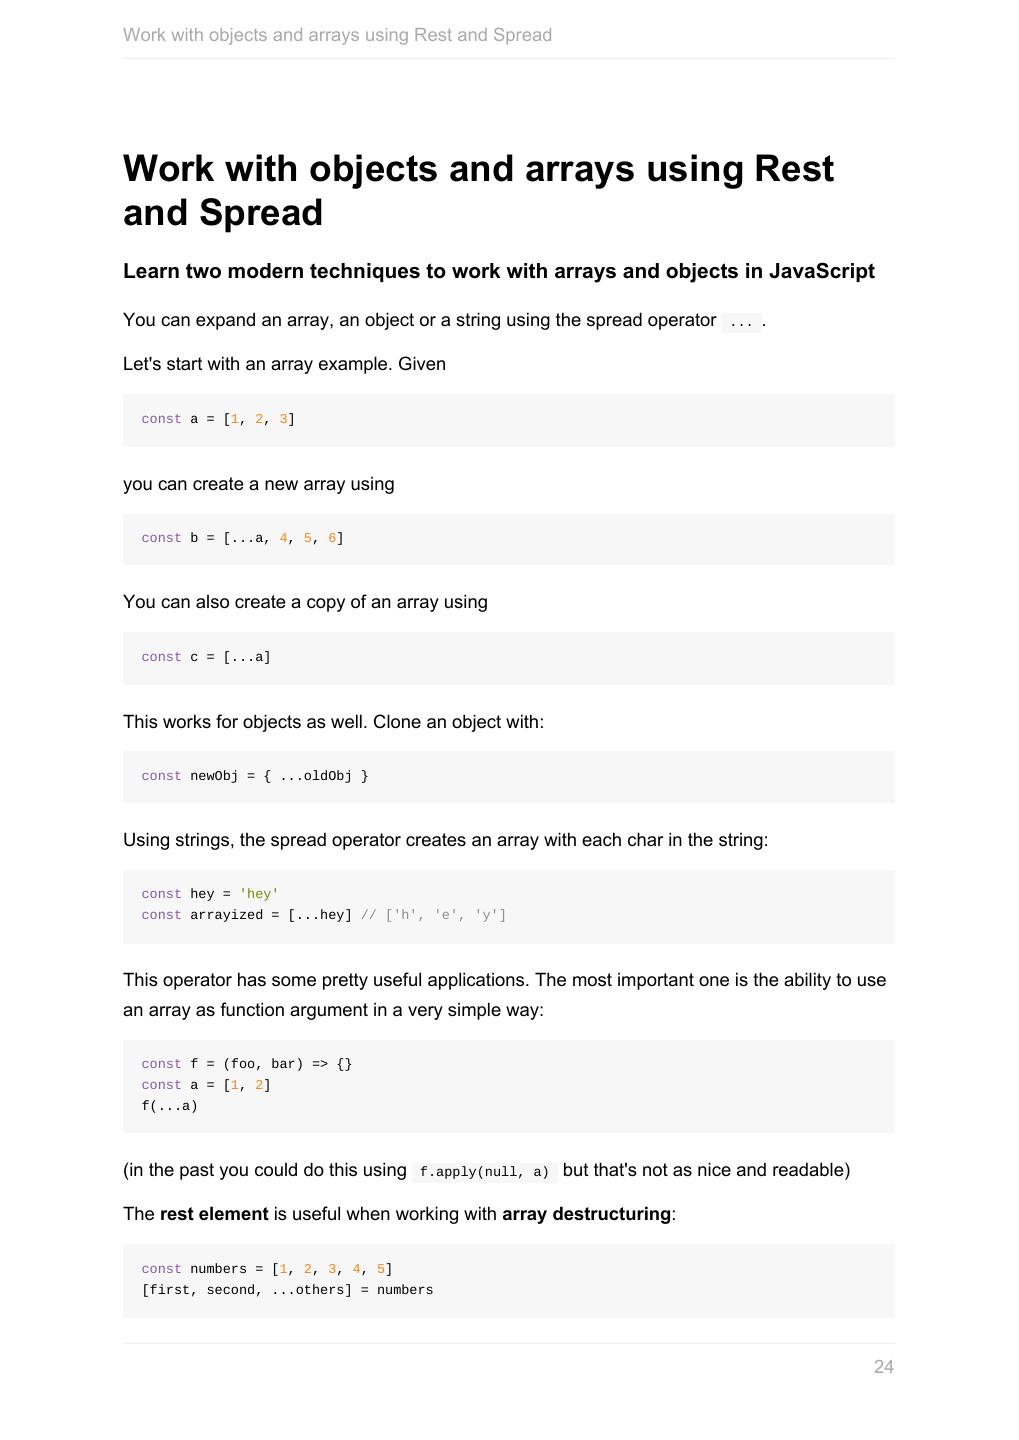
24 .Work with objects and arrays using Rest and Spread Work with objects and arrays using Rest and Spread Learn two modern techniques to work with arrays and objects in JavaScript You can expand an array, an object or a string using the spread operator ... . Let's start with an array example. Given const a = [1, 2, 3] you can create a new array using const b = [...a, 4, 5, 6] You can also create a copy of an array using const c = [...a] This works for objects as well. Clone an object with: const newObj = { ...oldObj } Using strings, the spread operator creates an array with each char in the string: const hey = 'hey' const arrayized = [...hey] // ['h', 'e', 'y'] This operator has some pretty useful applications. The most important one is the ability to use an array as function argument in a very simple way: const f = (foo, bar) => {} const a = [1, 2] f(...a) (in the past you could do this using f.apply(null, a) but that's not as nice and readable) The rest element is useful when working with array destructuring: const numbers = [1, 2, 3, 4, 5] [first, second, ...others] = numbers 24
25 .Work with objects and arrays using Rest and Spread and spread elements: const numbers = [1, 2, 3, 4, 5] const sum = (a, b, c, d, e) => a + b + c + d + e const sum = sum(...numbers) ES2018 introduces rest properties, which are the same but for objects. Rest properties: const { first, second, ...others } = { first: 1, second: 2, third: 3, fourth: 4, fifth: 5 } first // 1 second // 2 others // { third: 3, fourth: 4, fifth: 5 } Spread properties allow to create a new object by combining the properties of the object passed after the spread operator: const items = { first, second, ...others } items //{ first: 1, second: 2, third: 3, fourth: 4, fifth: 5 } 25
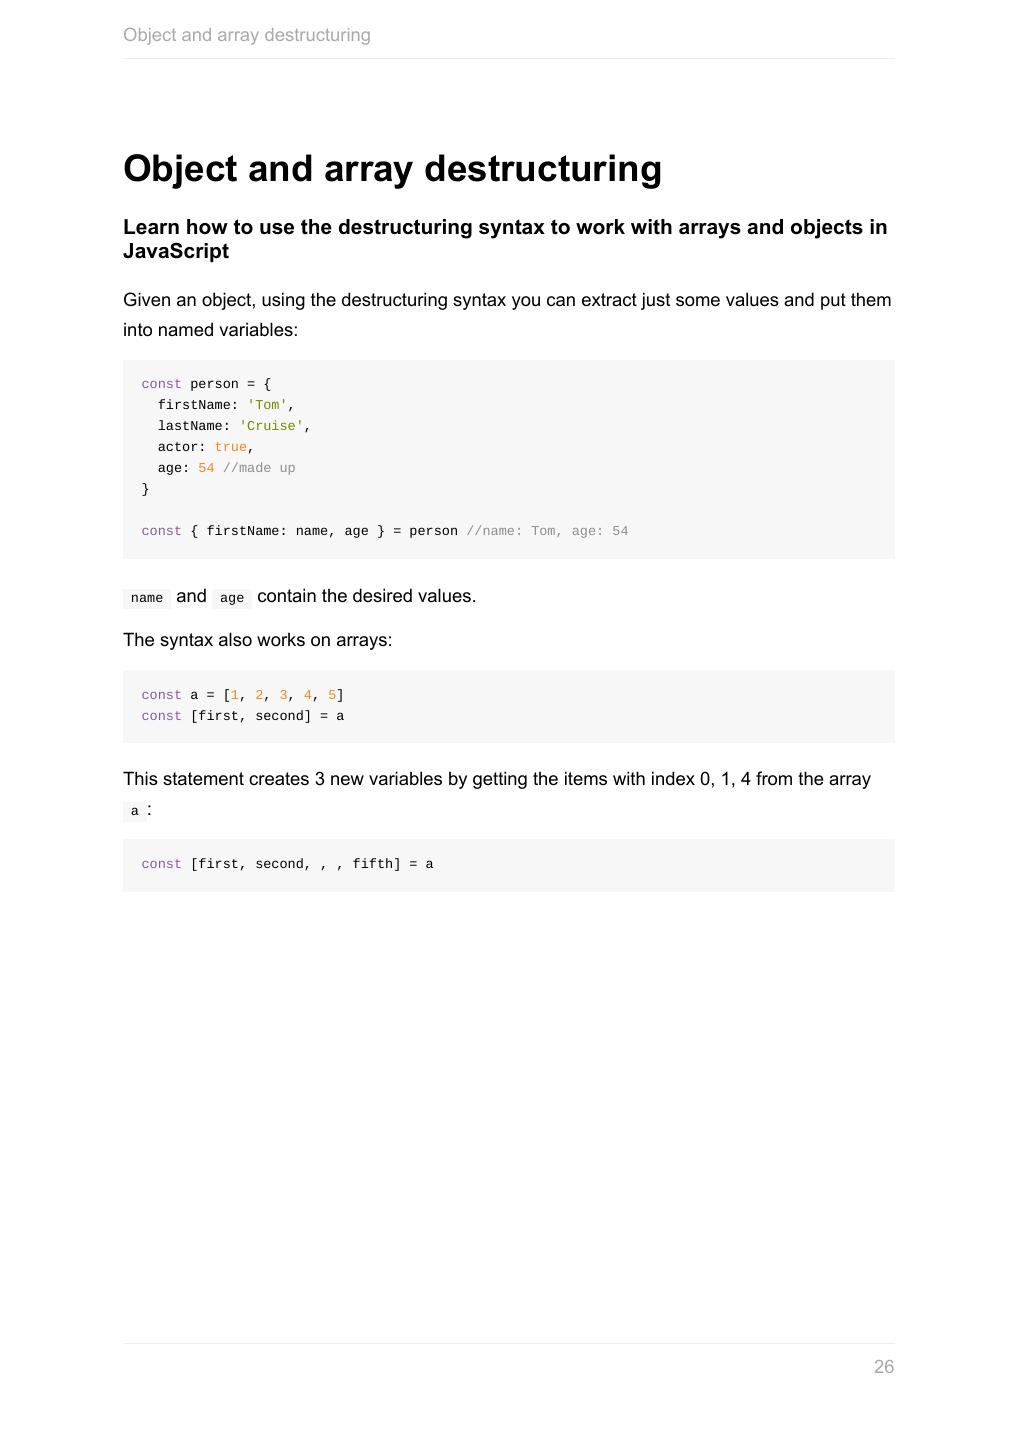
26 .Object and array destructuring Object and array destructuring Learn how to use the destructuring syntax to work with arrays and objects in JavaScript Given an object, using the destructuring syntax you can extract just some values and put them into named variables: const person = { firstName: 'Tom', lastName: 'Cruise', actor: true, age: 54 //made up } const { firstName: name, age } = person //name: Tom, age: 54 name and age contain the desired values. The syntax also works on arrays: const a = [1, 2, 3, 4, 5] const [first, second] = a This statement creates 3 new variables by getting the items with index 0, 1, 4 from the array a : const [first, second, , , fifth] = a 26
27 .Template literals Template literals Introduced in ES2015, aka ES6, Template Literals offer a new way to declare strings, but also some new interesting constructs which are already widely popular. Introduction to Template Literals Template Literals are a new ES2015 / ES6 feature that allows you to work with strings in a novel way compared to ES5 and below. The syntax at a first glance is very simple, just use backticks instead of single or double quotes: const a_string = `something` They are unique because they provide a lot of features that normal strings built with quotes do not, in particular: they offer a great syntax to define multiline strings they provide an easy way to interpolate variables and expressions in strings they allow you to create DSLs with template tags (DSL means domain specific language, and it's for example used in React by Styled Components, to define CSS for a component) Let's dive into each of these in detail. Multiline strings Pre-ES6, to create a string spanning over two lines you had to use the \ character at the end of a line: const string = 'first part \ second part' This allows to create a string on 2 lines, but it's rendered on just one line: first part second part 27
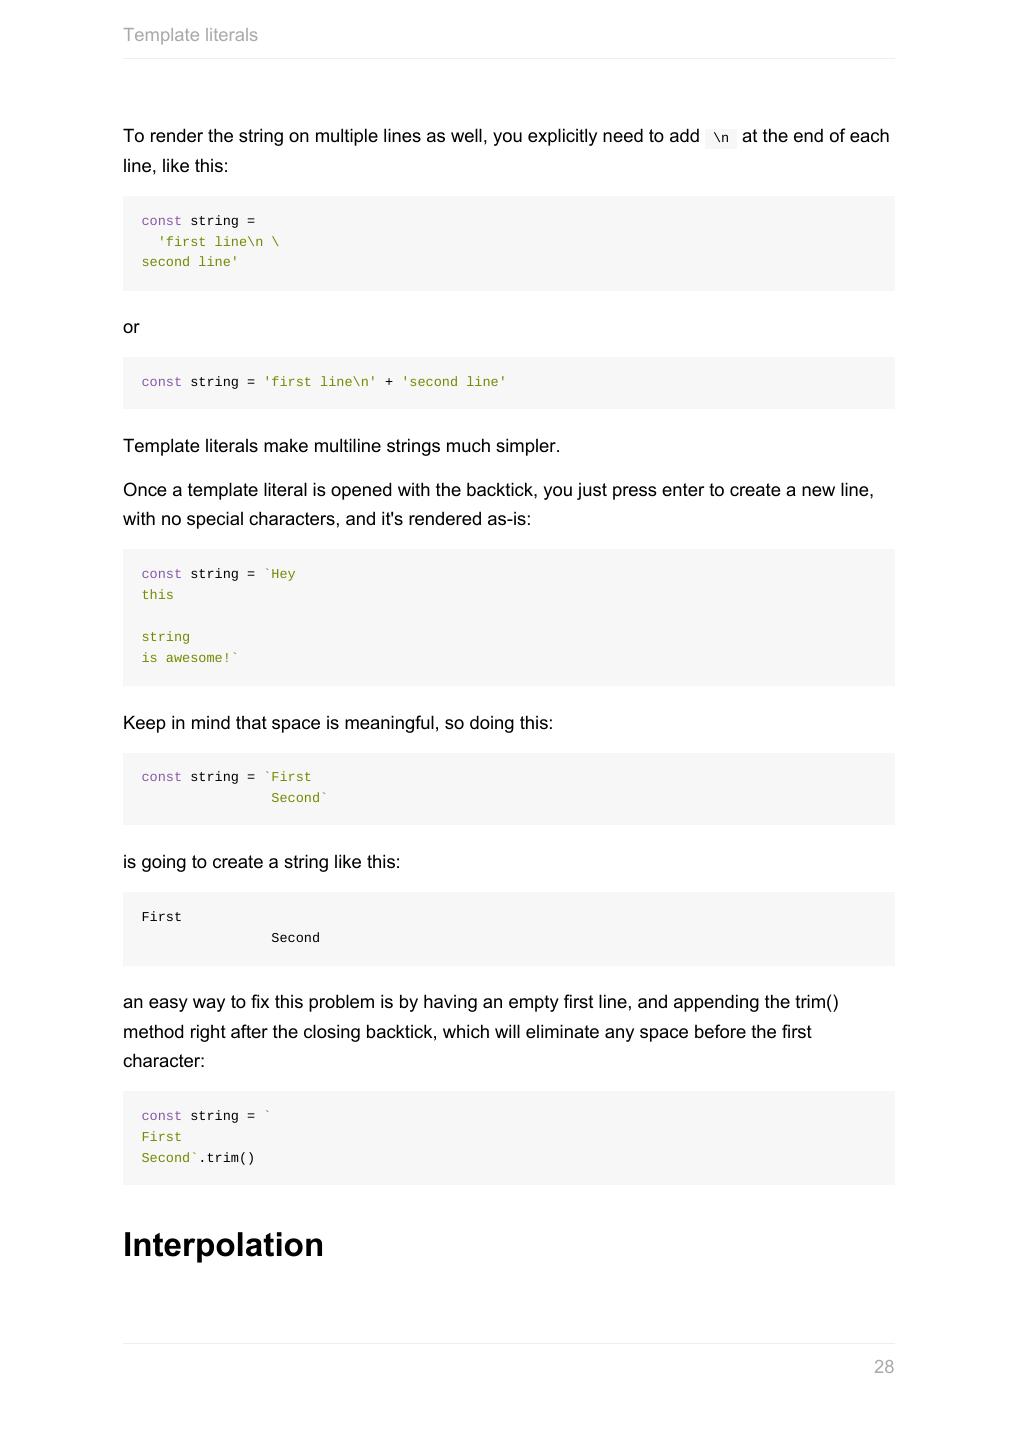
28 .Template literals To render the string on multiple lines as well, you explicitly need to add \n at the end of each line, like this: const string = 'first line\n \ second line' or const string = 'first line\n' + 'second line' Template literals make multiline strings much simpler. Once a template literal is opened with the backtick, you just press enter to create a new line, with no special characters, and it's rendered as-is: const string = `Hey this string is awesome!` Keep in mind that space is meaningful, so doing this: const string = `First Second` is going to create a string like this: First Second an easy way to fix this problem is by having an empty first line, and appending the trim() method right after the closing backtick, which will eliminate any space before the first character: const string = ` First Second`.trim() Interpolation 28
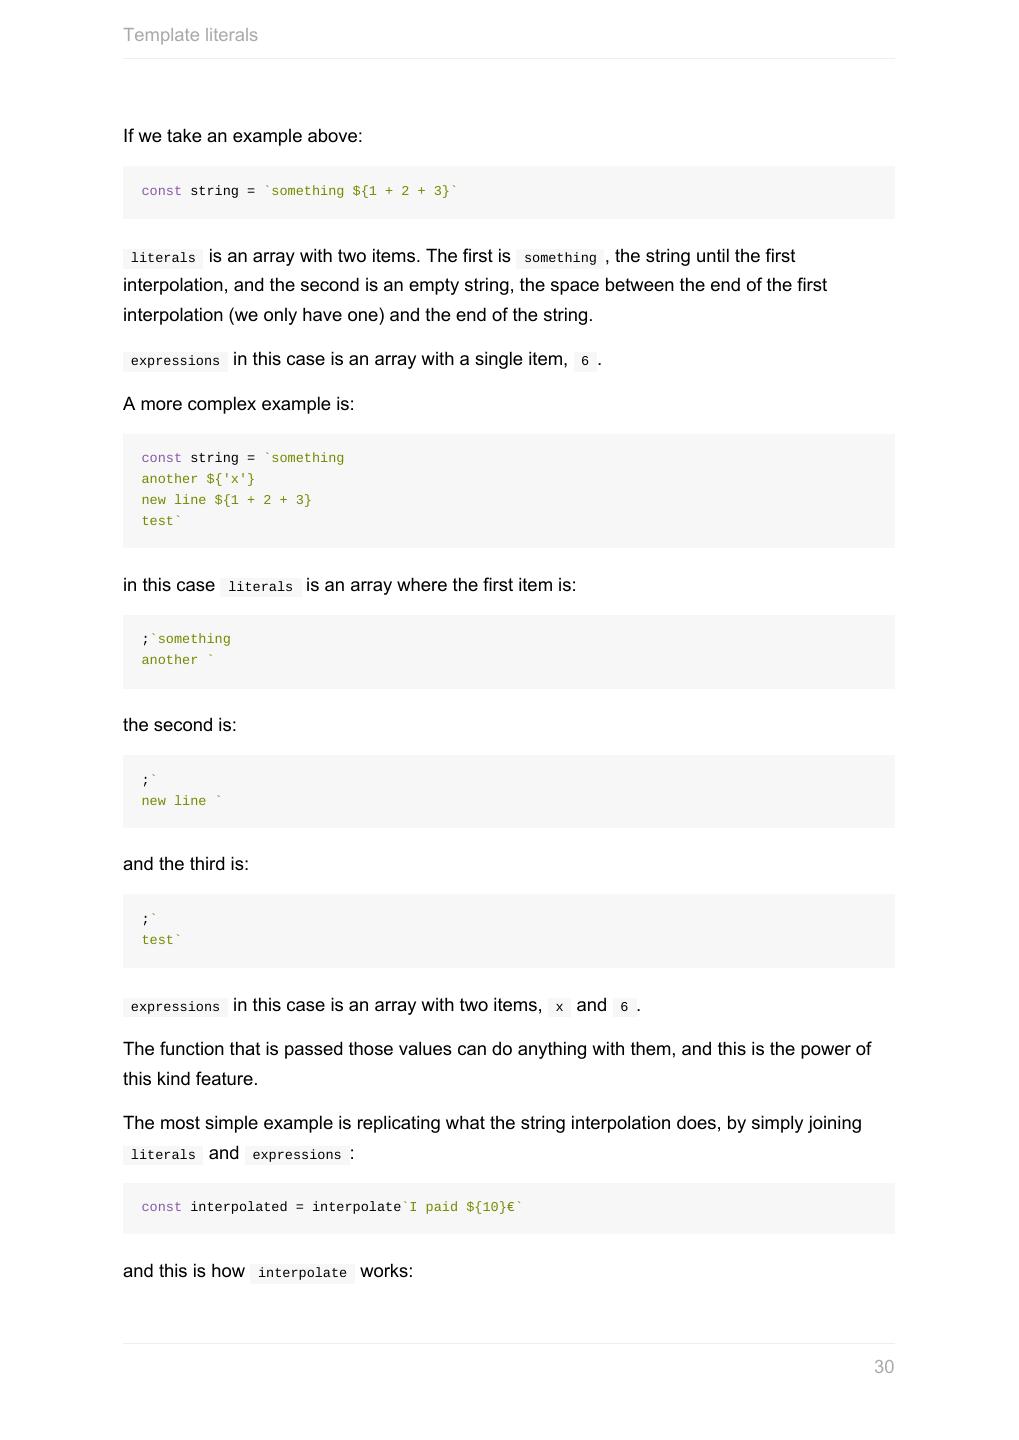
29 .Template literals Template literals provide an easy way to interpolate variables and expressions into strings. You do so by using the ${...} syntax: const var = 'test' const string = `something ${var}` //something test inside the ${} you can add anything, even expressions: const string = `something ${1 + 2 + 3}` const string2 = `something ${foo() ? 'x' : 'y'}` Template tags Tagged templates is one feature that might sound less useful at first for you, but it's actually used by lots of popular libraries around, like Styled Components or Apollo, the GraphQL client/server lib, so it's essential to understand how it works. In Styled Components template tags are used to define CSS strings: const Button = styled.button` font-size: 1.5em; background-color: black; color: white; ` In Apollo template tags are used to define a GraphQL query schema: const query = gql` query { ... } ` The styled.button and gql template tags highlighted in those examples are just functions: function gql(literals, ...expressions) {} this function returns a string, which can be the result of any kind of computation. literals is an array containing the template literal content tokenized by the expressions interpolations. expressions contains all the interpolations. 29


