- 快召唤伙伴们来围观吧
- 微博 QQ QQ空间 贴吧
- 文档嵌入链接
- 复制
- 微信扫一扫分享
- 已成功复制到剪贴板
Apache-Phoenix使用文档-英文
展开查看详情
1 .
2 . 目 录 致谢 F.A.Q. Quick Start Building Tuning Explain Plan Configuration Backward Compatibility Release Notes Performance Testing Apache Spark Integration Phoenix Storage Handler for Apache Hive Apache Pig Integration Map Reduce Integration Apache Flume Plugin Apache Kafka Plugin Python Driver 本文档使用 书栈(BookStack.CN) 构建 - 2 -
3 .致谢 致谢 当前文档 《Apache Phoenix使用文档(英文)》 由 进击的皇虫 使用 书栈(BookStack.CN) 进行构建,生 成于 2018-07-15。 书栈(BookStack.CN) 仅提供文档编写、整理、归类等功能,以及对文档内容的生成和导出工具。 文档内容由网友们编写和整理,书栈(BookStack.CN) 难以确认文档内容知识点是否错漏。如果您在阅读文档 获取知识的时候,发现文档内容有不恰当的地方,请向我们反馈,让我们共同携手,将知识准确、高效且有效地传递 给每一个人。 同时,如果您在日常工作、生活和学习中遇到有价值有营养的知识文档,欢迎分享到 书栈(BookStack.CN) , 为知识的传承献上您的一份力量! 如果当前文档生成时间太久,请到 书栈(BookStack.CN) 获取最新的文档,以跟上知识更新换代的步伐。 文档地址:http://www.bookstack.cn/books/Apache-Phoenix-en 书栈官网:http://www.bookstack.cn 书栈开源:https://github.com/TruthHun 分享,让知识传承更久远! 感谢知识的创造者,感谢知识的分享者,也感谢每一位阅读到此处的读者,因为我们 都将成为知识的传承者。 本文档使用 书栈(BookStack.CN) 构建 - 3 -
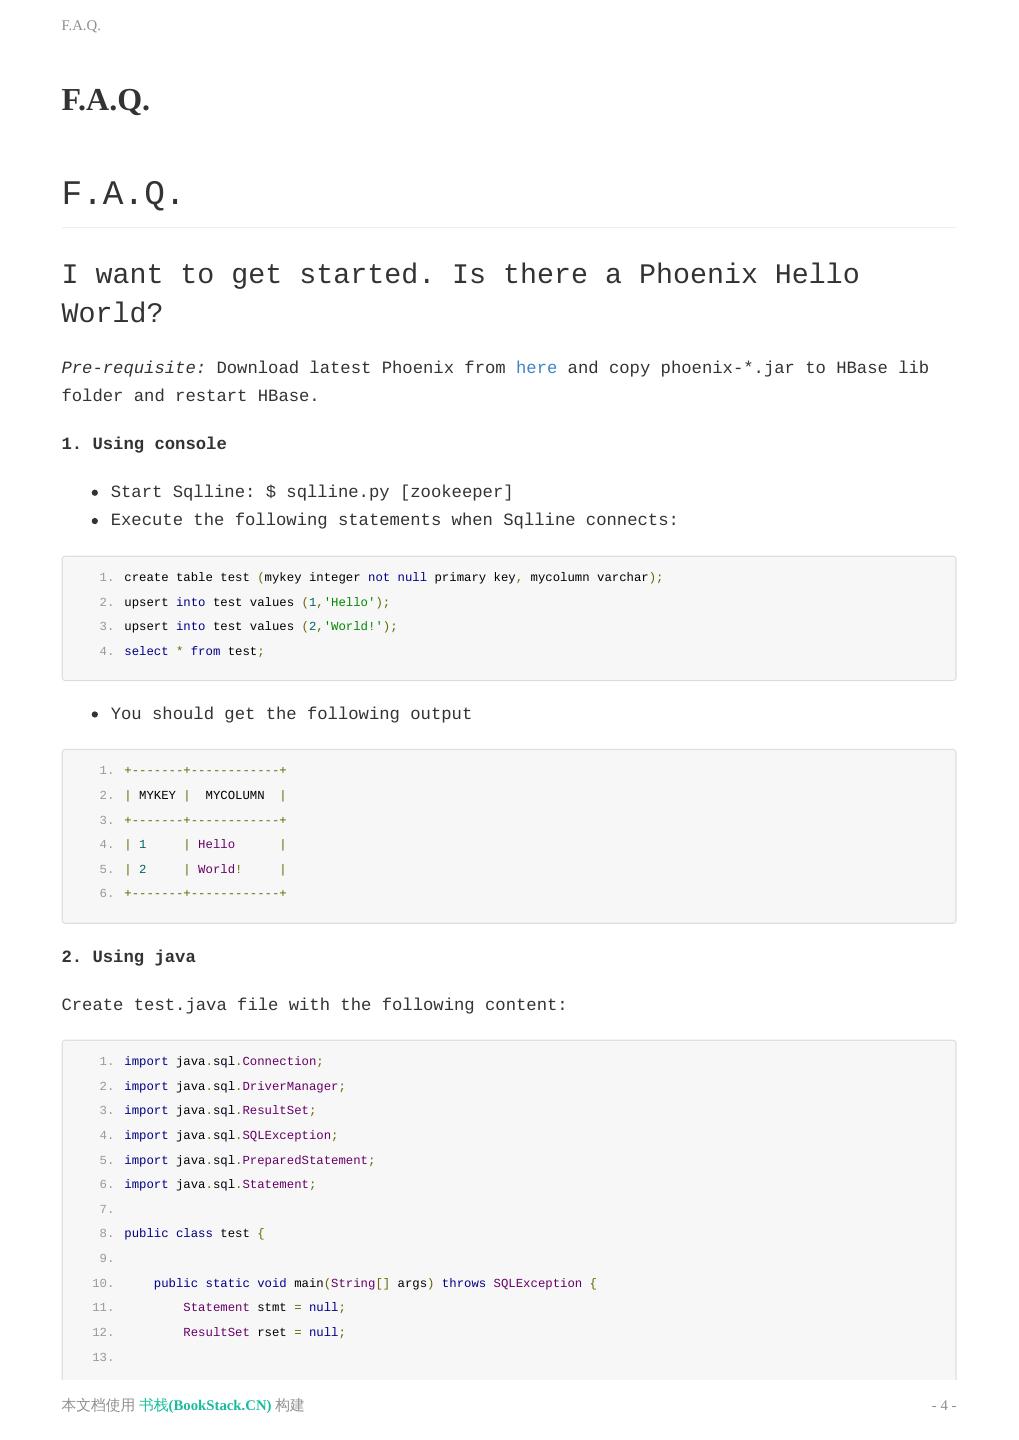
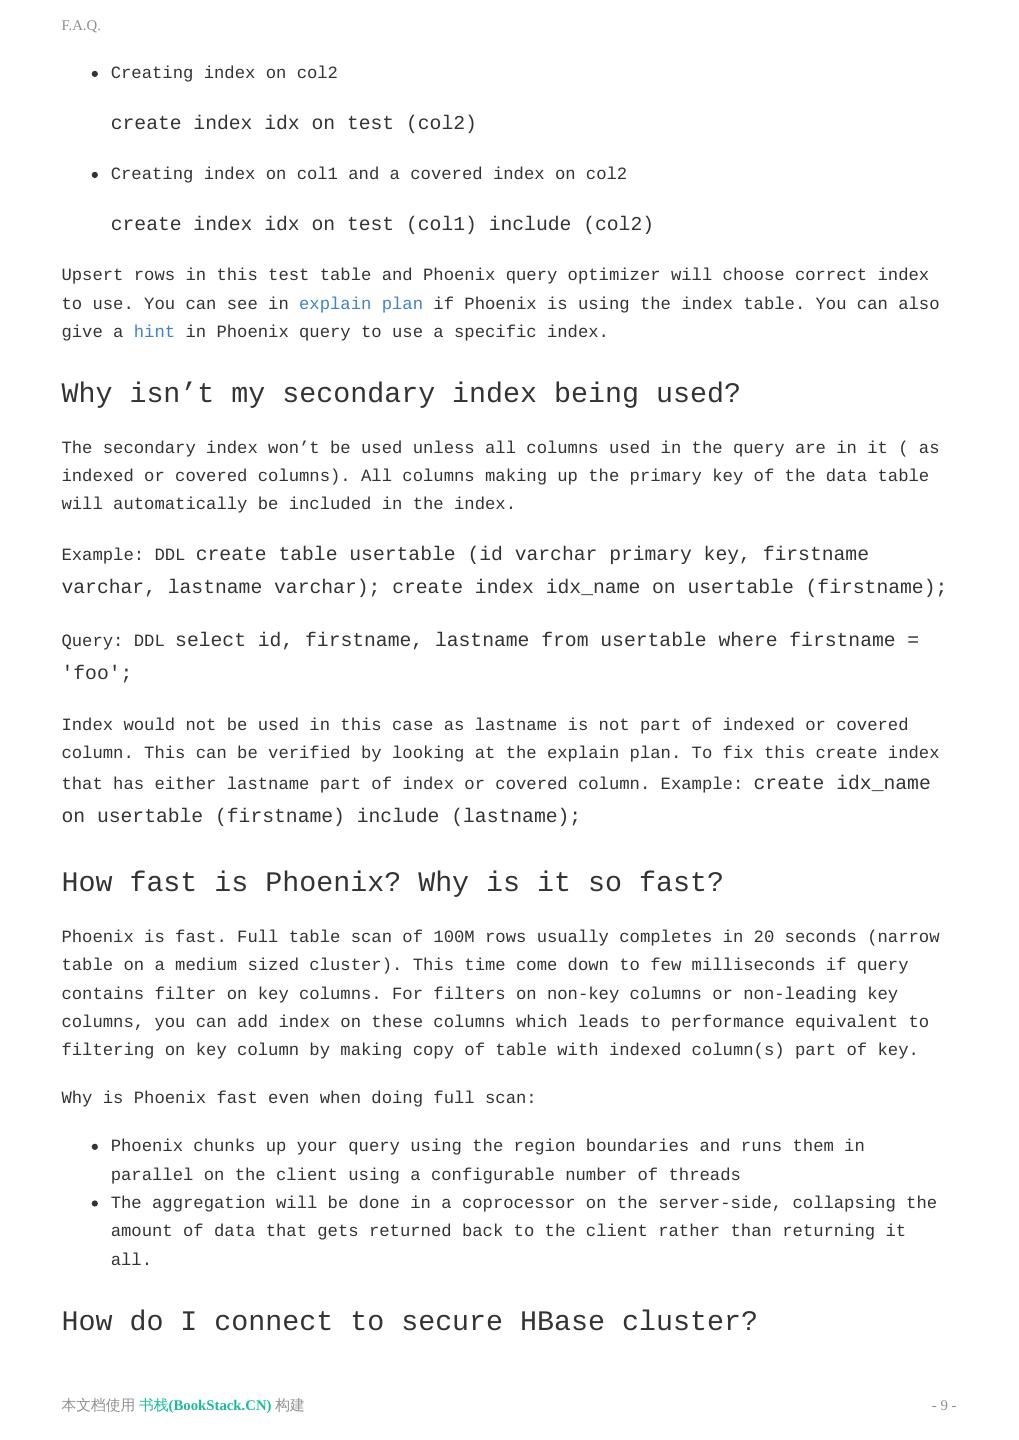
4 .F.A.Q. F.A.Q. F.A.Q. I want to get started. Is there a Phoenix Hello World? Pre-requisite: Download latest Phoenix from here and copy phoenix-*.jar to HBase lib folder and restart HBase. 1. Using console Start Sqlline: $ sqlline.py [zookeeper] Execute the following statements when Sqlline connects: 1. create table test (mykey integer not null primary key, mycolumn varchar); 2. upsert into test values (1,'Hello'); 3. upsert into test values (2,'World!'); 4. select * from test; You should get the following output 1. +-------+------------+ 2. | MYKEY | MYCOLUMN | 3. +-------+------------+ 4. | 1 | Hello | 5. | 2 | World! | 6. +-------+------------+ 2. Using java Create test.java file with the following content: 1. import java.sql.Connection; 2. import java.sql.DriverManager; 3. import java.sql.ResultSet; 4. import java.sql.SQLException; 5. import java.sql.PreparedStatement; 6. import java.sql.Statement; 7. 8. public class test { 9. 10. public static void main(String[] args) throws SQLException { 11. Statement stmt = null; 12. ResultSet rset = null; 13. 本文档使用 书栈(BookStack.CN) 构建 - 4 -
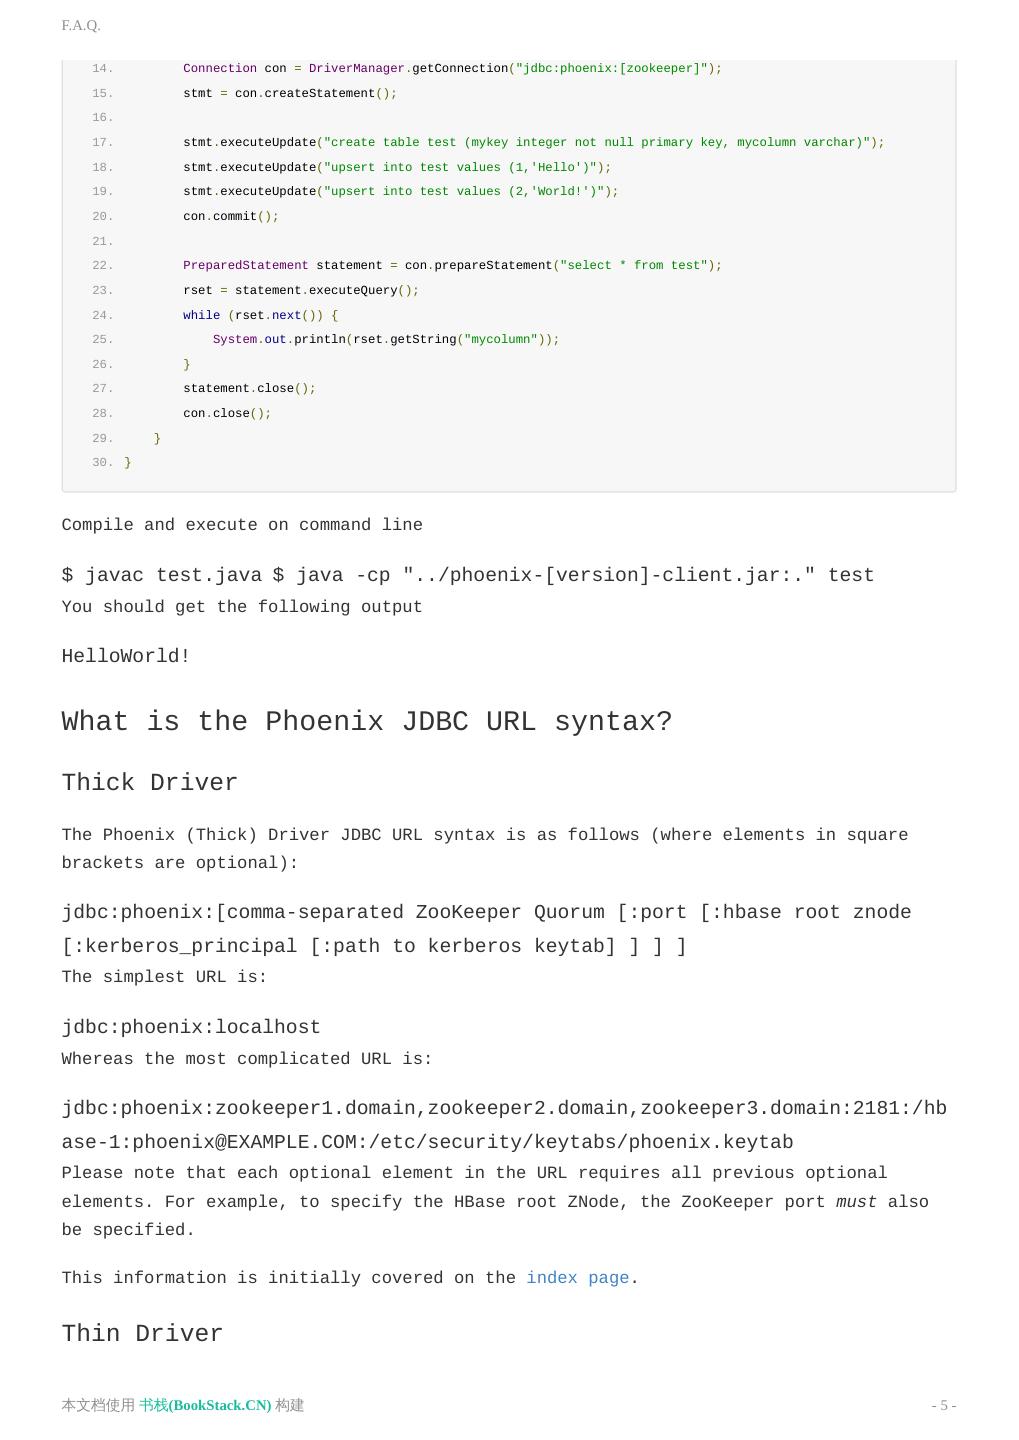
5 .F.A.Q. 14. Connection con = DriverManager.getConnection("jdbc:phoenix:[zookeeper]"); 15. stmt = con.createStatement(); 16. 17. stmt.executeUpdate("create table test (mykey integer not null primary key, mycolumn varchar)"); 18. stmt.executeUpdate("upsert into test values (1,'Hello')"); 19. stmt.executeUpdate("upsert into test values (2,'World!')"); 20. con.commit(); 21. 22. PreparedStatement statement = con.prepareStatement("select * from test"); 23. rset = statement.executeQuery(); 24. while (rset.next()) { 25. System.out.println(rset.getString("mycolumn")); 26. } 27. statement.close(); 28. con.close(); 29. } 30. } Compile and execute on command line $ javac test.java $ java -cp "../phoenix-[version]-client.jar:." test You should get the following output HelloWorld! What is the Phoenix JDBC URL syntax? Thick Driver The Phoenix (Thick) Driver JDBC URL syntax is as follows (where elements in square brackets are optional): jdbc:phoenix:[comma-separated ZooKeeper Quorum [:port [:hbase root znode [:kerberos_principal [:path to kerberos keytab] ] ] ] The simplest URL is: jdbc:phoenix:localhost Whereas the most complicated URL is: jdbc:phoenix:zookeeper1.domain,zookeeper2.domain,zookeeper3.domain:2181:/hb ase-1:phoenix@EXAMPLE.COM:/etc/security/keytabs/phoenix.keytab Please note that each optional element in the URL requires all previous optional elements. For example, to specify the HBase root ZNode, the ZooKeeper port must also be specified. This information is initially covered on the index page. Thin Driver 本文档使用 书栈(BookStack.CN) 构建 - 5 -
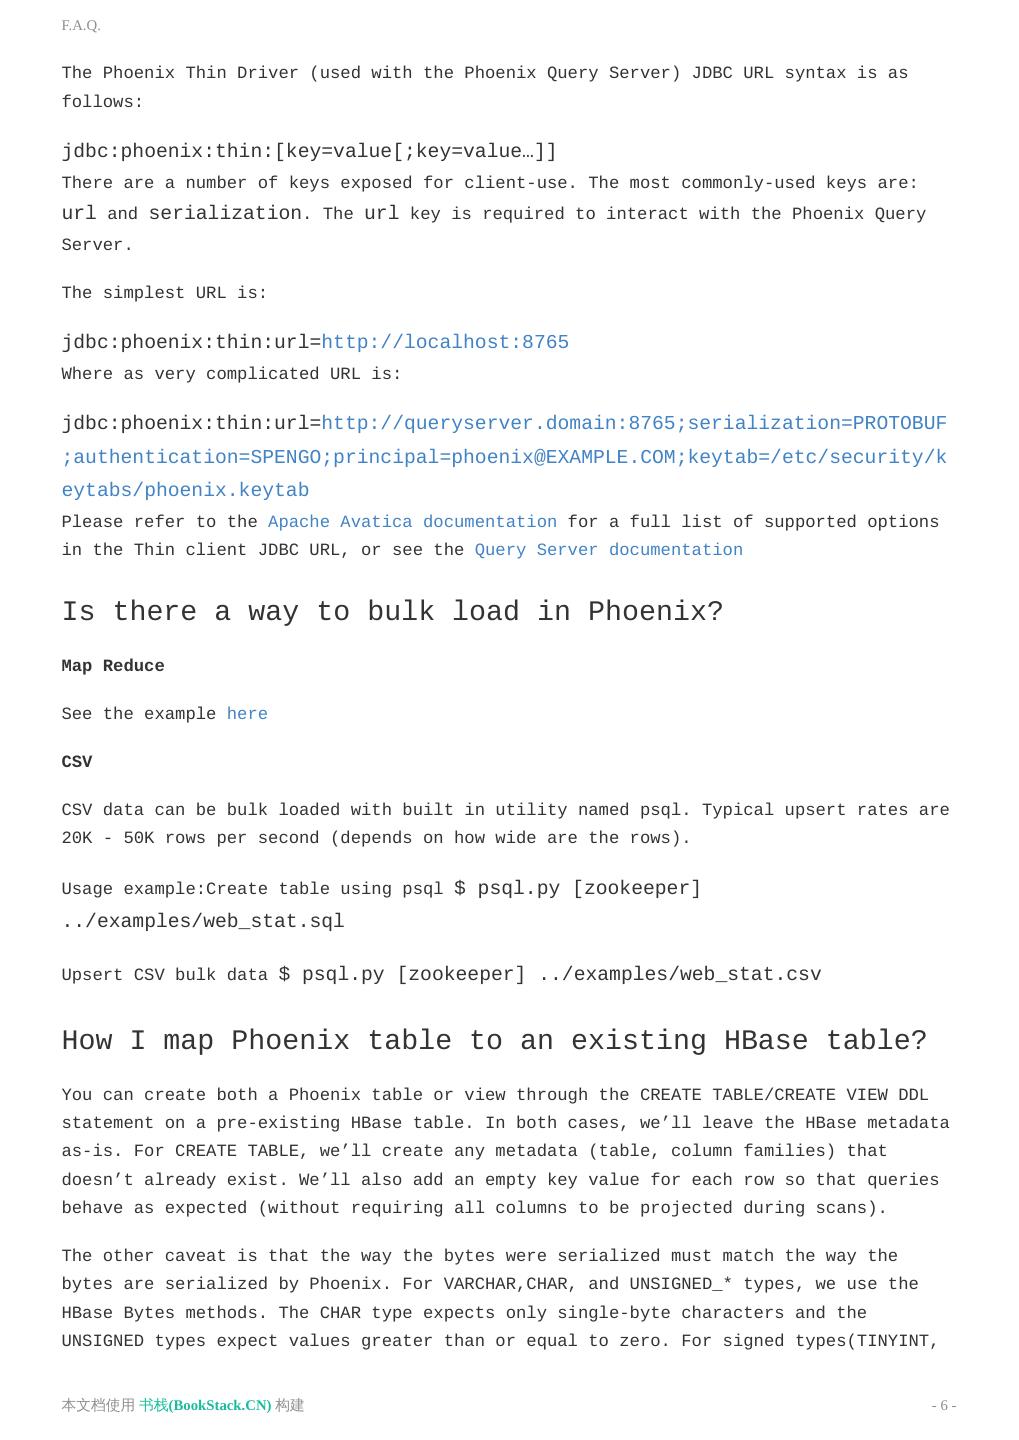
6 .F.A.Q. The Phoenix Thin Driver (used with the Phoenix Query Server) JDBC URL syntax is as follows: jdbc:phoenix:thin:[key=value[;key=value…]] There are a number of keys exposed for client-use. The most commonly-used keys are: url and serialization. The url key is required to interact with the Phoenix Query Server. The simplest URL is: jdbc:phoenix:thin:url=http://localhost:8765 Where as very complicated URL is: jdbc:phoenix:thin:url=http://queryserver.domain:8765;serialization=PROTOBUF ;authentication=SPENGO;principal=phoenix@EXAMPLE.COM;keytab=/etc/security/k eytabs/phoenix.keytab Please refer to the Apache Avatica documentation for a full list of supported options in the Thin client JDBC URL, or see the Query Server documentation Is there a way to bulk load in Phoenix? Map Reduce See the example here CSV CSV data can be bulk loaded with built in utility named psql. Typical upsert rates are 20K - 50K rows per second (depends on how wide are the rows). Usage example:Create table using psql $ psql.py [zookeeper] ../examples/web_stat.sql Upsert CSV bulk data $ psql.py [zookeeper] ../examples/web_stat.csv How I map Phoenix table to an existing HBase table? You can create both a Phoenix table or view through the CREATE TABLE/CREATE VIEW DDL statement on a pre-existing HBase table. In both cases, we’ll leave the HBase metadata as-is. For CREATE TABLE, we’ll create any metadata (table, column families) that doesn’t already exist. We’ll also add an empty key value for each row so that queries behave as expected (without requiring all columns to be projected during scans). The other caveat is that the way the bytes were serialized must match the way the bytes are serialized by Phoenix. For VARCHAR,CHAR, and UNSIGNED_* types, we use the HBase Bytes methods. The CHAR type expects only single-byte characters and the UNSIGNED types expect values greater than or equal to zero. For signed types(TINYINT, 本文档使用 书栈(BookStack.CN) 构建 - 6 -
7 .F.A.Q. SMALLINT, INTEGER and BIGINT), Phoenix will flip the first bit so that negative values will sort before positive values. Because HBase sorts row keys in lexicographical order and negative value’s first bit is 1 while positive 0 so that negative value is ‘greater than’ positive value if we don’t flip the first bit. So if you stored integers by HBase native API and want to access them by Phoenix, make sure that all your data types are UNSIGNED types. Our composite row keys are formed by simply concatenating the values together, with a zero byte character used as a separator after a variable length type. If you create an HBase table like this: create 't1', {NAME => 'f1', VERSIONS => 5} then you have an HBase table with a name of ‘t1’ and a column family with a name of ‘f1’. Remember, in HBase, you don’t model the possible KeyValues or the structure of the row key. This is the information you specify in Phoenix above and beyond the table and column family. So in Phoenix, you’d create a view like this: CREATE VIEW "t1" ( pk VARCHAR PRIMARY KEY, "f1".val VARCHAR ) The “pk” column declares that your row key is a VARCHAR (i.e. a string) while the “f1”.val column declares that your HBase table will contain KeyValues with a column family and column qualifier of “f1”:VAL and that their value will be a VARCHAR. Note that you don’t need the double quotes if you create your HBase table with all caps names (since this is how Phoenix normalizes strings, by upper casing them). For example, with: create 'T1', {NAME => 'F1', VERSIONS => 5} you could create this Phoenix view: CREATE VIEW t1 ( pk VARCHAR PRIMARY KEY, f1.val VARCHAR ) Or if you’re creating new HBase tables, just let Phoenix do everything for you like this (No need to use the HBase shell at all.): CREATE TABLE t1 ( pk VARCHAR PRIMARY KEY, val VARCHAR ) Are there any tips for optimizing Phoenix? Use Salting to increase read/write performance Salting can significantly increase read/write performance by pre-splitting the data into multiple regions. Although Salting will yield better performance in most scenarios. Example: CREATE TABLE TEST (HOST VARCHAR NOT NULL PRIMARY KEY, DESCRIPTION VARCHAR) SALT_BUCKETS=16 Note: Ideally for a 16 region server cluster with quad-core CPUs, choose salt buckets 本文档使用 书栈(BookStack.CN) 构建 - 7 -
8 .F.A.Q. between 32-64 for optimal performance. Per-split table Salting does automatic table splitting but in case you want to exactly control where table split occurs with out adding extra byte or change row key order then you can pre-split a table. Example: CREATE TABLE TEST (HOST VARCHAR NOT NULL PRIMARY KEY, DESCRIPTION VARCHAR) SPLIT ON ('CS','EU','NA') Use multiple column families Column family contains related data in separate files. If you query use selected columns then it make sense to group those columns together in a column family to improve read performance. Example: Following create table DDL will create two column faimiles A and B. CREATE TABLE TEST (MYKEY VARCHAR NOT NULL PRIMARY KEY, A.COL1 VARCHAR, A.COL2 VARCHAR, B.COL3 VARCHAR) Use compression On disk compression improves performance on large tables Example: CREATE TABLE TEST (HOST VARCHAR NOT NULL PRIMARY KEY, DESCRIPTION VARCHAR) COMPRESSION='GZ' Create indexes See faq.html#/How_do_I_create_Secondary_Index_on_a_table Optimize cluster parameters See http://hbase.apache.org/book/performance.html Optimize Phoenix parameters See tuning.html How do I create Secondary Index on a table? Starting with Phoenix version 2.1, Phoenix supports index over mutable and immutable data. Note that Phoenix 2.0.x only supports Index over immutable data. Index write performance index with immutable table is slightly faster than mutable table however data in immutable table cannot be updated. Example Create table Immutable table: create table test (mykey varchar primary key, col1 varchar, col2 varchar) IMMUTABLE_ROWS=true; Mutable table: create table test (mykey varchar primary key, col1 varchar, col2 varchar); 本文档使用 书栈(BookStack.CN) 构建 - 8 -
9 .F.A.Q. Creating index on col2 create index idx on test (col2) Creating index on col1 and a covered index on col2 create index idx on test (col1) include (col2) Upsert rows in this test table and Phoenix query optimizer will choose correct index to use. You can see in explain plan if Phoenix is using the index table. You can also give a hint in Phoenix query to use a specific index. Why isn’t my secondary index being used? The secondary index won’t be used unless all columns used in the query are in it ( as indexed or covered columns). All columns making up the primary key of the data table will automatically be included in the index. Example: DDL create table usertable (id varchar primary key, firstname varchar, lastname varchar); create index idx_name on usertable (firstname); Query: DDL select id, firstname, lastname from usertable where firstname = 'foo'; Index would not be used in this case as lastname is not part of indexed or covered column. This can be verified by looking at the explain plan. To fix this create index that has either lastname part of index or covered column. Example: create idx_name on usertable (firstname) include (lastname); How fast is Phoenix? Why is it so fast? Phoenix is fast. Full table scan of 100M rows usually completes in 20 seconds (narrow table on a medium sized cluster). This time come down to few milliseconds if query contains filter on key columns. For filters on non-key columns or non-leading key columns, you can add index on these columns which leads to performance equivalent to filtering on key column by making copy of table with indexed column(s) part of key. Why is Phoenix fast even when doing full scan: Phoenix chunks up your query using the region boundaries and runs them in parallel on the client using a configurable number of threads The aggregation will be done in a coprocessor on the server-side, collapsing the amount of data that gets returned back to the client rather than returning it all. How do I connect to secure HBase cluster? 本文档使用 书栈(BookStack.CN) 构建 - 9 -
10 .F.A.Q. Check out excellent post by Anil Gupta http://bigdatanoob.blogspot.com/2013/09/connect-phoenix-to-secure-hbase-cluster.html How do I connect with HBase running on Hadoop-2? Hadoop-2 profile exists in Phoenix pom.xml. Can phoenix work on tables with arbitrary timestamp as flexible as HBase API? By default, Phoenix let’s HBase manage the timestamps and just shows you the latest values for everything. However, Phoenix also allows arbitrary timestamps to be supplied by the user. To do that you’d specify a “CurrentSCN” at connection time, like this: 1. Properties props = new Properties(); 2. props.setProperty("CurrentSCN", Long.toString(ts)); 3. Connection conn = DriverManager.connect(myUrl, props); 4. 5. conn.createStatement().execute("UPSERT INTO myTable VALUES ('a')"); 6. conn.commit(); The above is equivalent to doing this with the HBase API: 1. myTable.put(Bytes.toBytes('a'),ts); By specifying a CurrentSCN, you’re telling Phoenix that you want everything for that connection to be done at that timestamp. Note that this applies to queries done on the connection as well - for example, a query over myTable above would not see the data it just upserted, since it only sees data that was created before its CurrentSCN property. This provides a way of doing snapshot, flashback, or point-in-time queries. Keep in mind that creating a new connection is not an expensive operation. The same underlying HConnection is used for all connections to the same cluster, so it’s more or less like instantiating a few objects. Why isn’t my query doing a RANGE SCAN? DDL: CREATE TABLE TEST (pk1 char(1) not null, pk2 char(1) not null, pk3 char(1) not null, non-pk varchar CONSTRAINT PK PRIMARY KEY(pk1, pk2, pk3)); RANGE SCAN means that only a subset of the rows in your table will be scanned over. This occurs if you use one or more leading columns from your primary key constraint. Query that is not filtering on leading PK columns ex. select from test where pk2='x' and pk3='y'; will result in full scan whereas the following query will result in range scan select from test where pk1='x' and pk2='y';. Note that you 本文档使用 书栈(BookStack.CN) 构建 - 10 -
11 .F.A.Q. can add a secondary index on your “pk2” and “pk3” columns and that would cause a range scan to be done for the first query (over the index table). DEGENERATE SCAN means that a query can’t possibly return any rows. If we can determine that at compile time, then we don’t bother to even run the scan. FULL SCAN means that all rows of the table will be scanned over (potentially with a filter applied if you have a WHERE clause) SKIP SCAN means that either a subset or all rows in your table will be scanned over, however it will skip large groups of rows depending on the conditions in your filter. See this blog for more detail. We don’t do a SKIP SCAN if you have no filter on the leading primary key columns, but you can force a SKIP SCAN by using the /+ SKIP_SCAN / hint. Under some conditions, namely when the cardinality of your leading primary key columns is low, it will be more efficient than a FULL SCAN. Should I pool Phoenix JDBC Connections? No, it is not necessary to pool Phoenix JDBC Connections. Phoenix’s Connection objects are different from most other JDBC Connections due to the underlying HBase connection. The Phoenix Connection object is designed to be a thin object that is inexpensive to create. If Phoenix Connections are reused, it is possible that the underlying HBase connection is not always left in a healthy state by the previous user. It is better to create new Phoenix Connections to ensure that you avoid any potential issues. Implementing pooling for Phoenix could be done simply by creating a delegate Connection that instantiates a new Phoenix connection when retrieved from the pool and then closes the connection when returning it to the pool (see PHOENIX-2388). Why does Phoenix add an empty/dummy KeyValue when doing an upsert? The empty or dummy KeyValue (with a column qualifier of _0) is needed to ensure that a given column is available for all rows. As you may know, data is stored in HBase as KeyValues, meaning that the full row key is stored for each column value. This also implies that the row key is not stored at all unless there is at least one column stored. Now consider JDBC row which has an integer primary key, and several columns which are all null. In order to be able to store the primary key, a KeyValue needs to be stored to show that the row is present at all. This column is represented by the empty column that you’ve noticed. This allows doing a “SELECT * FROM TABLE” and receiving records for all rows, even those whose non-pk columns are null. The same issue comes up even if only one column is null for some (or all) records. A 本文档使用 书栈(BookStack.CN) 构建 - 11 -
12 .F.A.Q. scan over Phoenix will include the empty column to ensure that rows that only consist of the primary key (and have null for all non-key columns) will be included in a scan result. 原文: http://phoenix.apache.org/faq.html 本文档使用 书栈(BookStack.CN) 构建 - 12 -
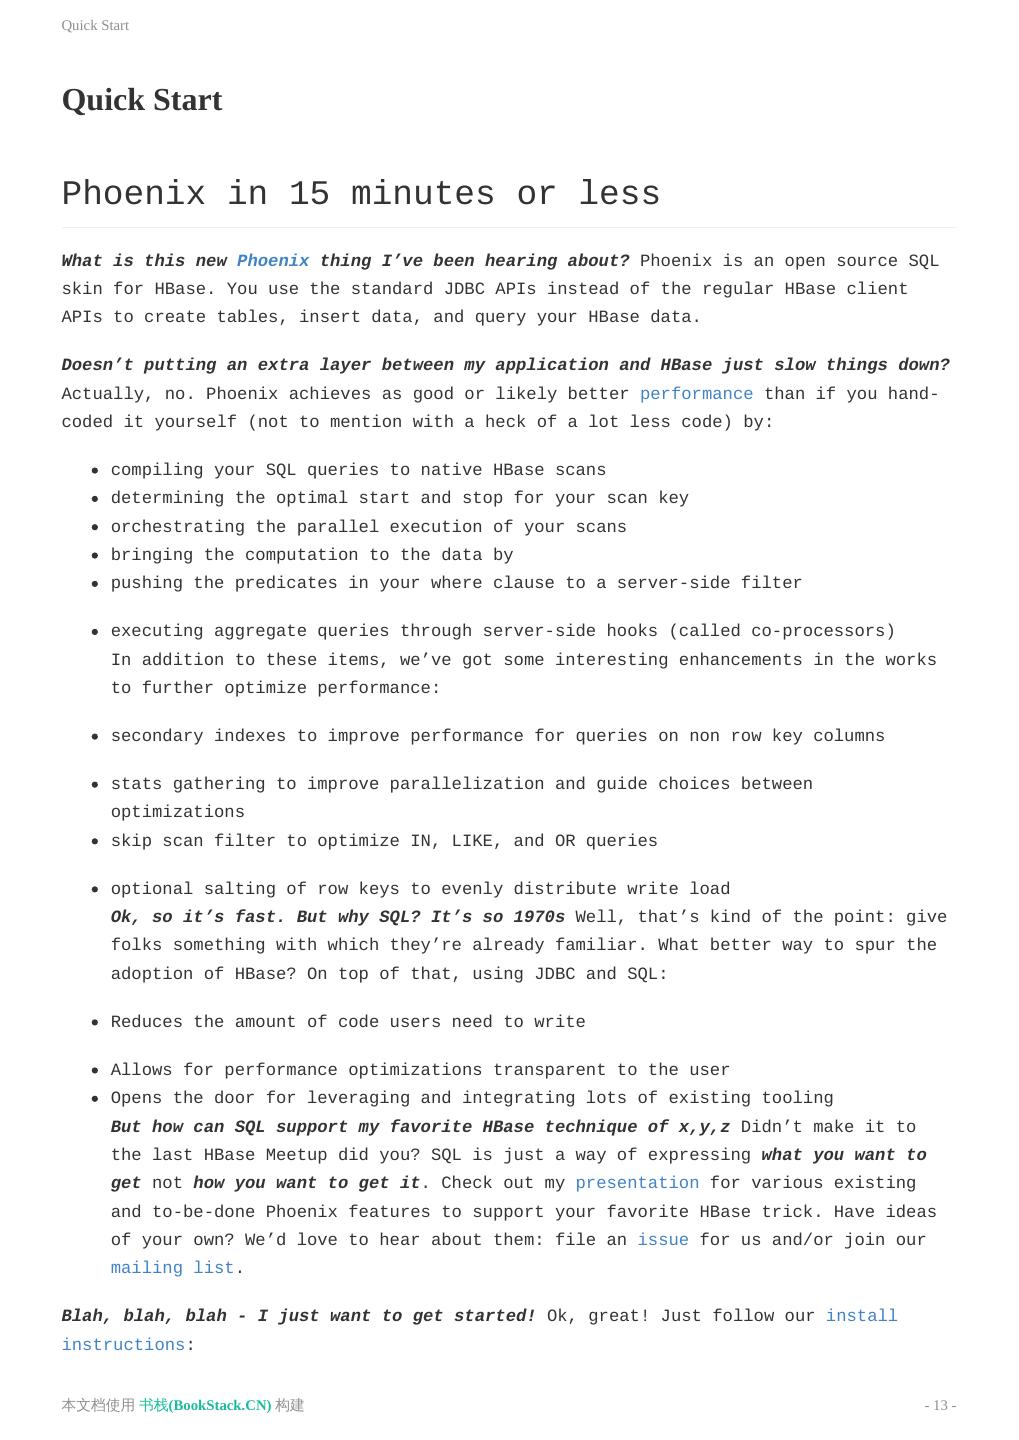
13 .Quick Start Quick Start Phoenix in 15 minutes or less What is this new Phoenix thing I’ve been hearing about? Phoenix is an open source SQL skin for HBase. You use the standard JDBC APIs instead of the regular HBase client APIs to create tables, insert data, and query your HBase data. Doesn’t putting an extra layer between my application and HBase just slow things down? Actually, no. Phoenix achieves as good or likely better performance than if you hand- coded it yourself (not to mention with a heck of a lot less code) by: compiling your SQL queries to native HBase scans determining the optimal start and stop for your scan key orchestrating the parallel execution of your scans bringing the computation to the data by pushing the predicates in your where clause to a server-side filter executing aggregate queries through server-side hooks (called co-processors) In addition to these items, we’ve got some interesting enhancements in the works to further optimize performance: secondary indexes to improve performance for queries on non row key columns stats gathering to improve parallelization and guide choices between optimizations skip scan filter to optimize IN, LIKE, and OR queries optional salting of row keys to evenly distribute write load Ok, so it’s fast. But why SQL? It’s so 1970s Well, that’s kind of the point: give folks something with which they’re already familiar. What better way to spur the adoption of HBase? On top of that, using JDBC and SQL: Reduces the amount of code users need to write Allows for performance optimizations transparent to the user Opens the door for leveraging and integrating lots of existing tooling But how can SQL support my favorite HBase technique of x,y,z Didn’t make it to the last HBase Meetup did you? SQL is just a way of expressing what you want to get not how you want to get it. Check out my presentation for various existing and to-be-done Phoenix features to support your favorite HBase trick. Have ideas of your own? We’d love to hear about them: file an issue for us and/or join our mailing list. Blah, blah, blah - I just want to get started! Ok, great! Just follow our install instructions: 本文档使用 书栈(BookStack.CN) 构建 - 13 -
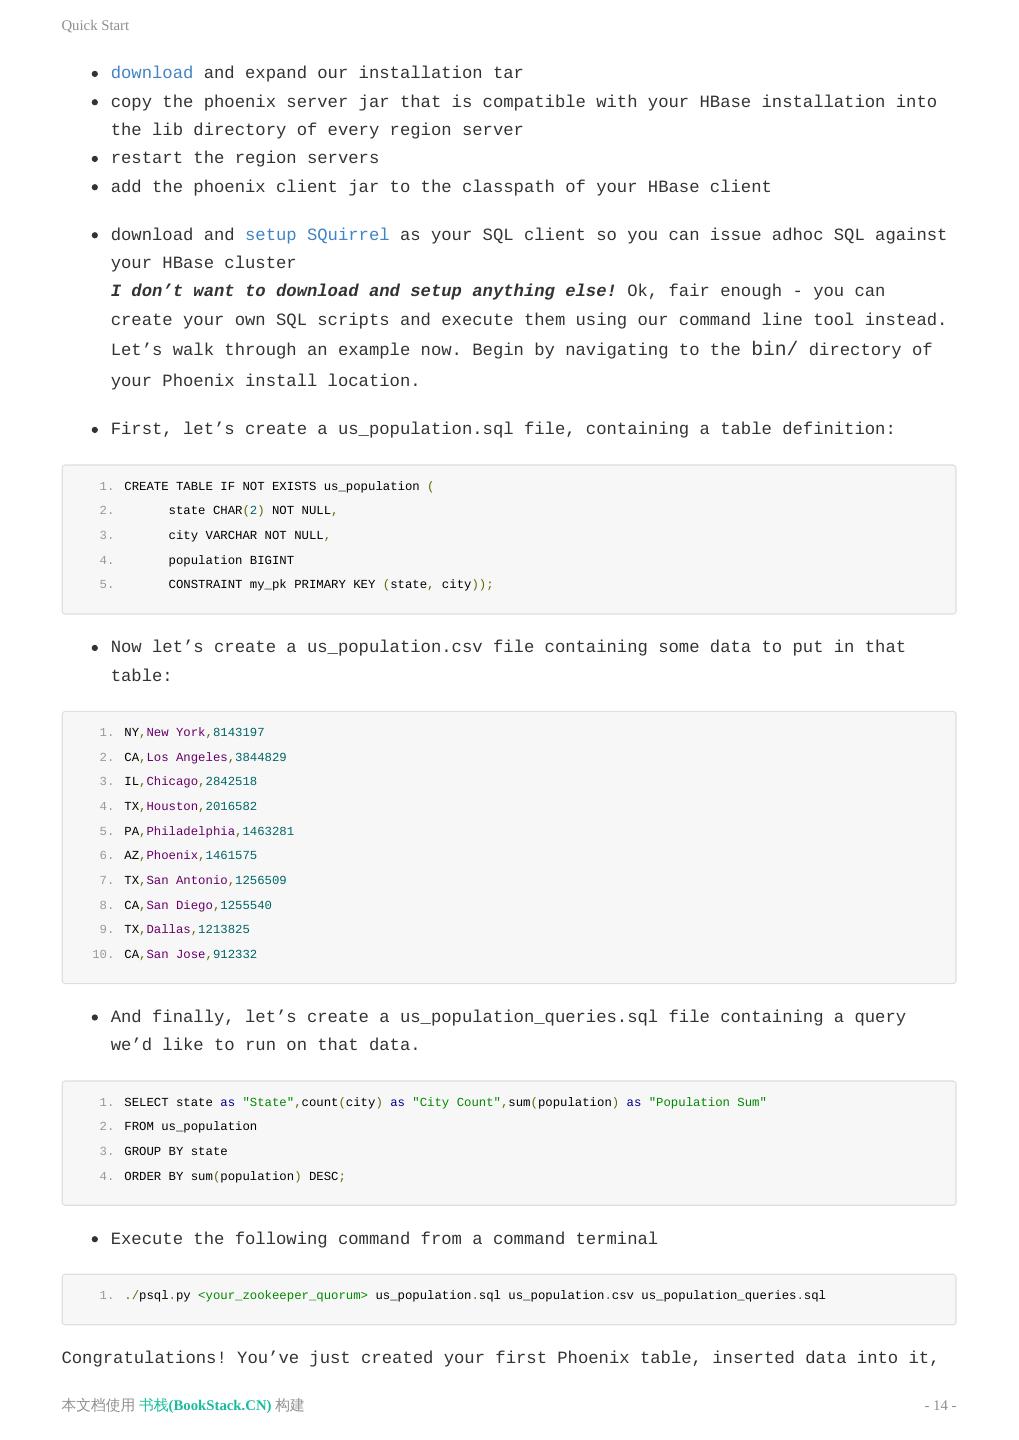
14 .Quick Start download and expand our installation tar copy the phoenix server jar that is compatible with your HBase installation into the lib directory of every region server restart the region servers add the phoenix client jar to the classpath of your HBase client download and setup SQuirrel as your SQL client so you can issue adhoc SQL against your HBase cluster I don’t want to download and setup anything else! Ok, fair enough - you can create your own SQL scripts and execute them using our command line tool instead. Let’s walk through an example now. Begin by navigating to the bin/ directory of your Phoenix install location. First, let’s create a us_population.sql file, containing a table definition: 1. CREATE TABLE IF NOT EXISTS us_population ( 2. state CHAR(2) NOT NULL, 3. city VARCHAR NOT NULL, 4. population BIGINT 5. CONSTRAINT my_pk PRIMARY KEY (state, city)); Now let’s create a us_population.csv file containing some data to put in that table: 1. NY,New York,8143197 2. CA,Los Angeles,3844829 3. IL,Chicago,2842518 4. TX,Houston,2016582 5. PA,Philadelphia,1463281 6. AZ,Phoenix,1461575 7. TX,San Antonio,1256509 8. CA,San Diego,1255540 9. TX,Dallas,1213825 10. CA,San Jose,912332 And finally, let’s create a us_population_queries.sql file containing a query we’d like to run on that data. 1. SELECT state as "State",count(city) as "City Count",sum(population) as "Population Sum" 2. FROM us_population 3. GROUP BY state 4. ORDER BY sum(population) DESC; Execute the following command from a command terminal 1. ./psql.py <your_zookeeper_quorum> us_population.sql us_population.csv us_population_queries.sql Congratulations! You’ve just created your first Phoenix table, inserted data into it, 本文档使用 书栈(BookStack.CN) 构建 - 14 -
15 .Quick Start and executed an aggregate query with just a few lines of code in 15 minutes or less! Big deal - 10 rows! What else you got? Ok, ok - tough crowd. Check out our bin/performance.py script to create as many rows as you want, for any schema you come up with, and run timed queries against it. Why is it called Phoenix anyway? Did some other project crash and burn and this is the next generation? I’m sorry, but we’re out of time and space, so we’ll have to answer that next time! 原文: http://phoenix.apache.org/Phoenix-in-15-minutes-or-less.html 本文档使用 书栈(BookStack.CN) 构建 - 15 -
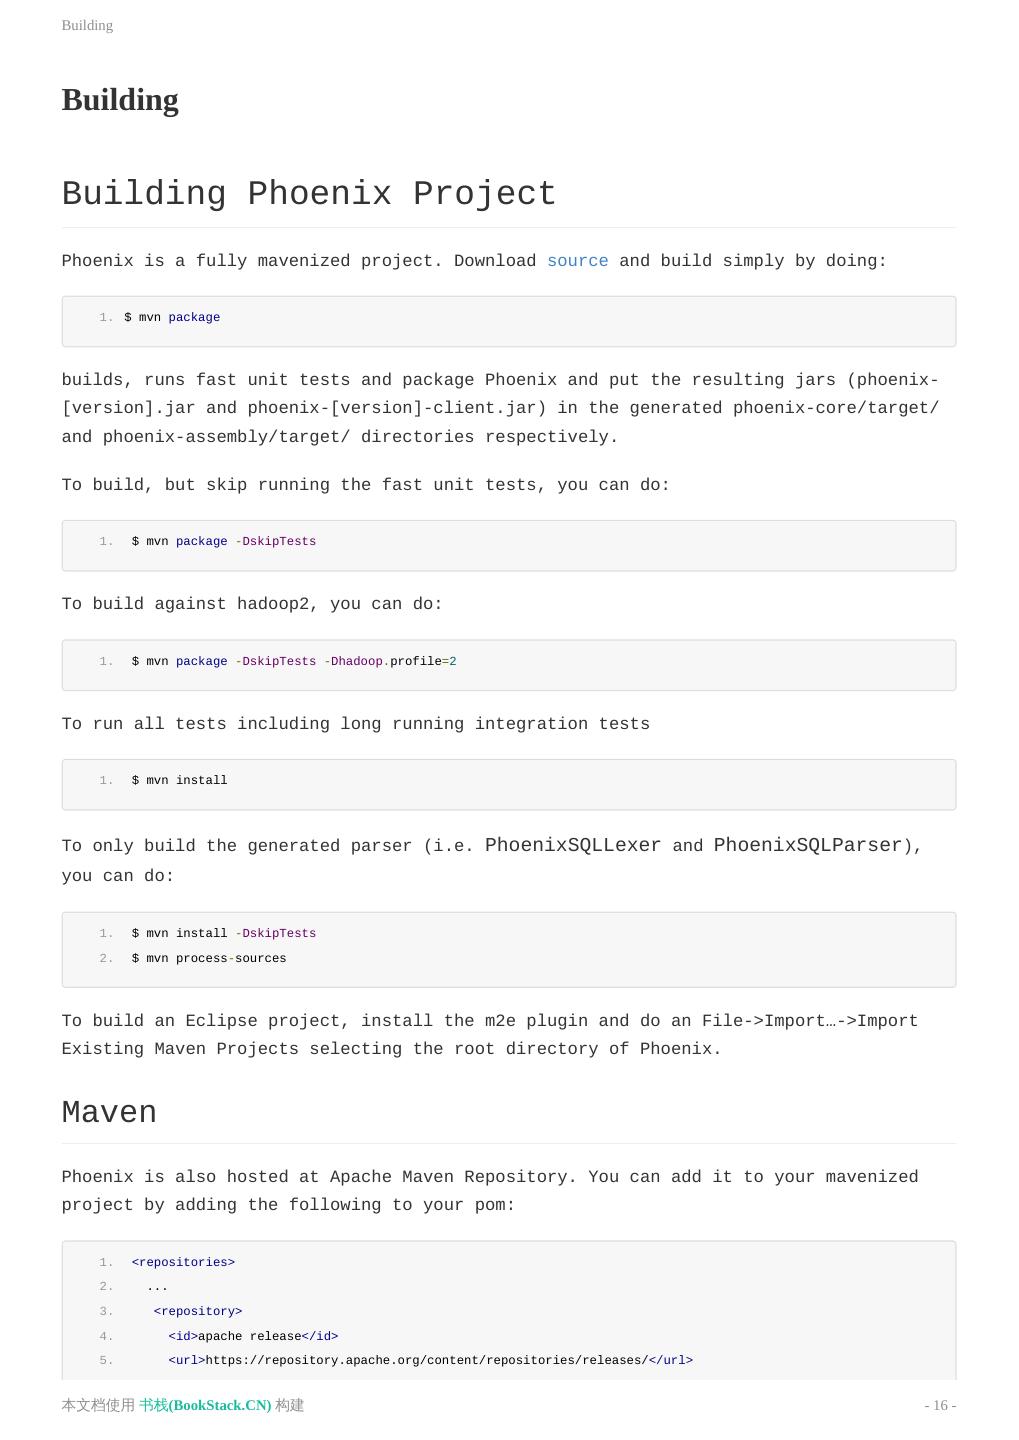
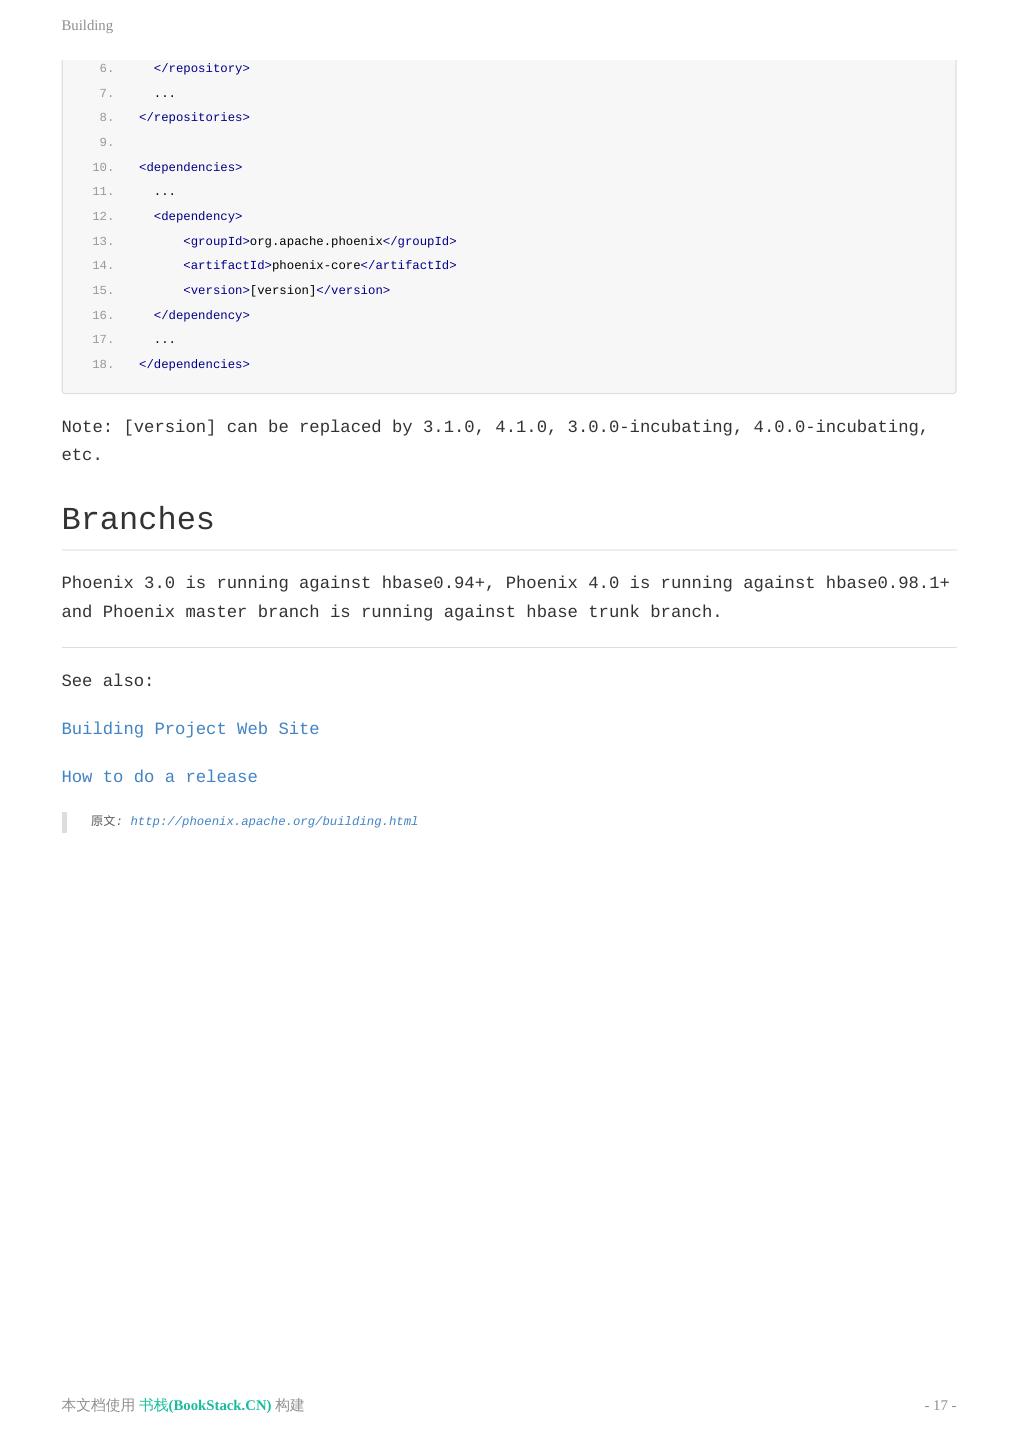
16 .Building Building Building Phoenix Project Phoenix is a fully mavenized project. Download source and build simply by doing: 1. $ mvn package builds, runs fast unit tests and package Phoenix and put the resulting jars (phoenix- [version].jar and phoenix-[version]-client.jar) in the generated phoenix-core/target/ and phoenix-assembly/target/ directories respectively. To build, but skip running the fast unit tests, you can do: 1. $ mvn package -DskipTests To build against hadoop2, you can do: 1. $ mvn package -DskipTests -Dhadoop.profile=2 To run all tests including long running integration tests 1. $ mvn install To only build the generated parser (i.e. PhoenixSQLLexer and PhoenixSQLParser), you can do: 1. $ mvn install -DskipTests 2. $ mvn process-sources To build an Eclipse project, install the m2e plugin and do an File->Import…->Import Existing Maven Projects selecting the root directory of Phoenix. Maven Phoenix is also hosted at Apache Maven Repository. You can add it to your mavenized project by adding the following to your pom: 1. <repositories> 2. ... 3. <repository> 4. <id>apache release</id> 5. <url>https://repository.apache.org/content/repositories/releases/</url> 本文档使用 书栈(BookStack.CN) 构建 - 16 -
17 .Building 6. </repository> 7. ... 8. </repositories> 9. 10. <dependencies> 11. ... 12. <dependency> 13. <groupId>org.apache.phoenix</groupId> 14. <artifactId>phoenix-core</artifactId> 15. <version>[version]</version> 16. </dependency> 17. ... 18. </dependencies> Note: [version] can be replaced by 3.1.0, 4.1.0, 3.0.0-incubating, 4.0.0-incubating, etc. Branches Phoenix 3.0 is running against hbase0.94+, Phoenix 4.0 is running against hbase0.98.1+ and Phoenix master branch is running against hbase trunk branch. See also: Building Project Web Site How to do a release 原文: http://phoenix.apache.org/building.html 本文档使用 书栈(BookStack.CN) 构建 - 17 -
18 .Tuning Tuning Tuning Guide Tuning Phoenix can be complex, but with a little knowledge of how it works you can make significant changes to the performance of your reads and writes. The most important factor in performance is the design of your schema, especially as it affects the underlying HBase row keys. Look in “General Tips” below to find design advice for different anticipated data access patterns. Subsequent sections describe how to use secondary indexes, hints, and explain plans. Note: Phoenix and HBase work well when your application does point lookups and small range scans. This can be achieved by good primary key design (see below). If you find that your application requires many full table scans, then Phoenix and HBase are likely not the best tool for the job. Instead, look at using other tools that write to HDFS directly using columnar representations such as Parquet. Primary Keys The underlying row key design is the single most important factor in Phoenix performance, and it’s important to get it right at design time because you cannot change it later without re-writing the data and index tables. The Phoenix primary keys are concatenated to create the underlying row key in Apache HBase. The columns for the primary key constraint should be chosen and ordered in a way that aligns with the common query patterns—choose the most frequently queried columns as primary keys. The key that you place in the leading position is the most performant one. For example, if you lead off with a column containing org ID values, it is easy to select all rows pertaining to a specific org. You can add the HBase row timestamp to the primary key to improve scan efficiency by skipping rows outside the queried time range. Every primary key imposes a cost because the entire row key is appended to every piece of data in memory and on disk. The larger the row key, the greater the storage overhead. Find ways to store information compactly in columns you plan to use for primary keys—store deltas instead of complete time stamps, for example. To sum up, the best practice is to design primary keys to add up to a row key that lets you scan the smallest amount of data. Tip: When choosing primary keys, lead with the column you filter most frequently across the queries that are most important to optimize. If you will use ORDER BY in your query, make sure your PK columns match the expressions in your ORDER BY clause. 本文档使用 书栈(BookStack.CN) 构建 - 18 -
19 .Tuning Monotonically increasing Primary keys If your primary keys are monotonically increasing, use salting to help distribute writes across the cluster and improve parallelization. Example: CREATE TABLE … ( … ) SALT_BUCKETS = N For optimal performance the number of salt buckets should approximately equal the number of region servers. Do not salt automatically. Use salting only when experiencing hotspotting. The downside of salting is that it imposes a cost on read because when you want to query the data you have to run multiple queries to do a range scan. General Tips The following sections provide a few general tips for different access scenarios. Is the Data Random-Access? As with any random read workloads, SSDs can improve performance because of their faster random seek time. Is the data read-heavy or write-heavy? For read-heavy data: Create global indexes. This will affect write speed depending on the number of columns included in an index because each index writes to its own separate table. Use multiple indexes to provide fast access to common queries. When specifying machines for HBase, do not skimp on cores; HBase needs them. For write-heavy data: Pre-split the table. It can be helpful to split the table into pre-defined regions, or if the keys are monotonically increasing use salting to to avoid creating write hotspots on a small number of nodes. Use real data types rather than raw byte data. Create local indexes. Reads from local indexes have a performance penalty, so it’s important to do performance testing. See the Pherf tool. Which columns will be accessed often? Choose commonly-queried columns as primary keys. For more information, see “Primary Keys” below. Create additional indexes to support common query patterns, including heavily accessed fields that are not in the primary key. Can the data be append-only (immutable)? 本文档使用 书栈(BookStack.CN) 构建 - 19 -
20 .Tuning If the data is immutable or append-only, declare the table and its indexes as immutable using the IMMUTABLE_ROWSoption at creation time to reduce the write- time cost. If you need to make an existing table immutable, you can do so with ALTER TABLE trans.event SET IMMUTABLE_ROWS=true after creation time. If speed is more important than data integrity, you can use the DISABLE_WALoption. Note: it is possible to lose data with DISABLE_WAL if a region server fails. Set the UPDATE_CACHE_FREQUENCYoption to 15 minutes or so if your metadata doesn’t change very often. This property determines how often an RPC is done to ensure you’re seeing the latest schema. If the data is not sparse (over 50% of the cells have values), use the SINGLE_CELL_ARRAY_WITH_OFFSETS data encoding scheme introduced in Phoenix 4.10, which obtains faster performance by reducing the size of the data. For more information, see “Column Mapping and Immutable Data Encoding” on the Apache Phoenix blog. Is the table very large? Use the ASYNC keyword with your CREATE INDEX call to create the index asynchronously via MapReduce job. You’ll need to manually start the job; see https://phoenix.apache.org/secondary_indexing.html#Index_Population for details. If the data is too large to scan the table completely, use primary keys to create an underlying composite row key that makes it easy to return a subset of the data or facilitates skip-scanning—Phoenix can jump directly to matching keys when the query includes key sets in the predicate. Is transactionality required? A transaction is a data operation that is atomic—that is, guaranteed to succeed completely or not at all. For example, if you need to make cross-row updates to a data table, then you should consider your data transactional. If you need transactionality, use the TRANSACTIONALoption. (See also http://phoenix.apache.org/transactions.html.) Block Encoding Using compression or encoding is a must. Both SNAPPY and FAST_DIFF are good all around options. FAST_DIFF encoding is automatically enabled on all Phoenix tables by default, and almost always improves overall read latencies and throughput by allowing more data to fit into blockcache. Note: FAST_DIFF encoding can increase garbage produced during request processing. Set encoding at table creation time. Example: CREATE TABLE … ( … ) 本文档使用 书栈(BookStack.CN) 构建 - 20 -
21 .Tuning DATA_BLOCK_ENCODING=‘FAST_DIFF’ Schema Design Because the schema affects the way the data is written to the underlying HBase layer, Phoenix performance relies on the design of your tables, indexes, and primary keys. Phoenix and the HBase data model HBase stores data in tables, which in turn contain columns grouped in column families. A row in an HBase table consists of versioned cells associated with one or more columns. An HBase row is a collection of many key-value pairs in which the rowkey attribute of the keys are equal. Data in an HBase table is sorted by the rowkey, and all access is via the rowkey. Phoenix creates a relational data model on top of HBase, enforcing a PRIMARY KEY constraint whose columns are concatenated to form the row key for the underlying HBase table. For this reason, it’s important to be cognizant of the size and number of the columns you include in the PK constraint, because a copy of the row key is included with every cell in the underlying HBase table. Column Families If some columns are accessed more frequently than others, create multiple column families to separate the frequently-accessed columns from rarely-accessed columns. This improves performance because HBase reads only the column families specified in the query. Columns Here are a few tips that apply to columns in general, whether they are indexed or not: Keep VARCHAR columns under 1MB or so due to I/O costs. When processing queries, HBase materializes cells in full before sending them over to the client, and the client receives them in full before handing them off to the application code. For structured objects, don’t use JSON, which is not very compact. Use a format such as protobuf, Avro, msgpack, or BSON. Consider compressing data before storage using a fast LZ variant to cut latency and I/O costs. Use the column mapping feature (added in Phoenix 4.10), which uses numerical HBase column qualifiers for non-PK columns instead of directly using column names. This improves performance when looking for a cell in the sorted list of cells returned by HBase, adds further across-the-board performance by reducing the disk size used by tables, and speeds up DDL operations like column rename and metadata-level column drops. For more information, see “Column Mapping and Immutable Data Encoding” on the Apache Phoenix blog. 本文档使用 书栈(BookStack.CN) 构建 - 21 -
22 .Tuning Indexes A Phoenix index is a physical table that stores a pivoted copy of some or all of the data in the main table, to serve specific kinds of queries. When you issue a query, Phoenix selects the best index for the query automatically. The primary index is created automatically based on the primary keys you select. You can create secondary indexes, specifying which columns are included based on the anticipated queries the index will support. See also: Secondary Indexing Secondary indexes Secondary indexes can improve read performance by turning what would normally be a full table scan into a point lookup (at the cost of storage space and write speed). Secondary indexes can be added or removed after table creation and don’t require changes to existing queries – queries simply run faster. A small number of secondary indexes is often sufficient. Depending on your needs, consider creating covered indexes or functional indexes, or both. If your table is large, use the ASYNC keyword with CREATE INDEX to create the index asynchronously. In this case, the index will be built through MapReduce, which means that the client going up or down won’t impact index creation and the job is retried automatically if necessary. You’ll need to manually start the job, which you can then monitor just as you would any other MapReduce job. Example: create index if not exists event_object_id_idx_b on trans.event (object_id) ASYNC UPDATE_CACHE_FREQUENCY=60000; See Index Population for details. If you can’t create the index asynchronously for some reason, then increase the query timeout (phoenix.query.timeoutMs) to be larger than the time it’ll take to build the index. If the CREATE INDEX call times out or the client goes down before it’s finished, then the index build will stop and must be run again. You can monitor the index table as it is created—you’ll see new regions created as splits occur. You can query the SYSTEM.STATS table, which gets populated as splits and compactions happen. You can also run a count(*) query directly against the index table, though that puts more load on your system because requires a full table scan. Tips: Create local indexes for write-heavy use cases. Create global indexes for read-heavy use cases. To save read-time overhead, consider creating covered indexes. If the primary key is monotonically increasing, create salt buckets. The salt 本文档使用 书栈(BookStack.CN) 构建 - 22 -
23 .Tuning buckets can’t be changed later, so design them to handle future growth. Salt buckets help avoid write hotspots, but can decrease overall throughput due to the additional scans needed on read. Set up a cron job to build indexes. Use ASYNC with CREATE INDEX to avoid blocking. Only create the indexes you need. Limit the number of indexes on frequently updated tables. Use covered indexes to convert table scans into efficient point lookups or range queries over the index table instead of the primary table: CREATE INDEX index ON table( … )INCLUDE( … ) Queries It’s important to know which queries are executed on the server side versus the client side, because this can impact performace due to network I/O and other bottlenecks. If you’re querying a billion-row table, you want to do as much computation as possible on the server side rather than transmitting a billion rows to the client for processing. Some queries, on the other hand, must be executed on the client. Sorting data that lives on multiple region servers, for example, requires that you aggregate and re-sort on the client. Reading Avoid joins unless one side is small, especially on frequent queries. For larger joins, see “Hints,” below. In the WHERE clause, filter leading columns in the primary key constraint. Filtering the first leading column with IN or OR in the WHERE clause enables skip scan optimizations. Equality or comparisions (< or >) in the WHERE clause enables range scan optimizations. Let Phoenix optimize query parallelism using statistics. This provides an automatic benefit if using Phoenix 4.2 or greater in production. See also: https://phoenix.apache.org/joins.html Range Queries If you regularly scan large data sets from spinning disk, you’re best off with GZIP (but watch write speed). Use a lot of cores for a scan to utilize the available memory bandwidth. Apache Phoenix makes it easy to utilize many cores to increase scan performance. For range queries, the HBase block cache does not provide much advantage. Large Range Queries 本文档使用 书栈(BookStack.CN) 构建 - 23 -
24 .Tuning For large range queries, consider setting Scan.setCacheBlocks(false) even if the whole scan could fit into the block cache. If you mostly perform large range queries you might even want to consider running HBase with a much smaller heap and size the block cache down, to only rely on the OS Cache. This will alleviate some garbage collection related issues. Point Lookups For point lookups it is quite important to have your data set cached, and you should use the HBase block cache. Hints Hints let you override default query processing behavior and specify such factors as which index to use, what type of scan to perform, and what type of join to use. During the query, Hint global index if you want to force it when query includes a column not in the index. If necessary, you can do bigger joins with the /+ USE_SORT_MERGE_JOIN / hint, but a big join will be an expensive operation over huge numbers of rows. If the overall size of all right-hand-side tables would exceed the memory size limit, use the /+ NO_STAR_JOIN /hint. See also: Hint. Explain Plans An EXPLAIN plan tells you a lot about how a query will be run. To generate an explain plan run this query and to interpret the plan, see this reference. Parallelization You can improve parallelization with the UPDATE STATISTICS command. This command subdivides each region by determining keys called guideposts that are equidistant from each other, then uses these guideposts to break up queries into multiple parallel scans. Statistics are turned on by default. With Phoenix 4.9, the user can set guidepost width for each table. Optimal guidepost width depends on a number of factors such as cluster size, cluster usage, number of cores per node, table size, and disk I/O. In Phoenix 4.12, we have added a new configuration phoenix.use.stats.parallelization that controls whether statistics should be used for driving parallelization. Note that one can still run stats collection. The information collected is used to surface estimates on number of bytes and rows a query will scan when an EXPLAIN is generated for it. 本文档使用 书栈(BookStack.CN) 构建 - 24 -
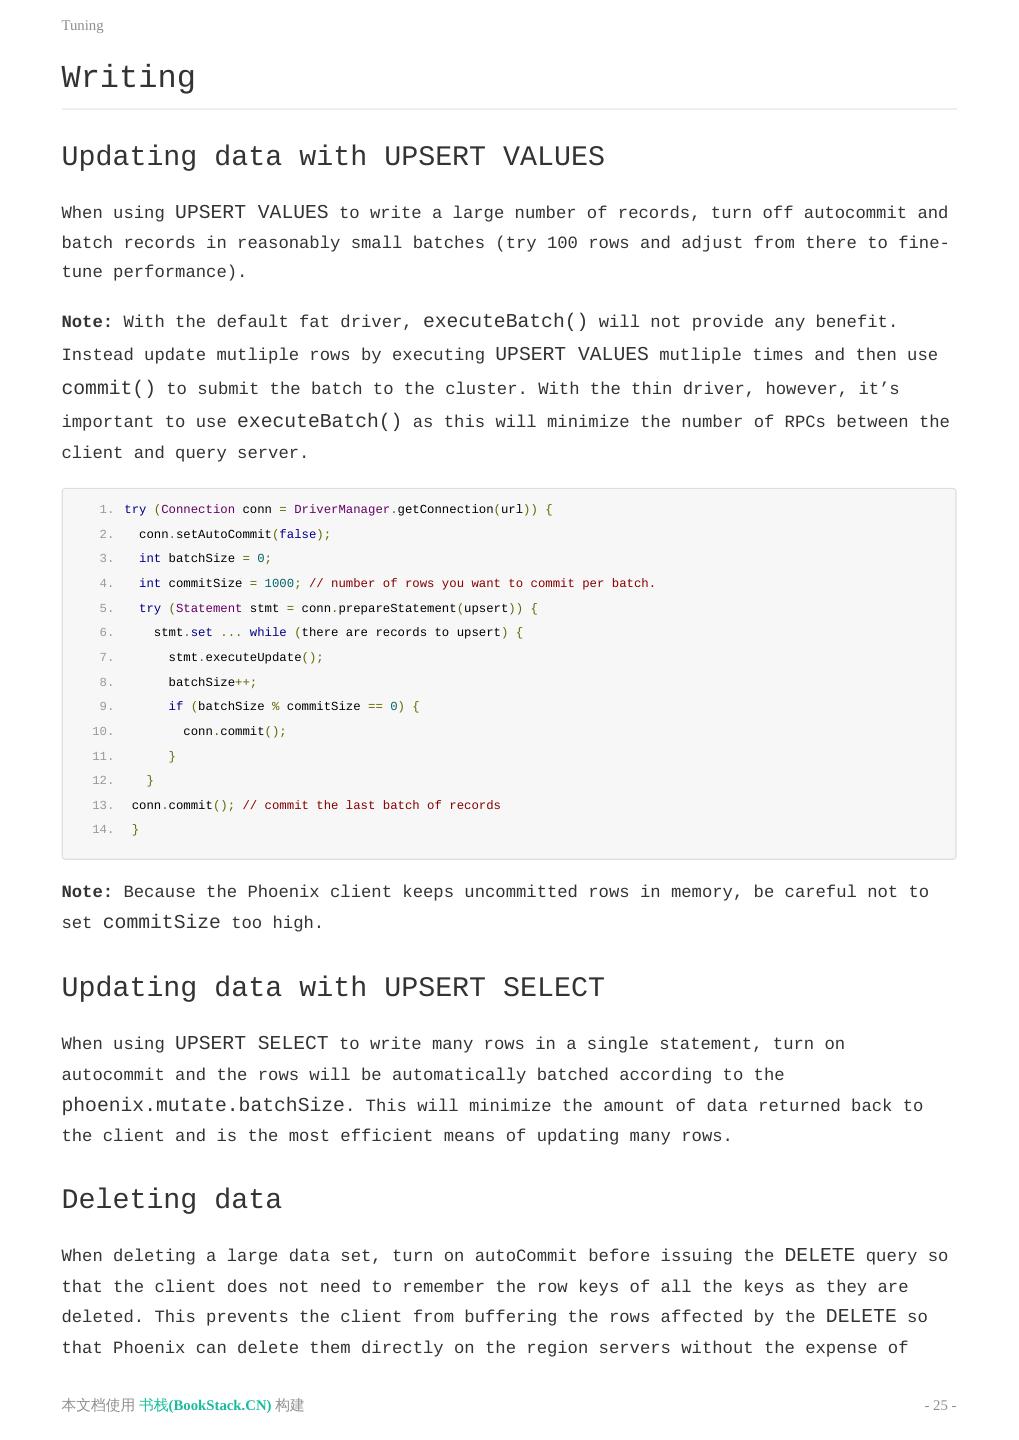
25 .Tuning Writing Updating data with UPSERT VALUES When using UPSERT VALUES to write a large number of records, turn off autocommit and batch records in reasonably small batches (try 100 rows and adjust from there to fine- tune performance). Note: With the default fat driver, executeBatch() will not provide any benefit. Instead update mutliple rows by executing UPSERT VALUES mutliple times and then use commit() to submit the batch to the cluster. With the thin driver, however, it’s important to use executeBatch() as this will minimize the number of RPCs between the client and query server. 1. try (Connection conn = DriverManager.getConnection(url)) { 2. conn.setAutoCommit(false); 3. int batchSize = 0; 4. int commitSize = 1000; // number of rows you want to commit per batch. 5. try (Statement stmt = conn.prepareStatement(upsert)) { 6. stmt.set ... while (there are records to upsert) { 7. stmt.executeUpdate(); 8. batchSize++; 9. if (batchSize % commitSize == 0) { 10. conn.commit(); 11. } 12. } 13. conn.commit(); // commit the last batch of records 14. } Note: Because the Phoenix client keeps uncommitted rows in memory, be careful not to set commitSize too high. Updating data with UPSERT SELECT When using UPSERT SELECT to write many rows in a single statement, turn on autocommit and the rows will be automatically batched according to the phoenix.mutate.batchSize. This will minimize the amount of data returned back to the client and is the most efficient means of updating many rows. Deleting data When deleting a large data set, turn on autoCommit before issuing the DELETE query so that the client does not need to remember the row keys of all the keys as they are deleted. This prevents the client from buffering the rows affected by the DELETE so that Phoenix can delete them directly on the region servers without the expense of 本文档使用 书栈(BookStack.CN) 构建 - 25 -
26 .Tuning returning them to the client. Reducing RPC traffic To reduce RPC traffic, set the UPDATE_CACHE_FREQUENCY (4.7 or above) on your table and indexes when you create them (or issue an ALTER TABLE/INDEX call. See https://phoenix.apache.org/#Altering. Using local indexes If using 4.8, consider using local indexes to minimize the write time. In this case, the writes for the secondary index will be to the same region server as your base table. This approach does involve a performance hit on the read side, though, so make sure to quantify both write speed improvement and read speed reduction. Further Tuning For advice about tuning the underlying HBase and JVM layers, see Operational and Performance Configuration Options in the Apache HBase™ Reference Guide. Special Cases The following sections provide Phoenix-specific additions to the tuning recommendations in the Apache HBase™ Reference Guide section referenced above. For applications where failing quickly is better than waiting In addition to the HBase tuning referenced above, set phoenix.query.timeoutMs in hbase-site.xml on the client side to the maximum tolerable wait time in milliseconds. For applications that can tolerate slightly out of date information In addition to the HBase tuning referenced above, set phoenix.connection.consistency = timeline in hbase-site.xml on the client side for all connections. 原文: http://phoenix.apache.org/tuning_guide.html 本文档使用 书栈(BookStack.CN) 构建 - 26 -
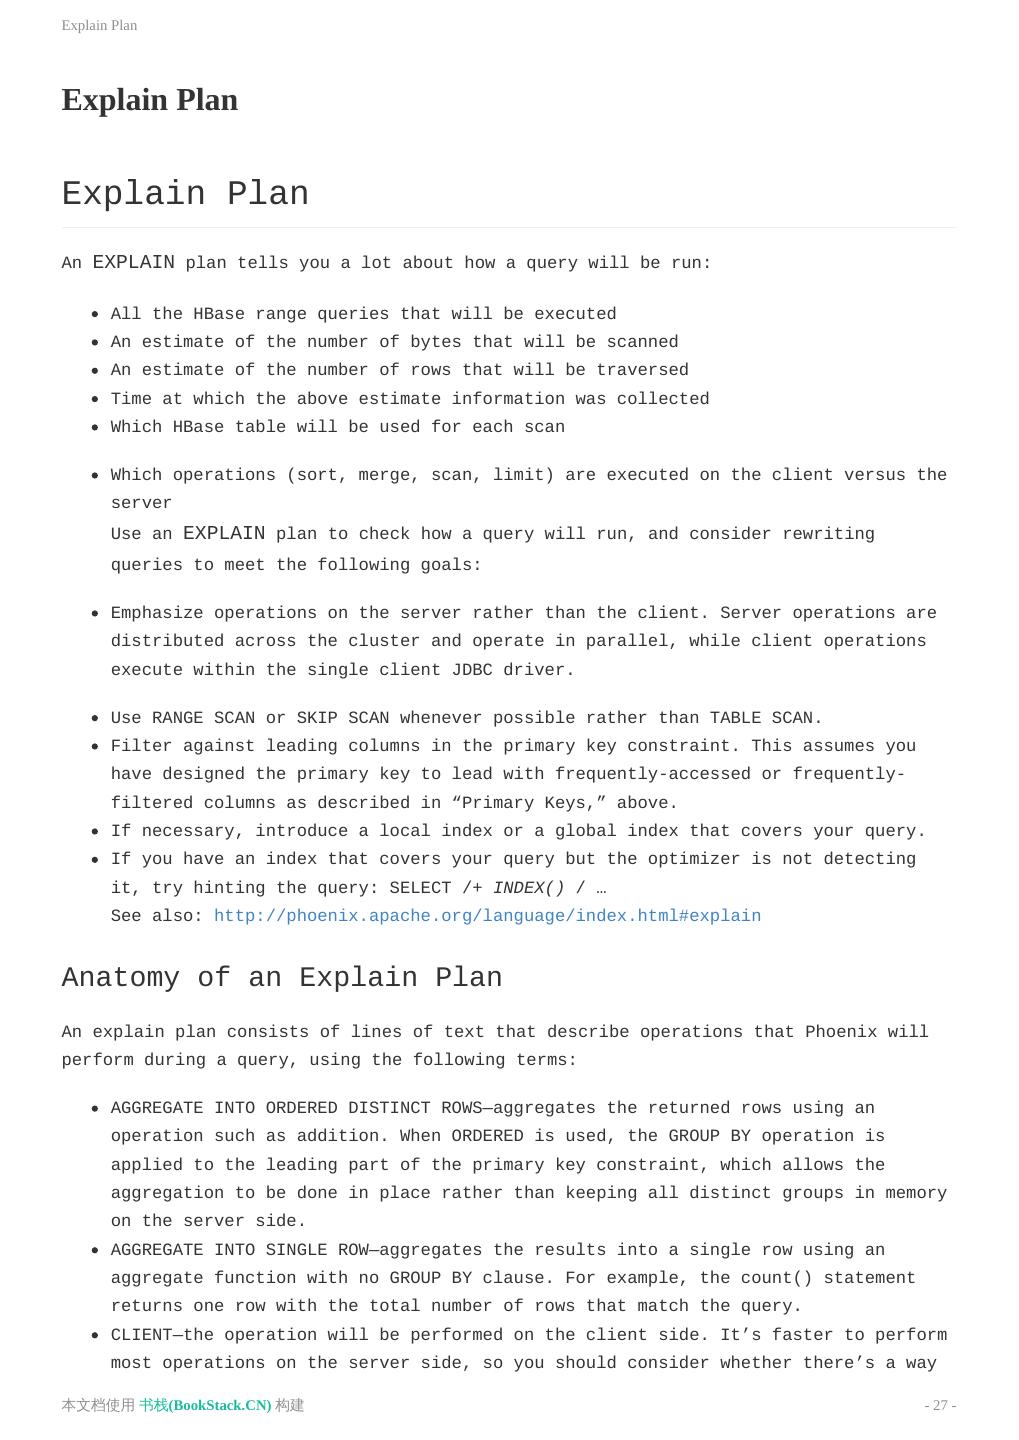
27 .Explain Plan Explain Plan Explain Plan An EXPLAIN plan tells you a lot about how a query will be run: All the HBase range queries that will be executed An estimate of the number of bytes that will be scanned An estimate of the number of rows that will be traversed Time at which the above estimate information was collected Which HBase table will be used for each scan Which operations (sort, merge, scan, limit) are executed on the client versus the server Use an EXPLAIN plan to check how a query will run, and consider rewriting queries to meet the following goals: Emphasize operations on the server rather than the client. Server operations are distributed across the cluster and operate in parallel, while client operations execute within the single client JDBC driver. Use RANGE SCAN or SKIP SCAN whenever possible rather than TABLE SCAN. Filter against leading columns in the primary key constraint. This assumes you have designed the primary key to lead with frequently-accessed or frequently- filtered columns as described in “Primary Keys,” above. If necessary, introduce a local index or a global index that covers your query. If you have an index that covers your query but the optimizer is not detecting it, try hinting the query: SELECT /+ INDEX() / … See also: http://phoenix.apache.org/language/index.html#explain Anatomy of an Explain Plan An explain plan consists of lines of text that describe operations that Phoenix will perform during a query, using the following terms: AGGREGATE INTO ORDERED DISTINCT ROWS—aggregates the returned rows using an operation such as addition. When ORDERED is used, the GROUP BY operation is applied to the leading part of the primary key constraint, which allows the aggregation to be done in place rather than keeping all distinct groups in memory on the server side. AGGREGATE INTO SINGLE ROW—aggregates the results into a single row using an aggregate function with no GROUP BY clause. For example, the count() statement returns one row with the total number of rows that match the query. CLIENT—the operation will be performed on the client side. It’s faster to perform most operations on the server side, so you should consider whether there’s a way 本文档使用 书栈(BookStack.CN) 构建 - 27 -
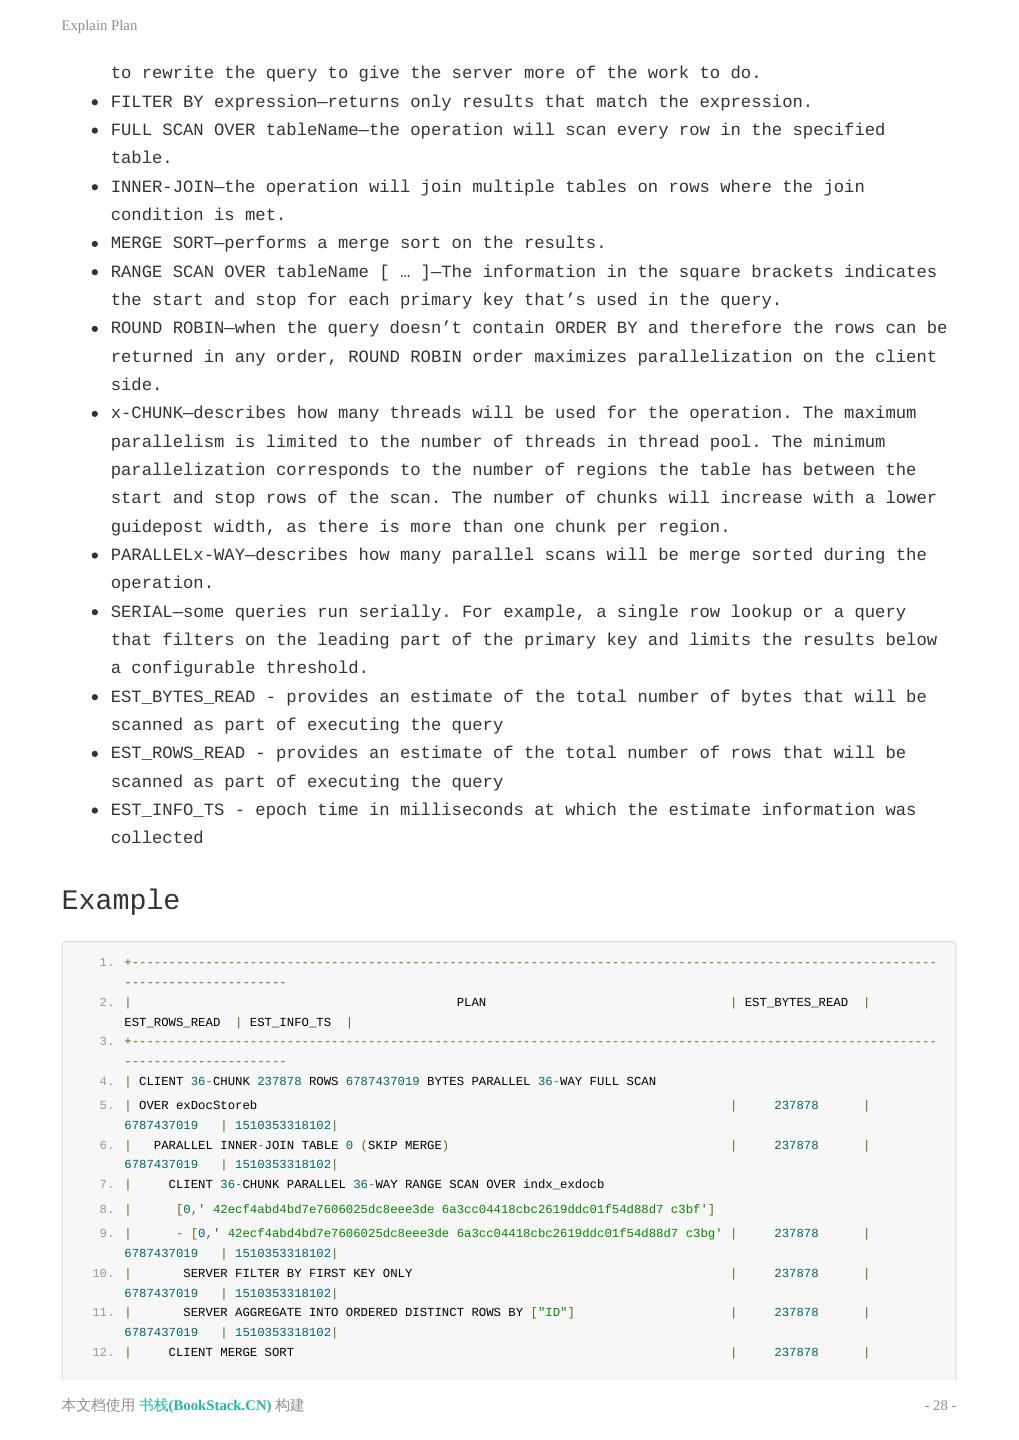
28 .Explain Plan to rewrite the query to give the server more of the work to do. FILTER BY expression—returns only results that match the expression. FULL SCAN OVER tableName—the operation will scan every row in the specified table. INNER-JOIN—the operation will join multiple tables on rows where the join condition is met. MERGE SORT—performs a merge sort on the results. RANGE SCAN OVER tableName [ … ]—The information in the square brackets indicates the start and stop for each primary key that’s used in the query. ROUND ROBIN—when the query doesn’t contain ORDER BY and therefore the rows can be returned in any order, ROUND ROBIN order maximizes parallelization on the client side. x-CHUNK—describes how many threads will be used for the operation. The maximum parallelism is limited to the number of threads in thread pool. The minimum parallelization corresponds to the number of regions the table has between the start and stop rows of the scan. The number of chunks will increase with a lower guidepost width, as there is more than one chunk per region. PARALLELx-WAY—describes how many parallel scans will be merge sorted during the operation. SERIAL—some queries run serially. For example, a single row lookup or a query that filters on the leading part of the primary key and limits the results below a configurable threshold. EST_BYTES_READ - provides an estimate of the total number of bytes that will be scanned as part of executing the query EST_ROWS_READ - provides an estimate of the total number of rows that will be scanned as part of executing the query EST_INFO_TS - epoch time in milliseconds at which the estimate information was collected Example 1. +------------------------------------------------------------------------------------------------------------- ---------------------- 2. | PLAN | EST_BYTES_READ | EST_ROWS_READ | EST_INFO_TS | 3. +------------------------------------------------------------------------------------------------------------- ---------------------- 4. | CLIENT 36-CHUNK 237878 ROWS 6787437019 BYTES PARALLEL 36-WAY FULL SCAN 5. | OVER exDocStoreb | 237878 | 6787437019 | 1510353318102| 6. | PARALLEL INNER-JOIN TABLE 0 (SKIP MERGE) | 237878 | 6787437019 | 1510353318102| 7. | CLIENT 36-CHUNK PARALLEL 36-WAY RANGE SCAN OVER indx_exdocb 8. | [0,' 42ecf4abd4bd7e7606025dc8eee3de 6a3cc04418cbc2619ddc01f54d88d7 c3bf'] 9. | - [0,' 42ecf4abd4bd7e7606025dc8eee3de 6a3cc04418cbc2619ddc01f54d88d7 c3bg' | 237878 | 6787437019 | 1510353318102| 10. | SERVER FILTER BY FIRST KEY ONLY | 237878 | 6787437019 | 1510353318102| 11. | SERVER AGGREGATE INTO ORDERED DISTINCT ROWS BY ["ID"] | 237878 | 6787437019 | 1510353318102| 12. | CLIENT MERGE SORT | 237878 | 本文档使用 书栈(BookStack.CN) 构建 - 28 -
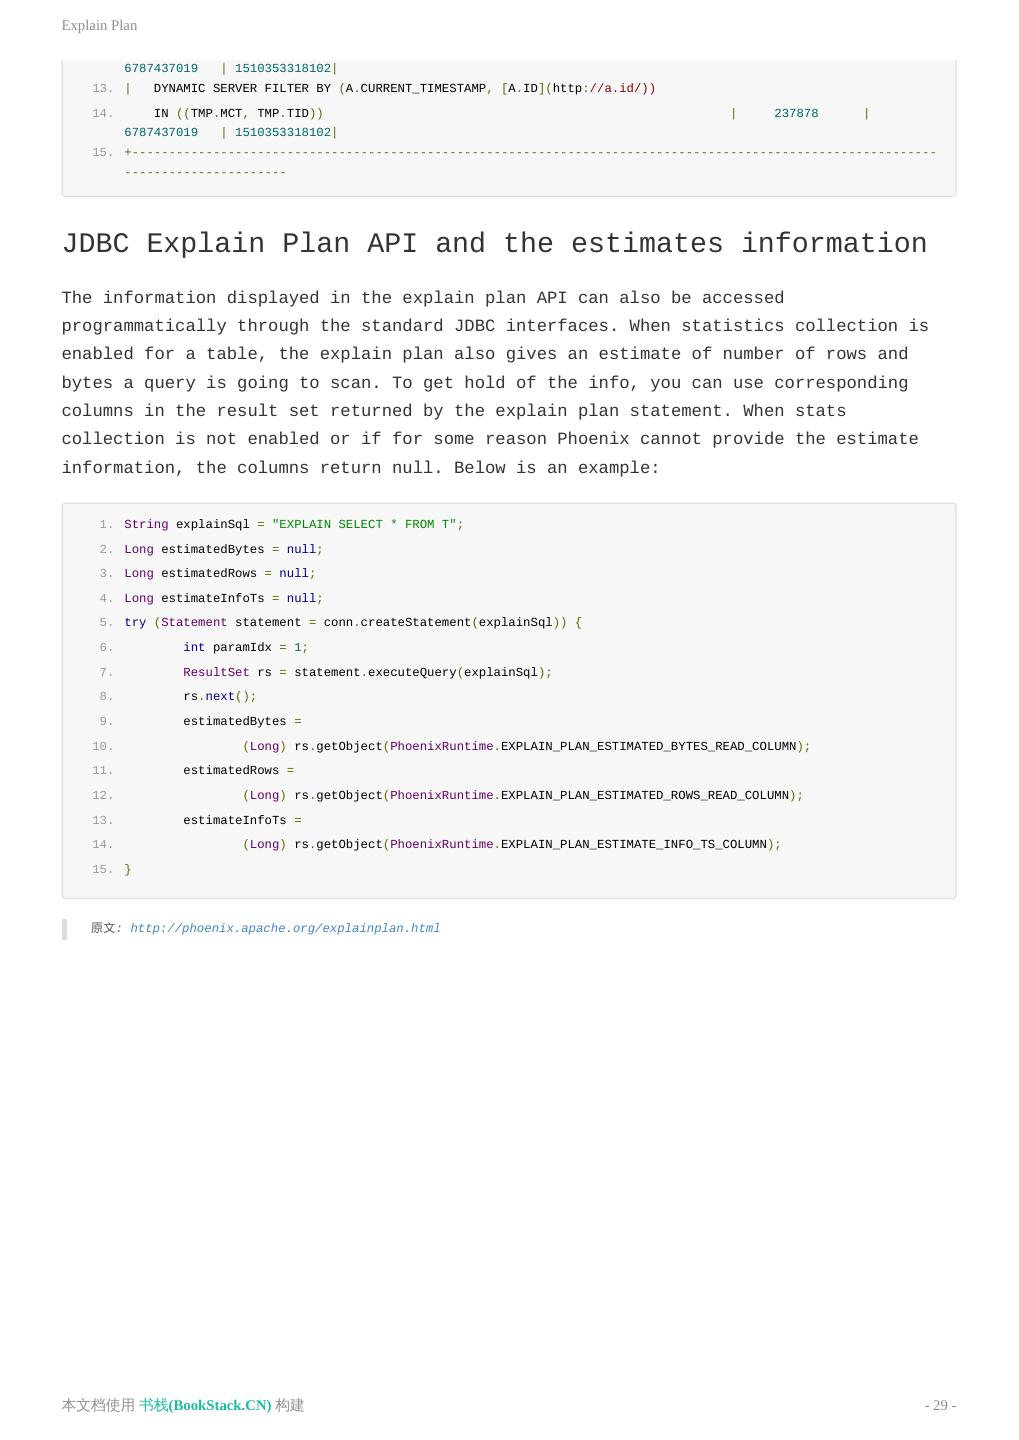
29 .Explain Plan 6787437019 | 1510353318102| 13. | DYNAMIC SERVER FILTER BY (A.CURRENT_TIMESTAMP, [A.ID](http://a.id/)) 14. IN ((TMP.MCT, TMP.TID)) | 237878 | 6787437019 | 1510353318102| 15. +------------------------------------------------------------------------------------------------------------- ---------------------- JDBC Explain Plan API and the estimates information The information displayed in the explain plan API can also be accessed programmatically through the standard JDBC interfaces. When statistics collection is enabled for a table, the explain plan also gives an estimate of number of rows and bytes a query is going to scan. To get hold of the info, you can use corresponding columns in the result set returned by the explain plan statement. When stats collection is not enabled or if for some reason Phoenix cannot provide the estimate information, the columns return null. Below is an example: 1. String explainSql = "EXPLAIN SELECT * FROM T"; 2. Long estimatedBytes = null; 3. Long estimatedRows = null; 4. Long estimateInfoTs = null; 5. try (Statement statement = conn.createStatement(explainSql)) { 6. int paramIdx = 1; 7. ResultSet rs = statement.executeQuery(explainSql); 8. rs.next(); 9. estimatedBytes = 10. (Long) rs.getObject(PhoenixRuntime.EXPLAIN_PLAN_ESTIMATED_BYTES_READ_COLUMN); 11. estimatedRows = 12. (Long) rs.getObject(PhoenixRuntime.EXPLAIN_PLAN_ESTIMATED_ROWS_READ_COLUMN); 13. estimateInfoTs = 14. (Long) rs.getObject(PhoenixRuntime.EXPLAIN_PLAN_ESTIMATE_INFO_TS_COLUMN); 15. } 原文: http://phoenix.apache.org/explainplan.html 本文档使用 书栈(BookStack.CN) 构建 - 29 -


