- 快召唤伙伴们来围观吧
- 微博 QQ QQ空间 贴吧
- 文档嵌入链接
- 复制
- 微信扫一扫分享
- 已成功复制到剪贴板
Self-Driving Model Lesson Learned
展开查看详情
1 .Self-driving vehicle Lessons learned from a Real-time image recognition project Gene Olafsen
2 .Hardware Modified SunFounder Rasperry Pi video car kit
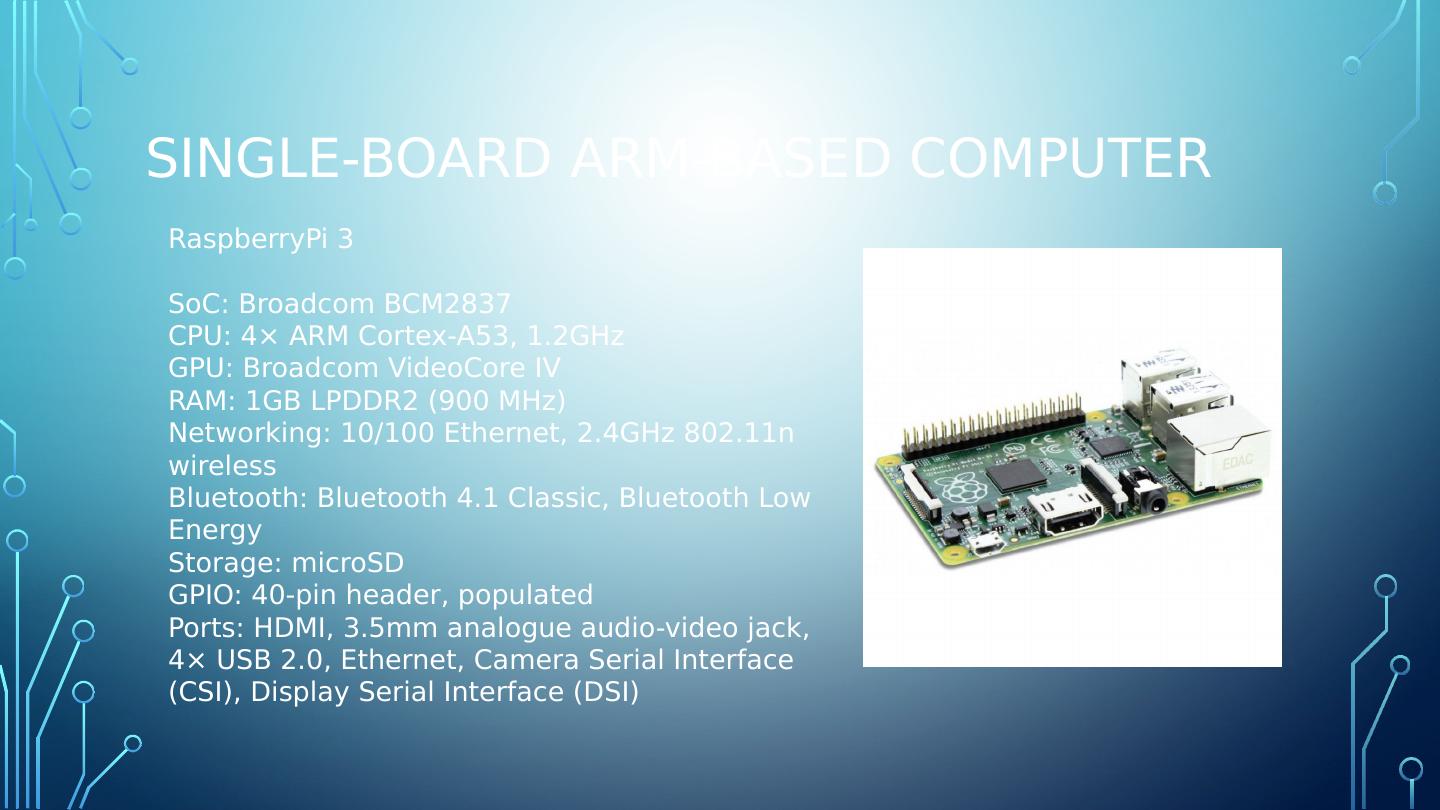
3 .Single-board ARM-based computer RaspberryPi 3 SoC: Broadcom BCM2837 CPU: 4× ARM Cortex-A53, 1.2GHz GPU: Broadcom VideoCore IV RAM: 1GB LPDDR2 (900 MHz) Networking: 10/100 Ethernet, 2.4GHz 802.11n wireless Bluetooth: Bluetooth 4.1 Classic, Bluetooth Low Energy Storage: microSD GPIO: 40-pin header, populated Ports: HDMI, 3.5mm analogue audio-video jack, 4× USB 2.0, Ethernet, Camera Serial Interface (CSI), Display Serial Interface (DSI)
4 .software Python TensorFlow Keras OpenCV
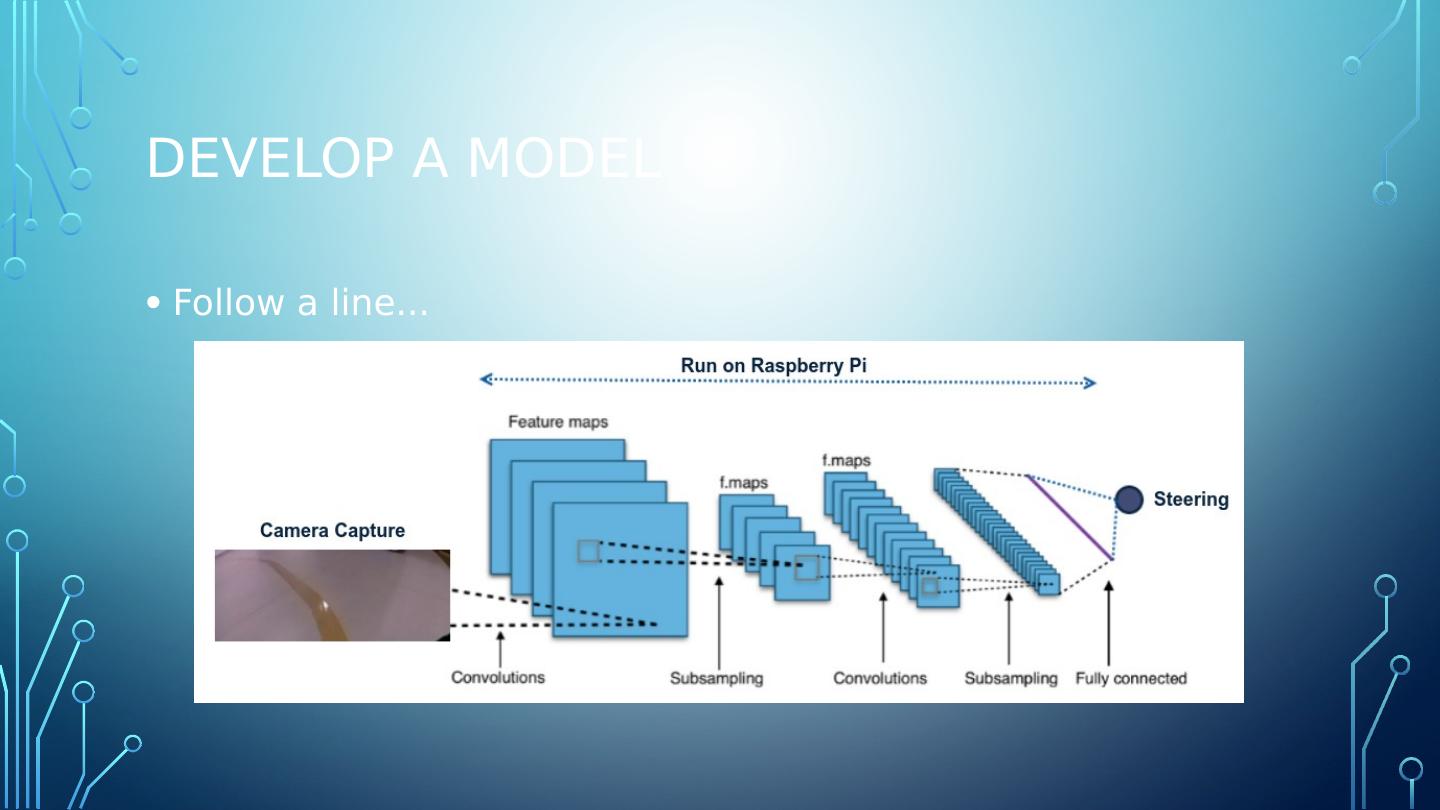
5 .Develop a Model Follow a line...
6 .Drive with XBOX Controller https://github.com/FRC4564/Xbox
7 .Define a path Rope or Tape
8 .Data Collection Images and Steering Angle 433
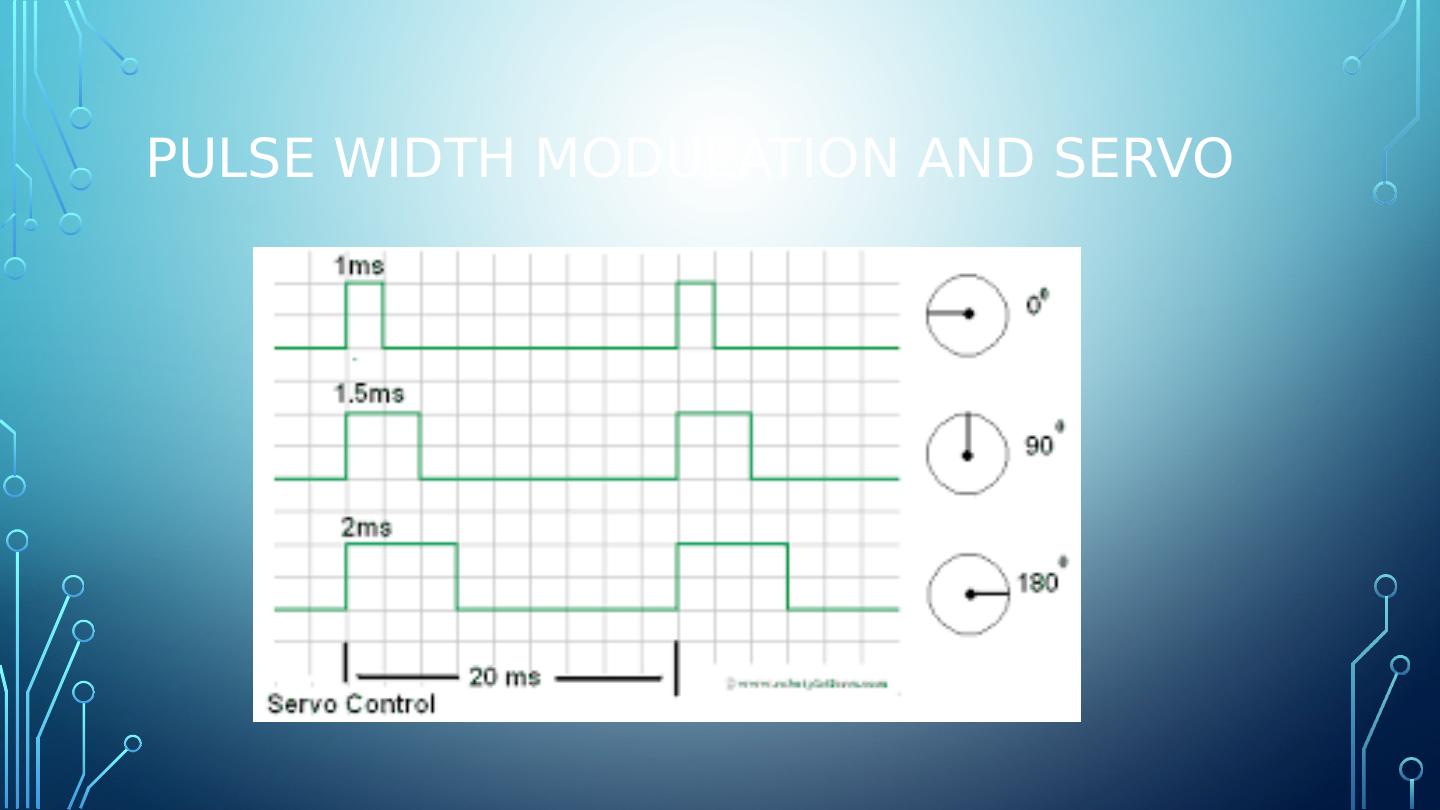
9 .Pulse width modulation and servo
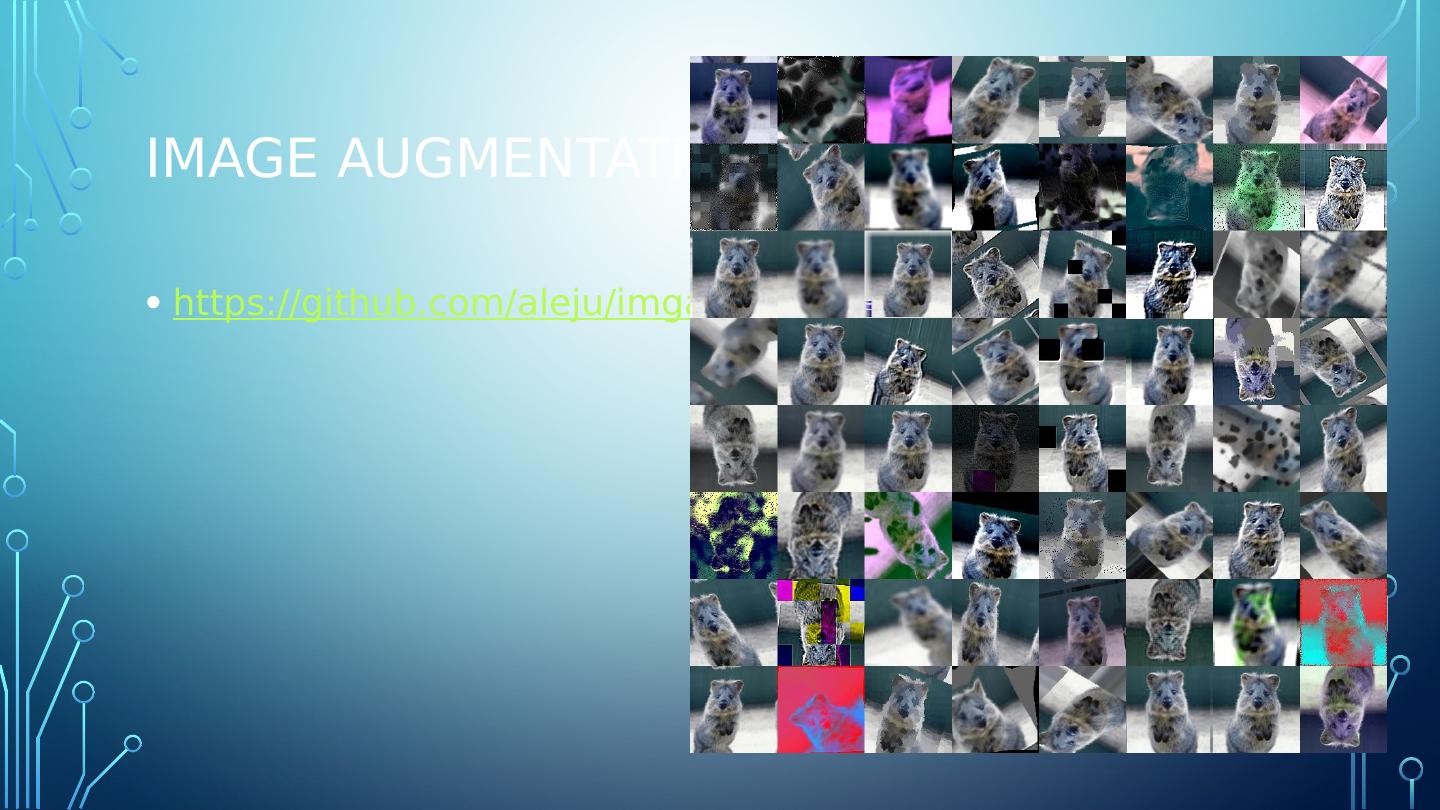
10 .Image augmentation https://github.com/aleju/imgaug
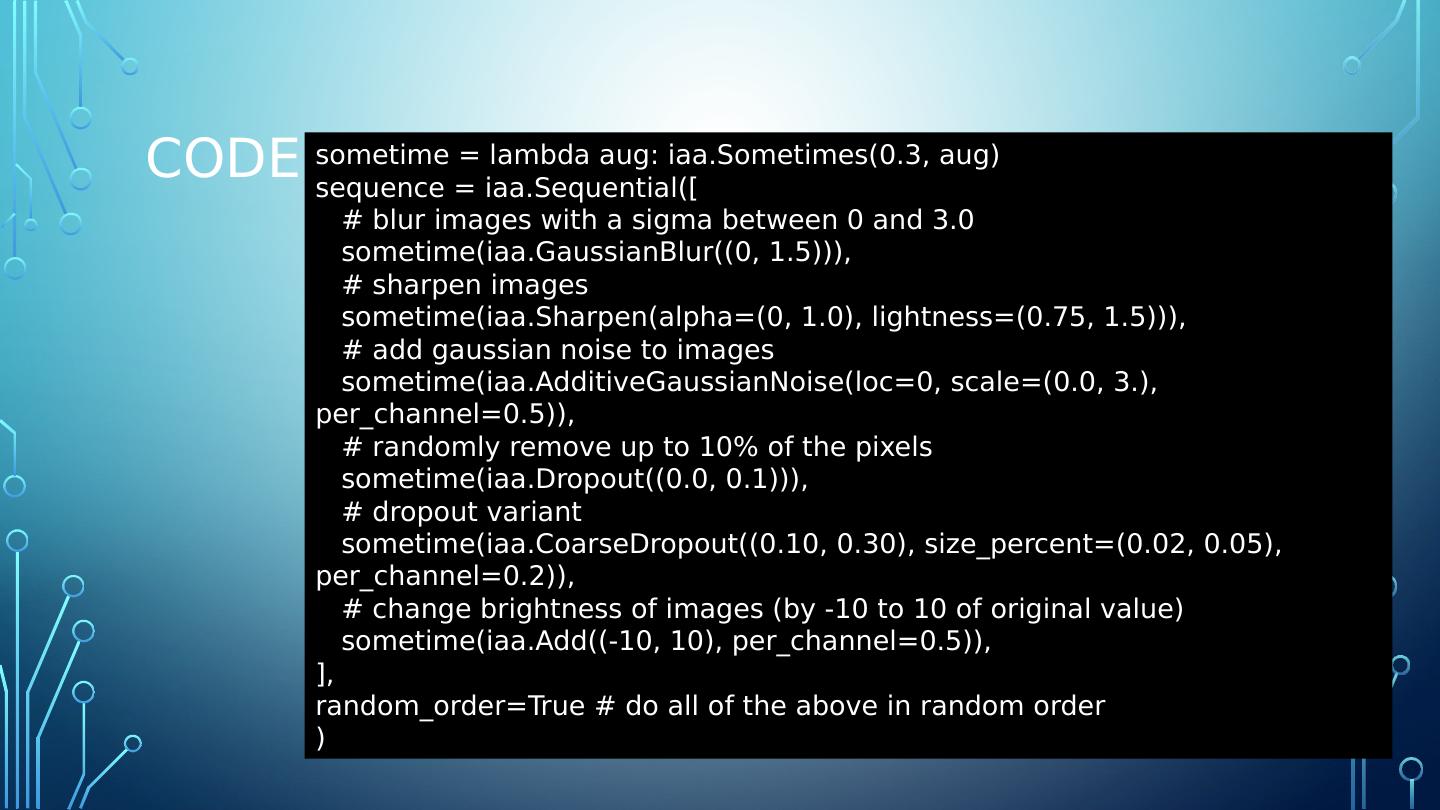
11 .Code sometime = lambda aug: iaa.Sometimes(0.3, aug) sequence = iaa.Sequential([ # blur images with a sigma between 0 and 3.0 sometime(iaa.GaussianBlur((0, 1.5))), # sharpen images sometime(iaa.Sharpen(alpha=(0, 1.0), lightness=(0.75, 1.5))), # add gaussian noise to images sometime(iaa.AdditiveGaussianNoise(loc=0, scale=(0.0, 3.), per_channel=0.5)), # randomly remove up to 10% of the pixels sometime(iaa.Dropout((0.0, 0.1))), # dropout variant sometime(iaa.CoarseDropout((0.10, 0.30), size_percent=(0.02, 0.05), per_channel=0.2)), # change brightness of images (by -10 to 10 of original value) sometime(iaa.Add((-10, 10), per_channel=0.5)), ], random_order=True # do all of the above in random order )
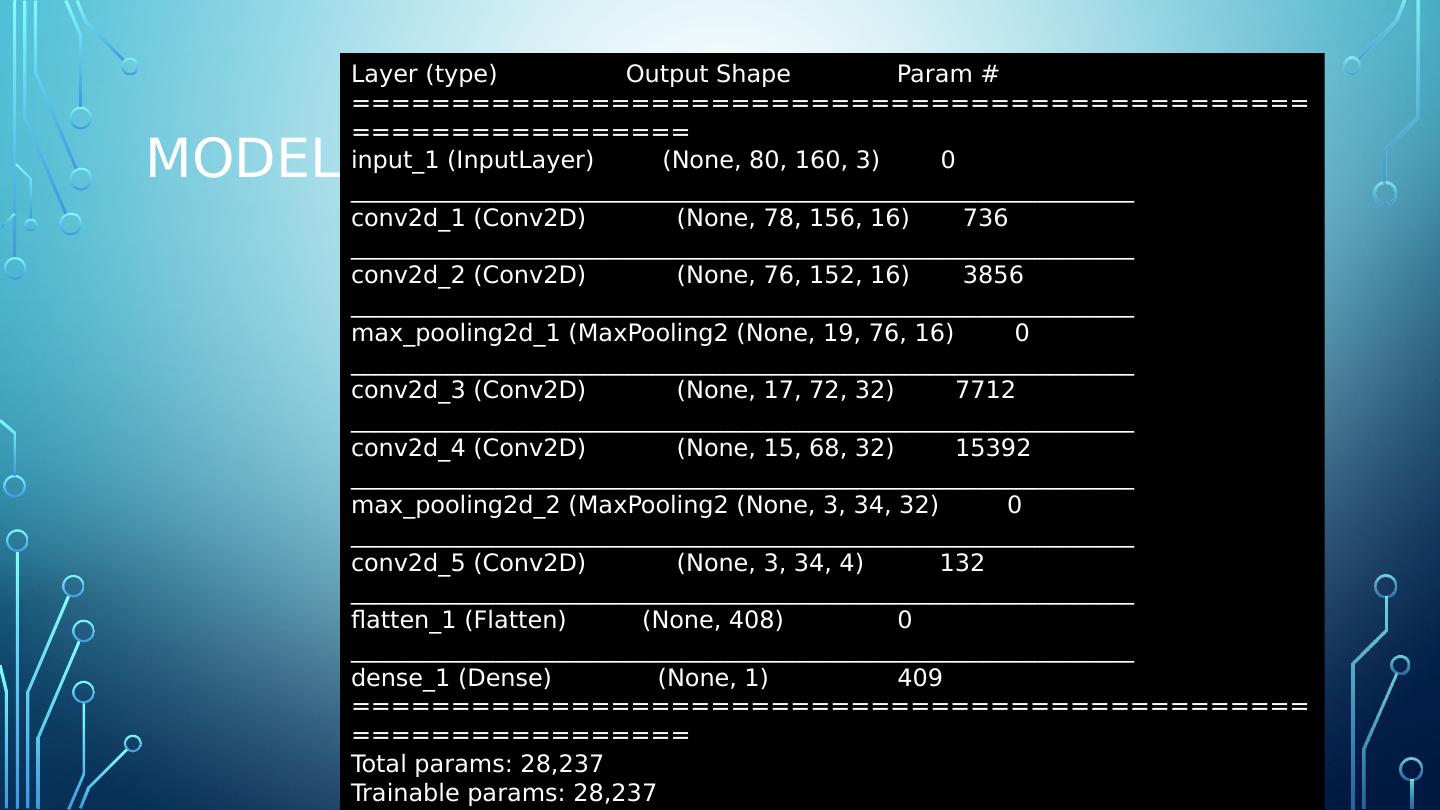
12 .Model Layer (type) Output Shape Param # ================================================================= input_1 ( InputLayer ) (None, 80, 160, 3) 0 _________________________________________________________________ conv2d_1 (Conv2D) (None, 78, 156, 16) 736 _________________________________________________________________ conv2d_2 (Conv2D) (None, 76, 152, 16) 3856 _________________________________________________________________ max_pooling2d_1 (MaxPooling2 (None, 19, 76, 16) 0 _________________________________________________________________ conv2d_3 (Conv2D) (None, 17, 72, 32) 7712 _________________________________________________________________ conv2d_4 (Conv2D) (None, 15, 68, 32) 15392 _________________________________________________________________ max_pooling2d_2 (MaxPooling2 (None, 3, 34, 32) 0 _________________________________________________________________ conv2d_5 (Conv2D) (None, 3, 34, 4) 132 _________________________________________________________________ flatten_1 (Flatten) (None, 408) 0 _________________________________________________________________ dense_1 (Dense) (None, 1) 409 ================================================================= Total params : 28,237 Trainable params : 28,237 Non-trainable params : 0
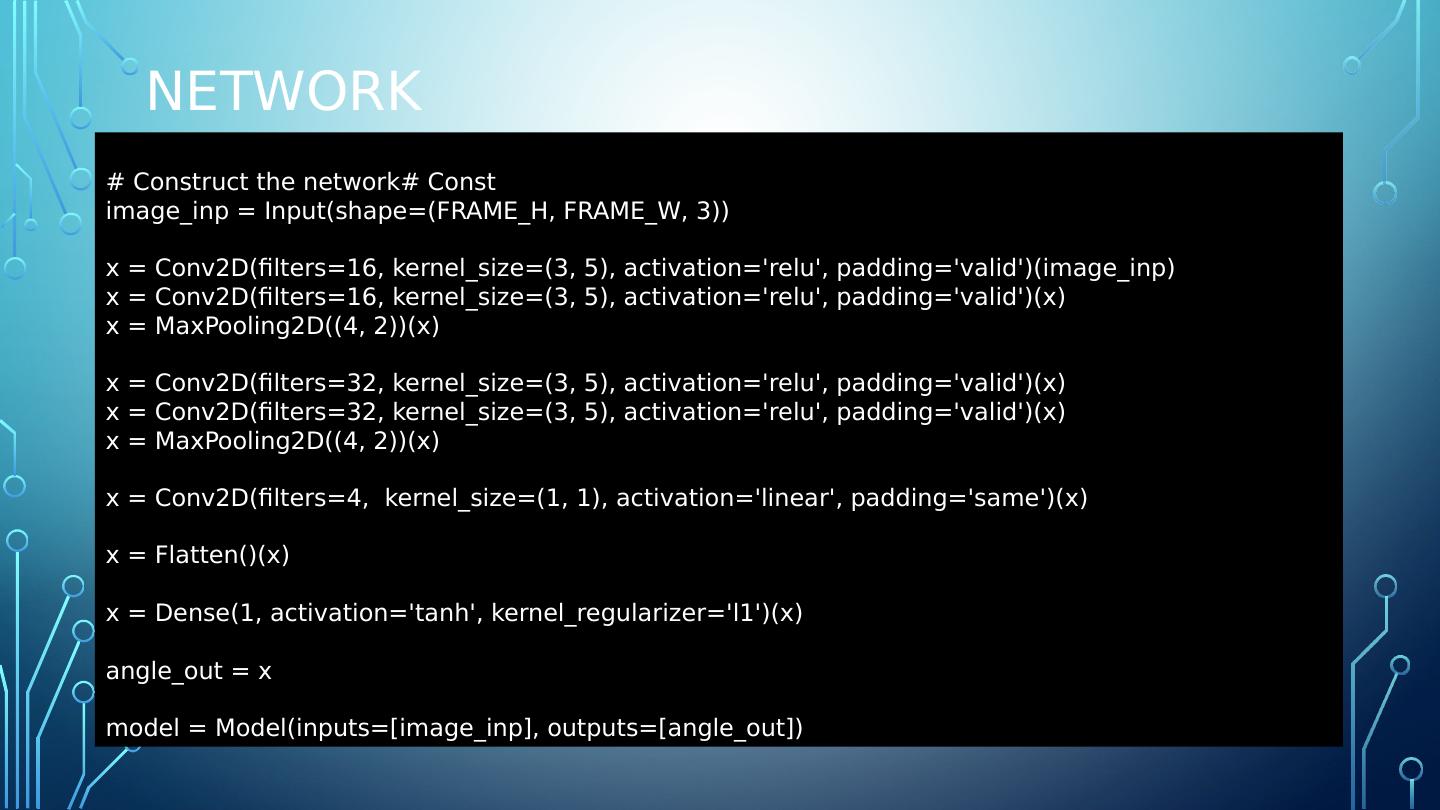
13 .network # Construct the network# Const image_inp = Input(shape=(FRAME_H, FRAME_W, 3)) x = Conv2D(filters=16, kernel_size =(3, 5), activation= relu , padding=valid)( image_inp ) x = Conv2D(filters=16, kernel_size =(3, 5), activation= relu , padding=valid)(x) x = MaxPooling2D((4, 2))(x) x = Conv2D(filters=32, kernel_size =(3, 5), activation= relu , padding=valid)(x) x = Conv2D(filters=32, kernel_size =(3, 5), activation= relu , padding=valid)(x) x = MaxPooling2D((4, 2))(x) x = Conv2D(filters=4, kernel_size =(1, 1), activation=linear, padding=same)(x) x = Flatten()(x) x = Dense(1, activation=tanh, kernel_regularizer =l1)(x) angle_out = x model = Model(inputs=[ image_inp ], outputs=[ angle_out ])
14 .collaborate Collect the image and steering training data during MW-MLG meetings! Train the model. Deploy the trained model and see how well it performs. Make the training data public (GitHub). Modify the model, train and deploy during future meetings.
15 .Future Enhancements Modulate speed approaching a curve Observe traffic signs Avoid obstacles
16 .Toolchain MobaXterm – SSH Terminal and X-Windows Server https://mobaxterm.mobatek.net/ Linnode – hosting https://www.linode.com/ CodeAnywhere – Browser-based SSH, Text Editor https://codeanywhere.com/ Git – Source/Data Repository https://github.com/
17 .Issues and lessons learned While this project is inspired by self-driving model car projects that already exist, there is nothing for the vehicle platform or controller which was selected.
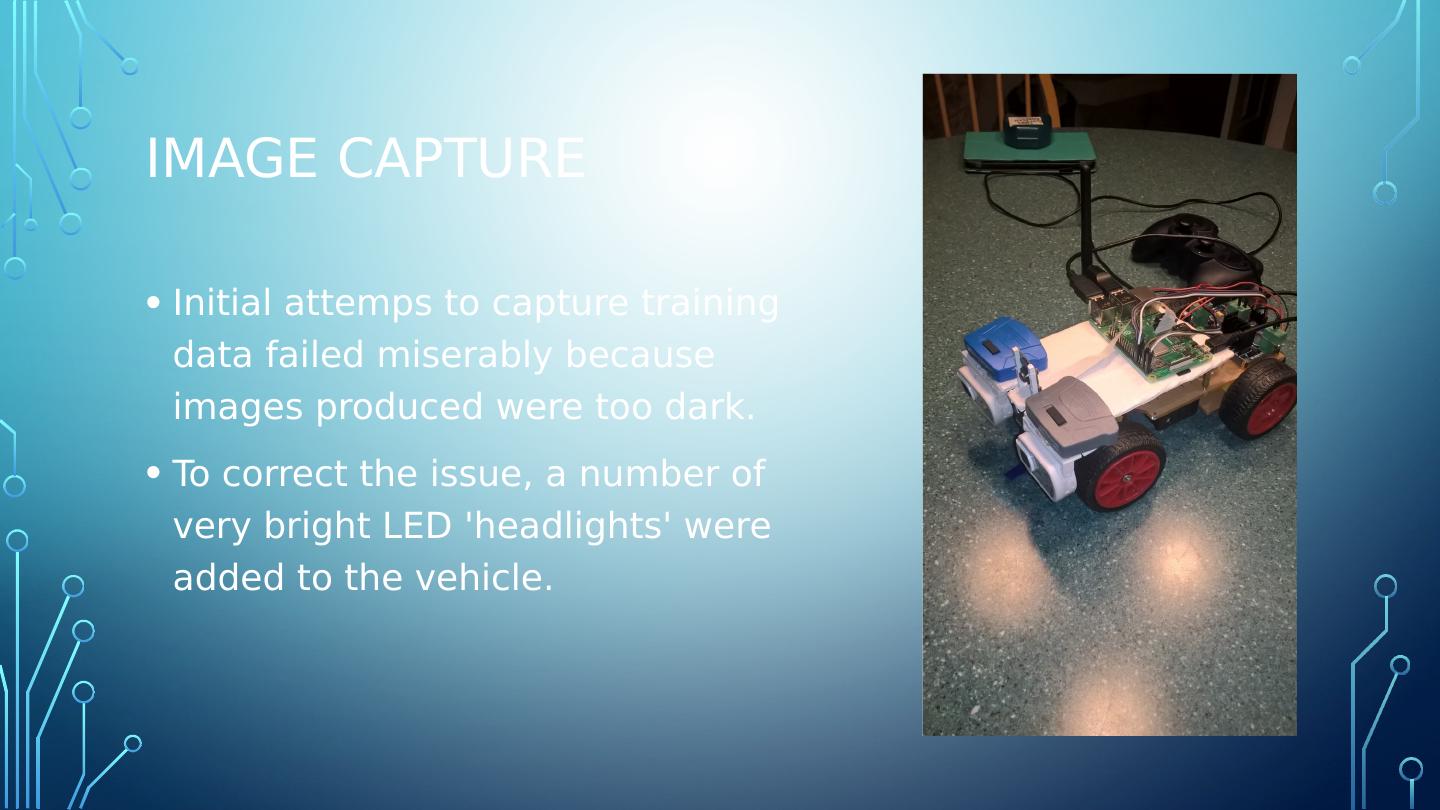
18 .Image capture Initial attemps to capture training data failed miserably because images produced were too dark. To correct the issue, a number of very bright LED headlights were added to the vehicle.
19 .Image capture Initial attemps to capture training data failed miserably because images produced were too dark. To correct the issue, a number of very bright LED headlights were added to the vehicle.
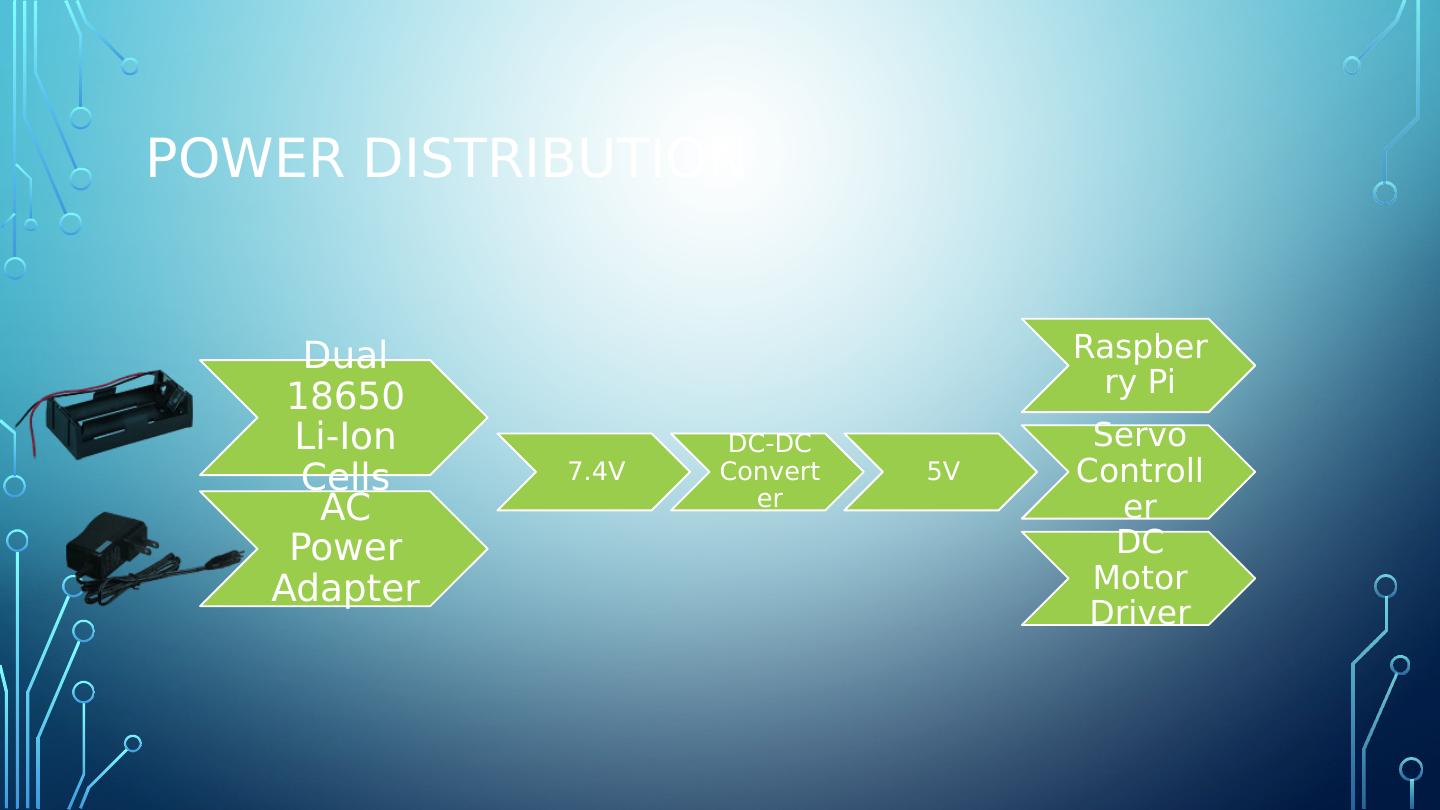
20 .Power distribution
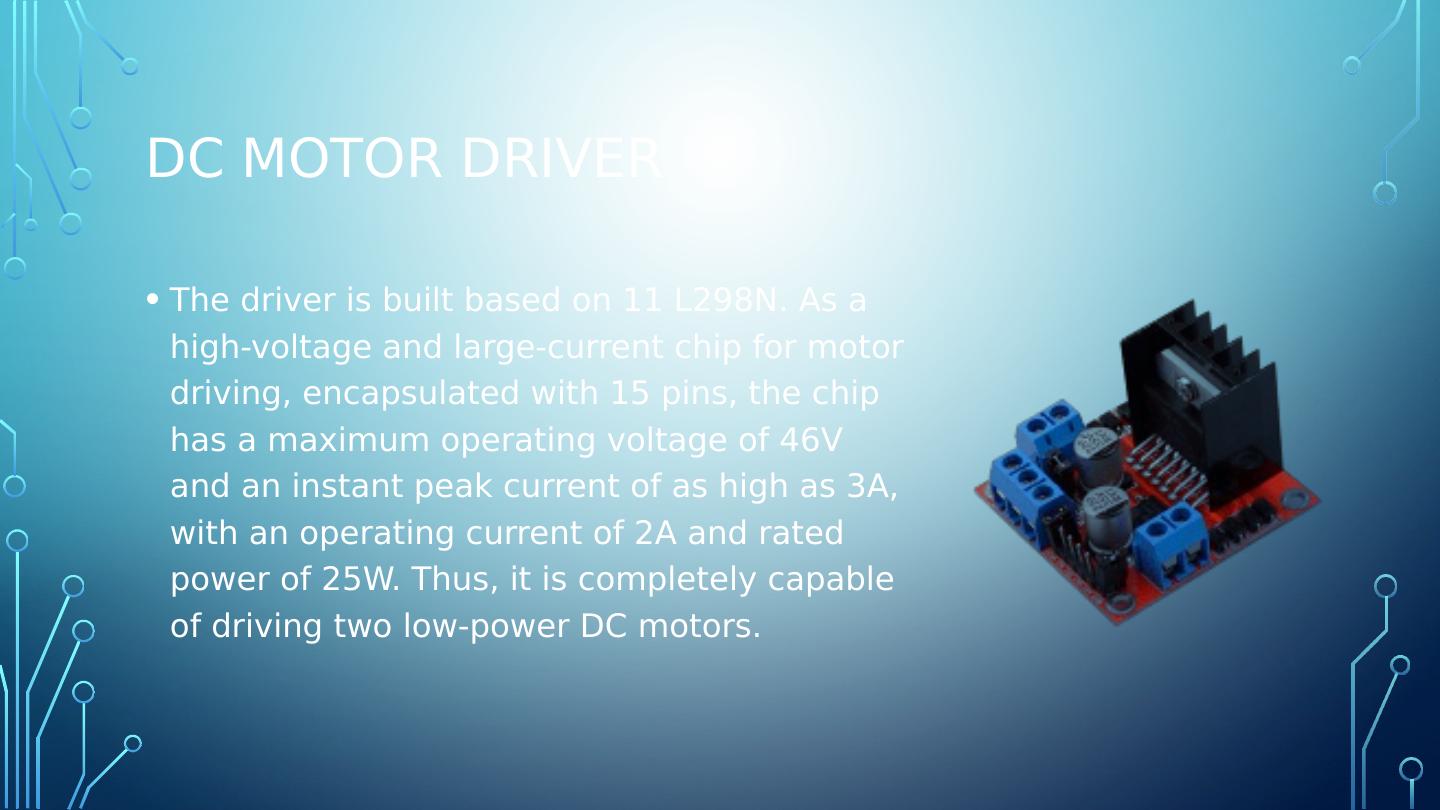
21 .DC Motor Driver The driver is built based on 11 L298N. As a high-voltage and large-current chip for motor driving, encapsulated with 15 pins, the chip has a maximum operating voltage of 46V and an instant peak current of as high as 3A, with an operating current of 2A and rated power of 25W. Thus, it is completely capable of driving two low-power DC motors.
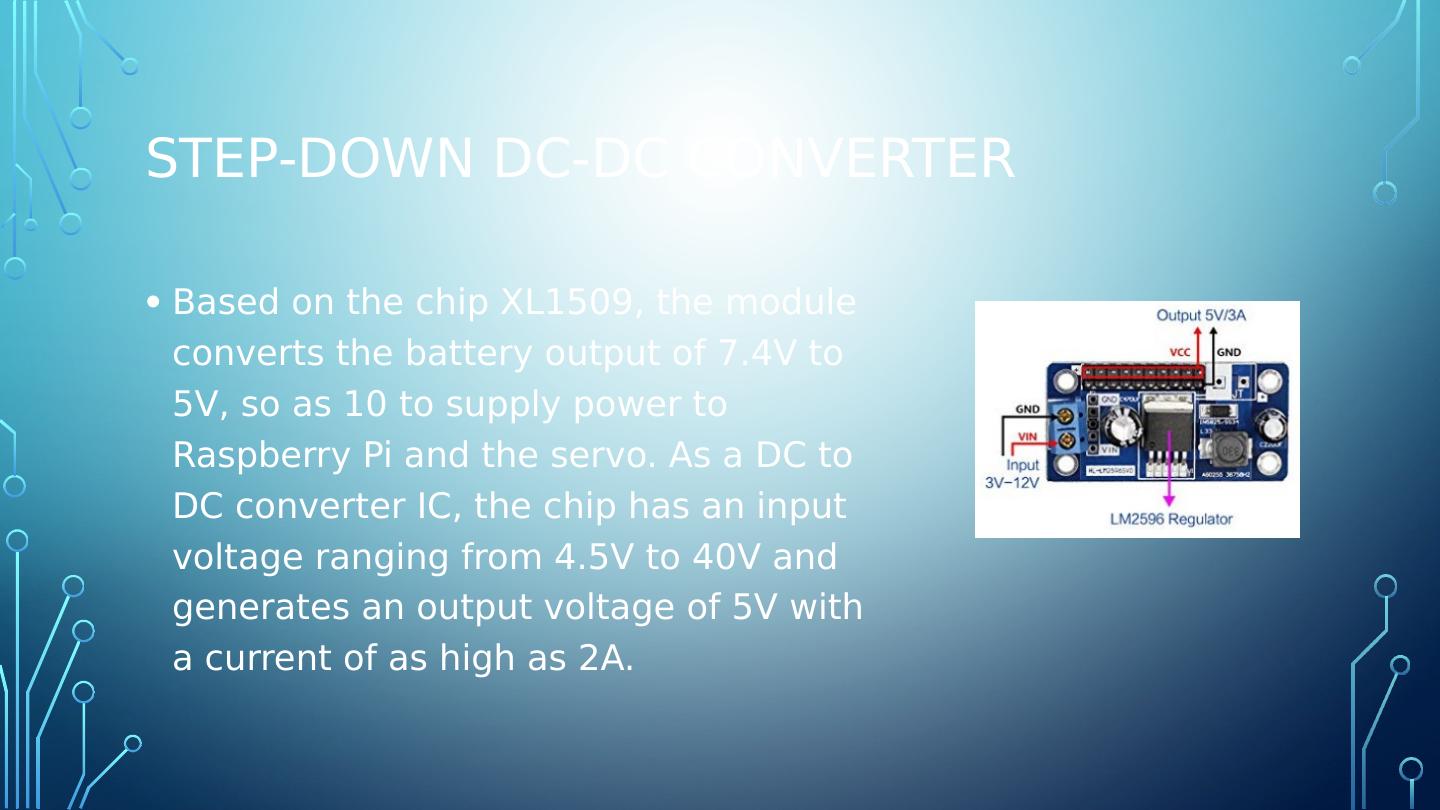
22 .Step-down dc-dc converter Based on the chip XL1509, the module converts the battery output of 7.4V to 5V, so as 10 to supply power to Raspberry Pi and the servo. As a DC to DC converter IC, the chip has an input voltage ranging from 4.5V to 40V and generates an output voltage of 5V with a current of as high as 2A.
23 .Initial training attempts I decided originally to provide a long continuous line on which to train the vehicle. The gamepad controller is used to steer the vehicle as it collects images and steering angle information.
24 .Testing the model Upon collecting the data, training the model and observing instance execution- the steering response to visual input was ineffective. In fact, there was almost no steering response produced- no matter what input was provided to the camera. The steering servo simple shuttered with a seemingly random response to any input.
25 .Training Data Analysis Upon collecting the data, training the model and observing instance execution- the steering response to visual input was ineffective. The data consisted of mostly straight steering angle values. Most of the driving is done in straight lines, with little continuous steering adjustment.
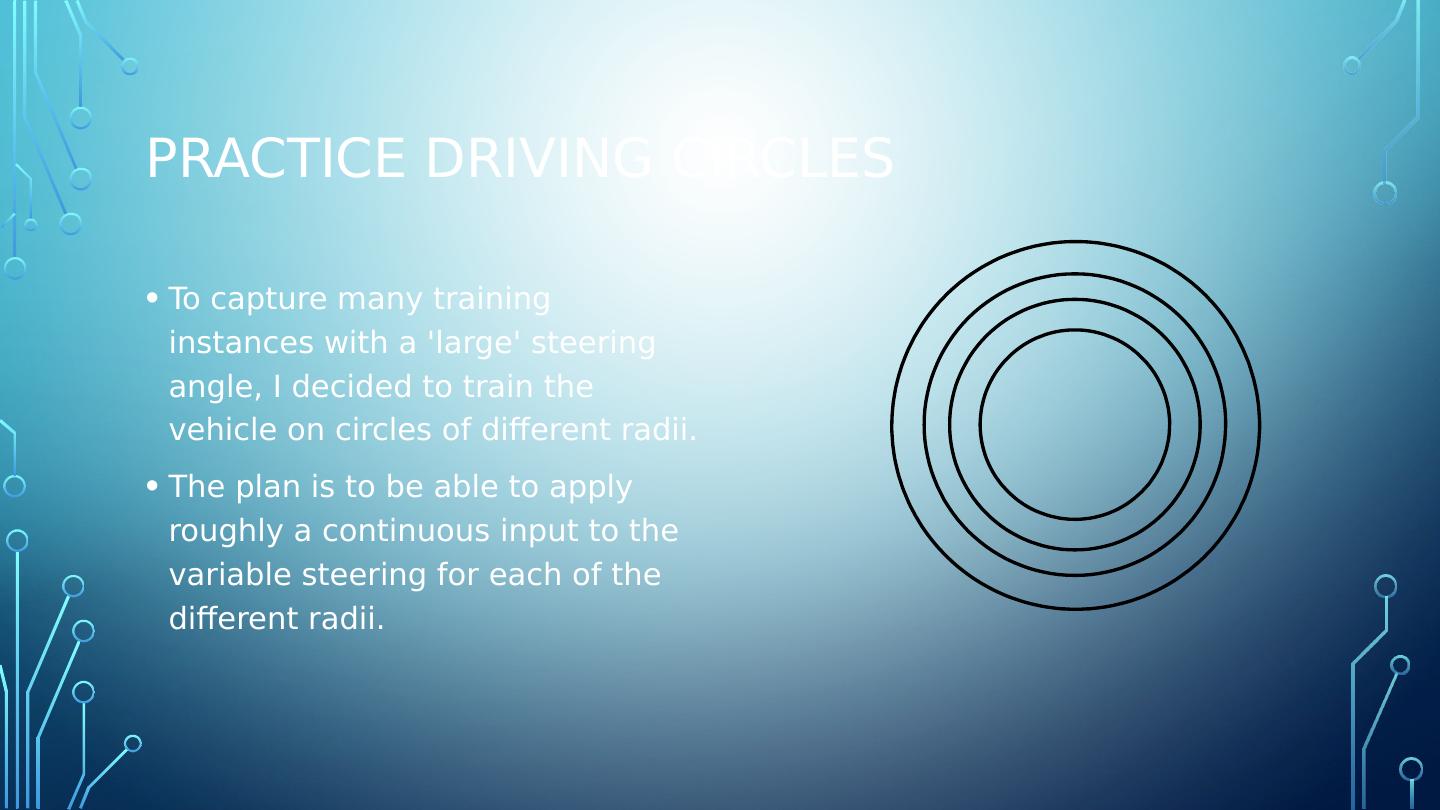
26 .Practice driving circles To capture many training instances with a large steering angle, I decided to train the vehicle on circles of different radii. The plan is to be able to apply roughly a continuous input to the variable steering for each of the different radii.
27 .DATA cAPTURE
28 .Camera position The camera was repositioned to look lower toward the ground in front of the vehicle. This change was mde so that the car could respond to sharper turns.
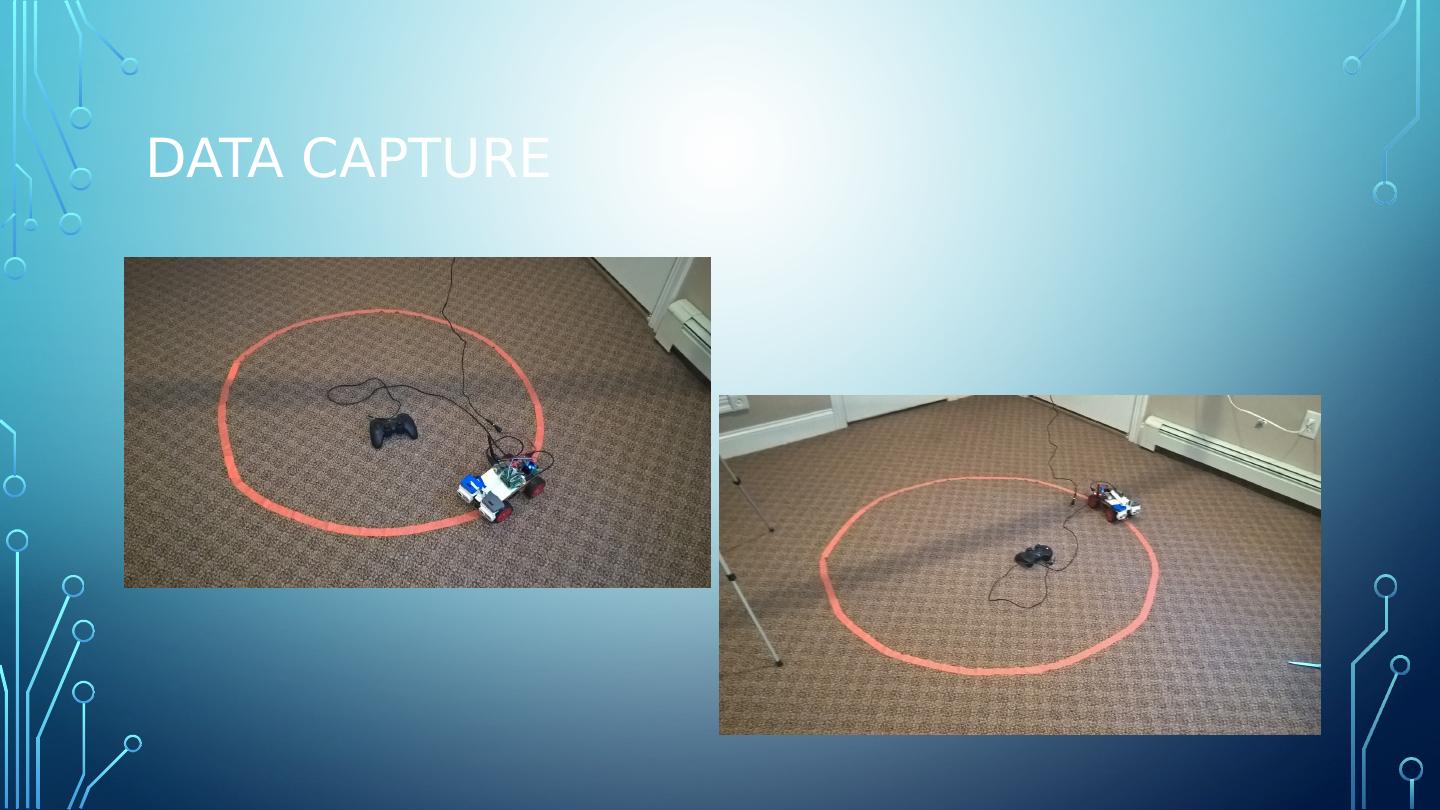
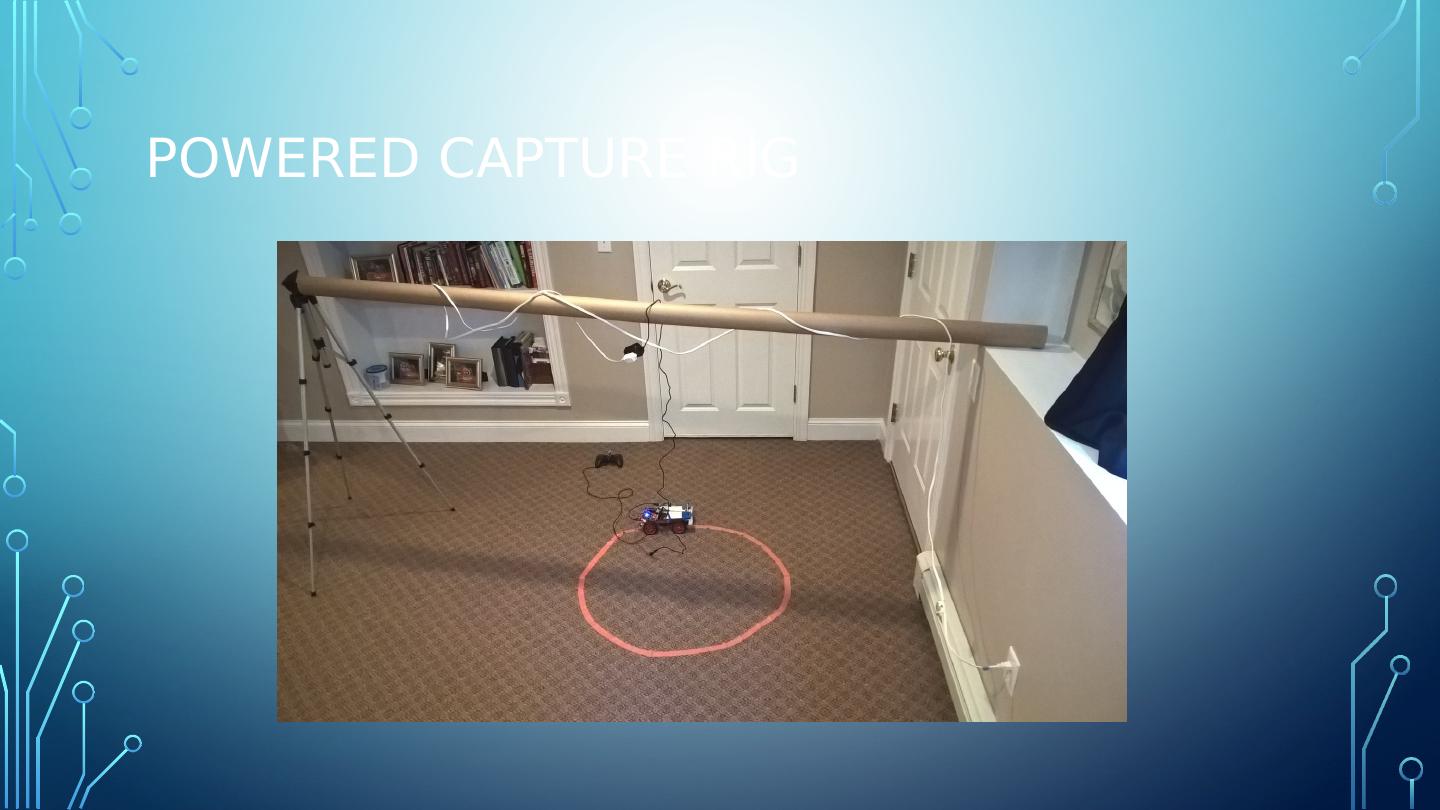
29 .POWERED capture Capturing a large number of training instances requires running the vehicle for extended periods of time... that means, no batteries. For each circle- the vehicle is driven clockwise for 2 or 3 revolutions and then counter-clockwise for 2 or 3 revolutions. This procedure captures labeled training data. Finally, the same circle is driven again 2 or 3 revolutions both clockwise and counterclockwise AGAIN to capture labeled validation data. The radius of the circle is increased a set amount. (about 2-3 inches )


